Introduction
The Cloud Playout module enables broadcasters and media publishers to use a collection of VOD videos and live streams and then stream them as a linear channel. The channel can be streamed to Brightcove Live, Amazon S3 or a specified RTMP URL.
To access the Cloud Playout module, click Cloud Playout in the navigation menu. A list of all Cloud Playout channels that have been created will be displayed (if any).
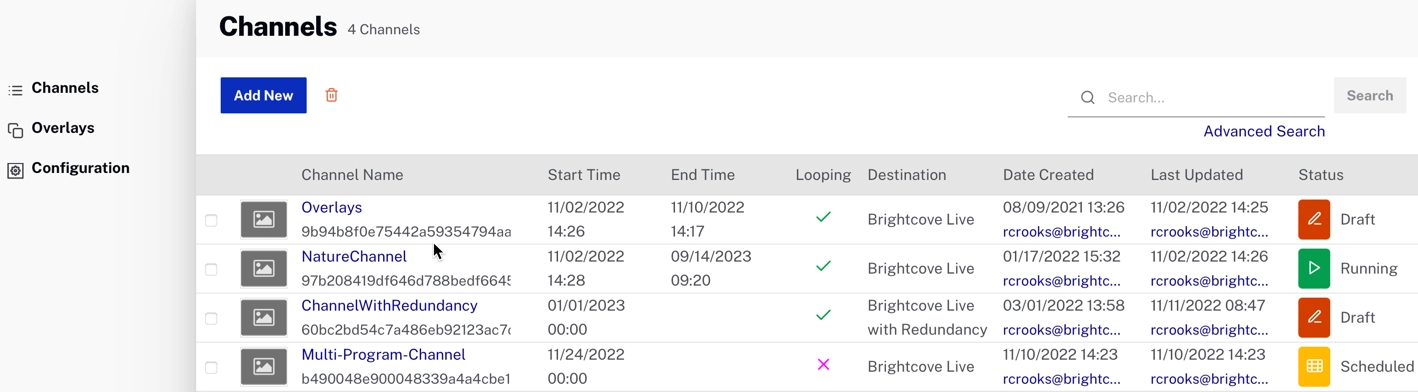
The page will display the following information:
- Channel Name - Name of the channel
- Start Time - Start time for the channel
- End Time - End time for the channel
- Looping - Indicates whether the program will loop
- Destination - Target destination for the channel
- Date Created - Date the channel was created
- Last Updated - Date the channel was last updated
- Status - Channel status
- DRAFT - Channel has been created but not activated
- CREATING - Channel is in the process of being activated
- SCHEDULED - Channel is active and ready to stream
- STARTING - Channel starting process to begin streaming
- RUNNING - Channel is actively streaming
- STOPPING - Channel streaming is stopping
- IDLE - Channel successfully ran and has been stopped
- DELETING - Channel is being deleted
- ERROR - An error occurred while creating or activating the channel
Creating a channel
To create a new Cloud Playout channel, follow these steps.
- Click Cloud Playout in the navigation header.
- Click :
- Enter the channel Identification details:
- Name - Name for the channel. The name must have English characters and the following special characters are allowed: _ . : / = + -
- Description - Channel description
- Image URL - URL to an image file for the channel; meant to be a channel image that could be retrieved as part of the channel's metadata
- Enter the channel Schedule details.
- Loop Playout Content - If On, the program will be played in a loop and the End Date/Time will be enabled. The program can still be modified at any time and the changes will be reflected in the current program and the loops to follow. See the Creating a looping program section below.
- Ad Insertion - If on, allows ads to be displayed during channel playback. If this option is selected, you can only output to a Brightcove Live Event or Amazon S3 Bucket. See Monetizing Content.
- Start Date/Time - Time when the channel will start playing out. The start time for all assets will be calculated by adding their duration to this start time. This time can be updated only when the channel is not in running state.
- End Date/Time - If no value is entered and Loop Playout Content is not selected, the stream will end once the playout is complete. If Loop Playout Content is selected and there is no End Date/Time, the playout will be streamed until the channel is stopped. This time can be updated at any time.
- If you will be using Live inputs, set Live Input to On, and enter a Slate URL, unless you are going to use the default Brightcove MP4 for you slate. The slate MP4 will play whenever Live input is stopped because the encoder is stopped or some technical issue blocks the live stream. Note that the Slate URL must be a static URL that is always available (short-lived CDN URLs are not allowed).
-
Import closed captions is enabled by default; if you do not want to import captions, disable it now or while the channel is in DRAFT state:
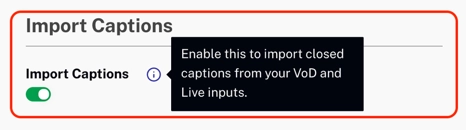
Import Captions -
- Optimize Display for - Controls the bitrate and dimensions for the output
- Mobile & Web - If checked, HD Output (RTMP or HLS single bitrate)
- Smart TV - If checked, full HD Output (RTMP or HLS single bitrate)
-
Output Region - The region where the channel will be created. Brightcove recommends selecting a region geographically closest to where the majority of your audience is expected.
There are some additional factors that will govern the region selection
- Since Cloud Playout pulls MP4 from the configured CDN, the MP4 must be available/accessed from the selected region.
- If there are true Live segments provisioned on hte Cloud Playout channel, the region must be closer to your contribution encoder.
- Select a region closer to the origin (or audience) from where the Live stream will be delivered for playback.
- If you have a CDN with geo-restriction for for VOD, the region used needs to be within the allowed countries/regions under geo-restriction.
- Output to - Select an output method for the channel
- Brightcove Live Event - Create or use a previously created Brightcove Live Channel. When creating a new channel, the region of the channel will be optimized based upon the Output Region that was selected.
- RTMP
- Amazon S3 Bucket - You can select this destination in addition to Brightcove Live Event, but not as the only destination. This option will push an HLS output to an Amazon S3 bucket. You will be required to enter Bucket Name, Region, Access Key and Secret Key. The bucket should be public and writeable.
- Optimize Display for - Controls the bitrate and dimensions for the output
- Click . The new channel will be created with a status of DRAFT.
Adding content to a channel
See Managing the Channel Program for information on how to add VOD content, playlists, and live events to your channel.
Also see:
After videos and live events have been added to a channel, click Activate to activate the channel. A channel must be activated before streaming can begin. See the Using channel actions for more information.
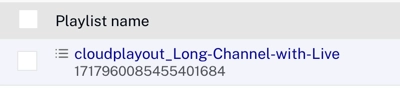
When videos are added to a channel, a system-generated playlist will be created and visible in the Media module.
We strongly recommend that you make any changes to the channel in the Cloud Playout module, and do not edit the generated playlist in any way.
Getting the RTMP ingest point
For your live encoder, you will need the RTMP ingest point for your channel. To find it, open the channel, go to Settings:
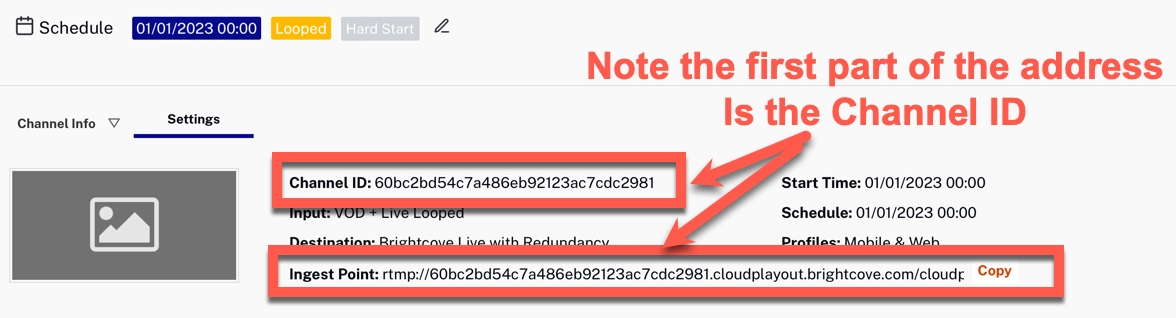
Depending on the encoder you are using, you may need to enter both the RTMP ingest point and the stream name. The stream name for the channel is the Channel ID, which is also the last part of the Ingest Point address.
Editing a channel
For channels in DRAFT or SCHEDULED state
To edit a draft or scheduled Cloud Playout channel:
- Click the channel name to open the channel details.
- Click

- Make the appropriate edits in the dialog and then click
Note that the Destination properties cannot be edited once a channel has been created.
For a running channel
To edit a running channel:
- Click the channel name to open the channel details.
- Click

- Click
- The channel settings dialog will open - some options that can't be changed will not be available.
- Make changes and click
Creating a looping program
To create a program that loops, when creating the channel, set the Loop Playout Content setting to On. As videos are added to the program, the program listing will update to display the series of videos with associated start/end times to fill the entire channel scheduled time. When you change the duration of a live event, the duration of events that have already passed will remain unchanged, but any future plays of the event will use the new duration.
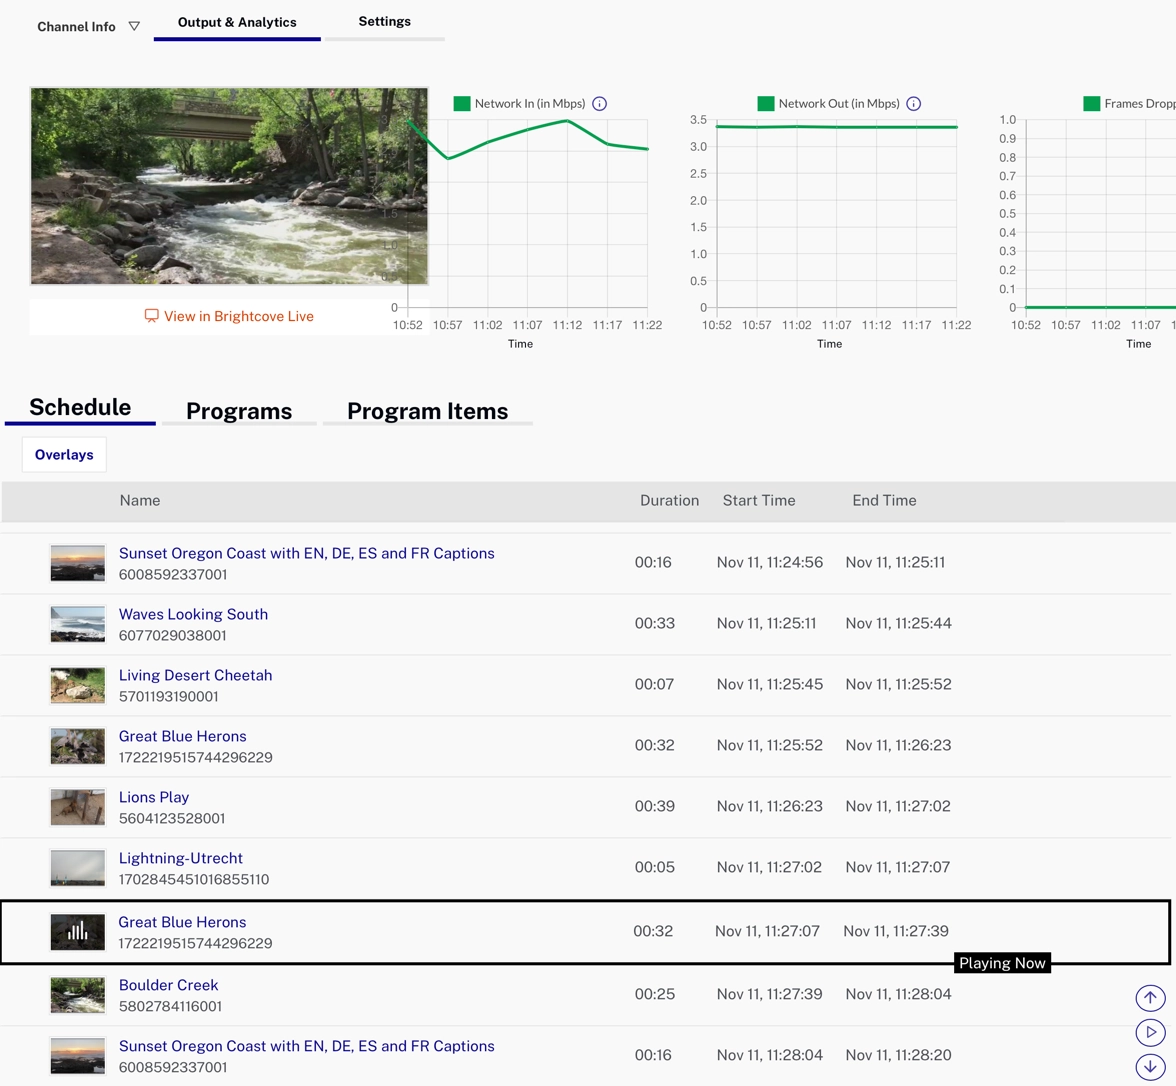
In the example below, the looping channel is running:
Working with an electronic program guide
Brightcove generates the EPG for Cloud Playout channels and Video Cloud will handle that for you.
If you want to see the program data for the EPG, an API is available to retrieve the EPG. For more information see the Overview: EPG API topic.
Deleting a channel
To delete a Cloud Playout channel, click the checkbox next to the channel name and then click Delete.