Publishing a Live Event to Facebook
The Brightcove Live to Social Media feature can be used to schedule and then broadcast a live event to Facebook. To do this, the following tasks will be completed:
Creating a live channel in the Live module
Before a Facebook live event can be published, a live channel must exist in the Live module. Live channels are listed on the Channels page and become available as a source in the Social module's Publish flow.
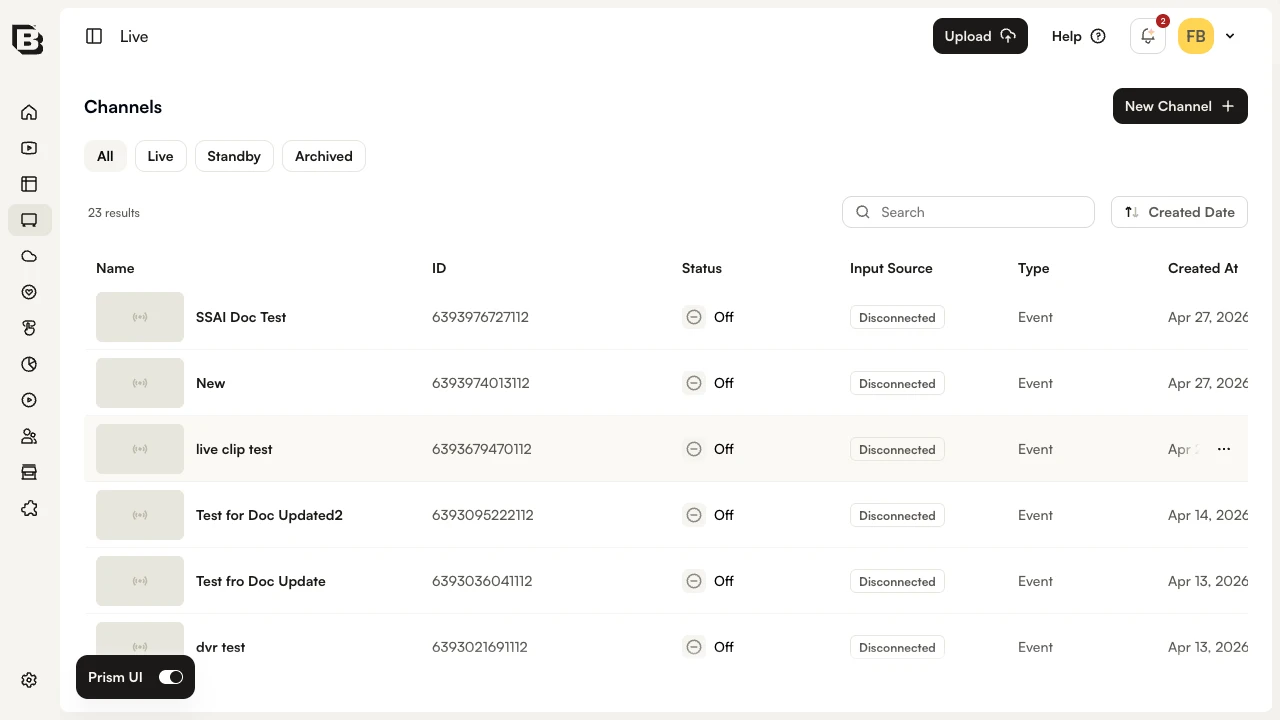
When creating a channel for a live-to-Facebook event, keep the following points in mind:
- For recurring events, you can create the channel ahead of time and activate it when you are ready to start streaming to Facebook.
- For non-recurring events, the live event must be started within 30 minutes of the channel being created.
For detailed information on creating live channels, see Getting Started with the Live Module.
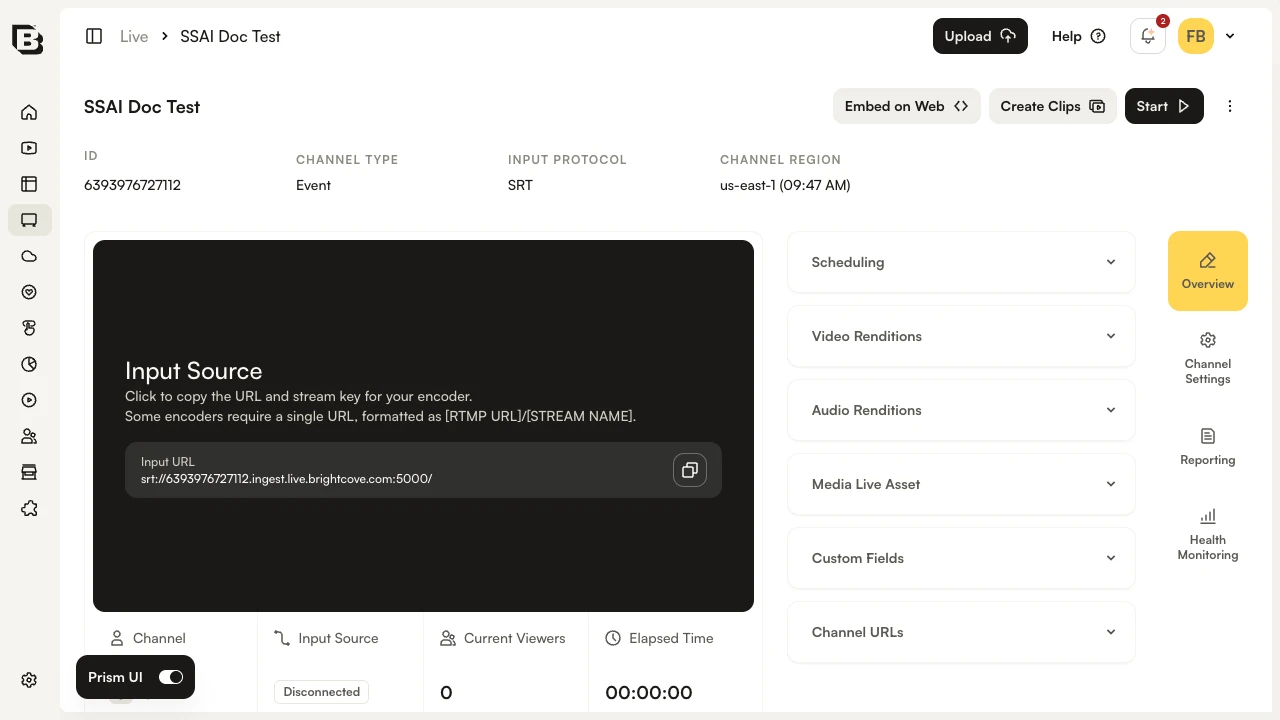
- Open the Live module.
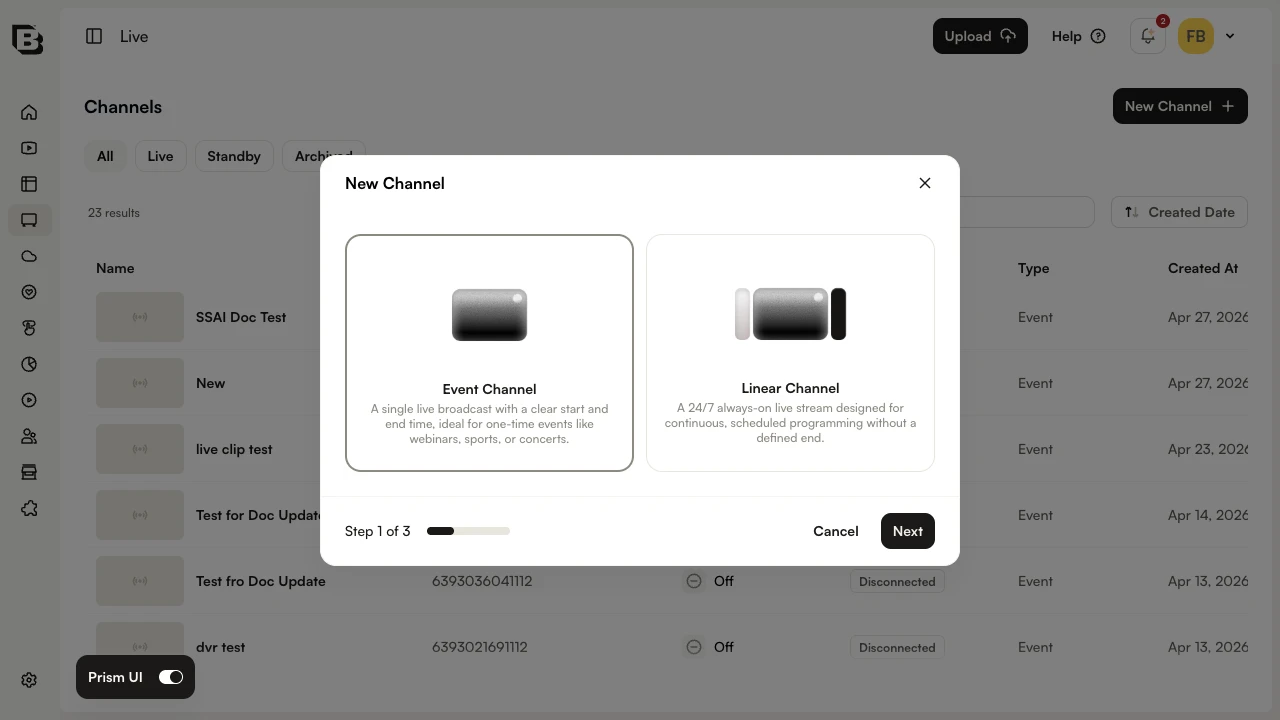
- Click New Channel. In Step 1 of 3, select Event Channel for a one-time broadcast (or Linear Channel for an always-on stream) and click Next.
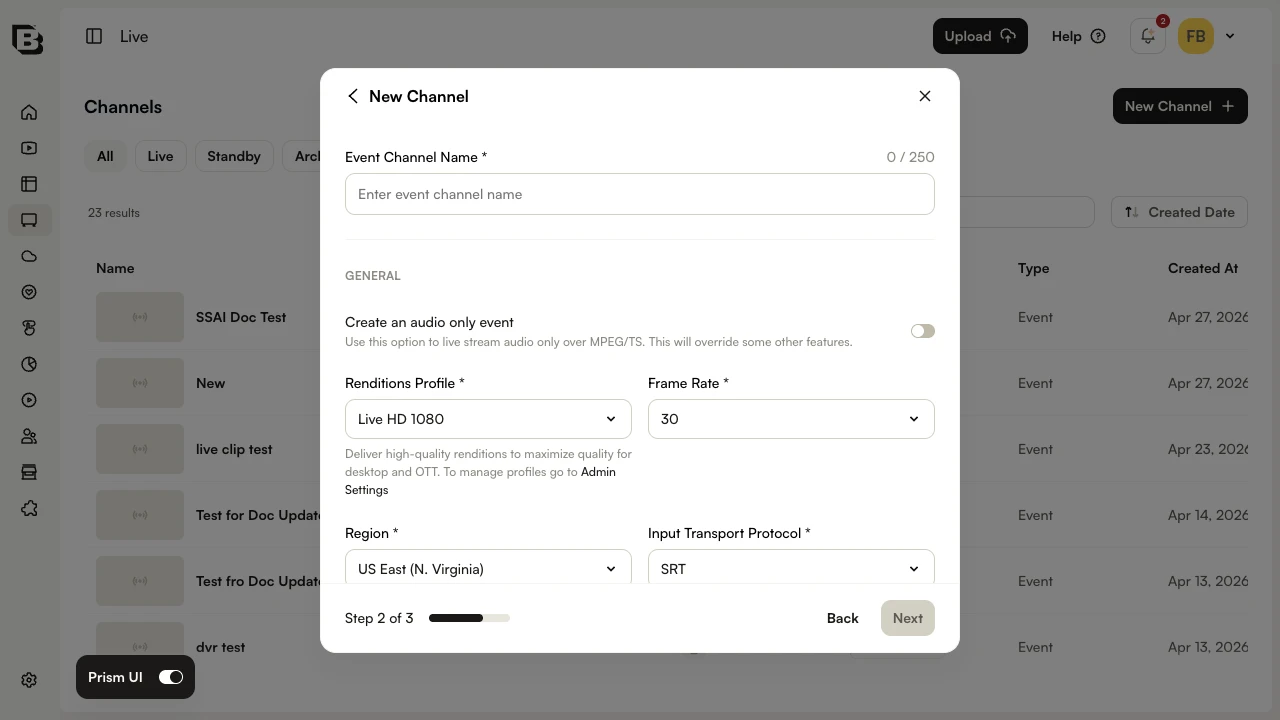
- In Step 2 of 3, enter an Event Channel Name and configure the Renditions Profile, Frame Rate, Region, and Input Transport Protocol. Click Next.
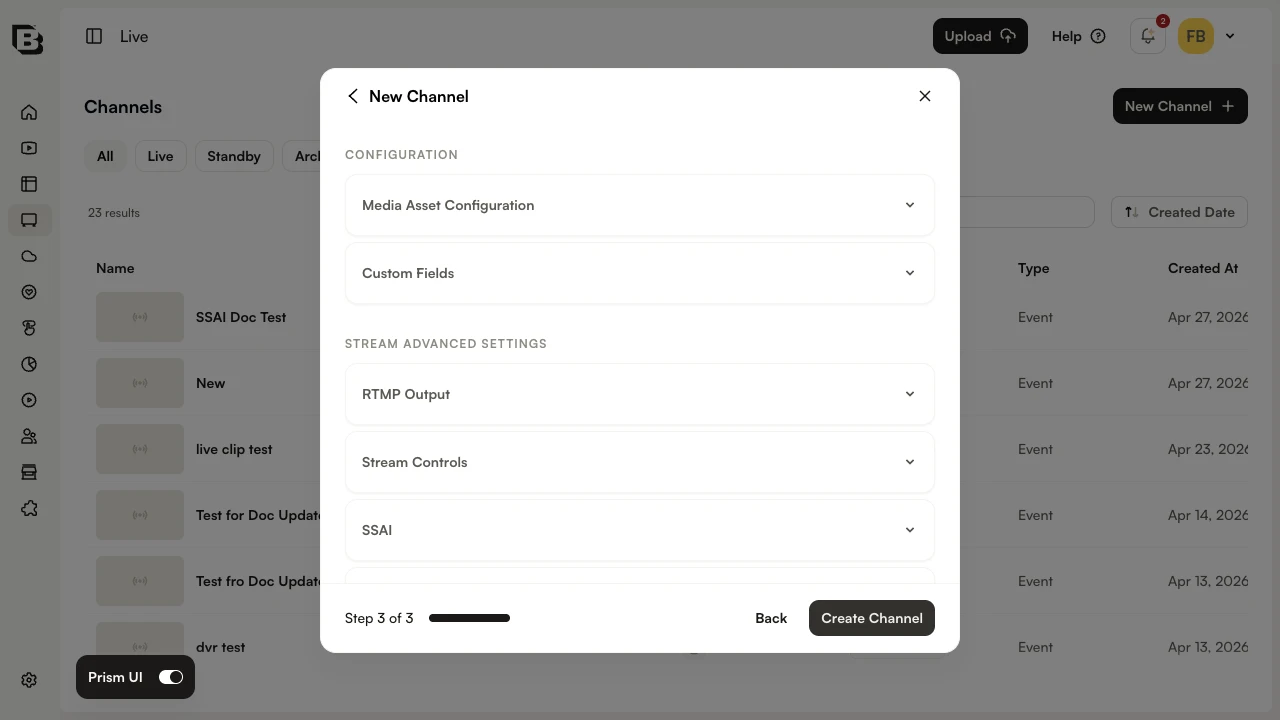
- In Step 3 of 3, expand and configure Media Asset Configuration, Custom Fields, RTMP Output, Stream Controls, and SSAI as needed. Click Create Channel.
- Open the channel from the Channels list. The channel detail page displays the Input Source URL and stream key needed to configure your encoder.
Publishing the live channel to Facebook
Publishing a live channel from the Social module connects it to a Facebook destination so the broadcast can be made available on Facebook. Before publishing, a Facebook publishing destination must exist. For information on creating publishing destinations, see Creating Social Media Publishing Destinations.
- Open the Social module. The Published page is displayed.
- Click Publish in the top-right corner. The Publish dialog opens.
- In the Select the video you want to publish step, locate the live channel you created. Live channels are listed alongside videos and show a 59:60 placeholder thumbnail. Select the channel's checkbox.
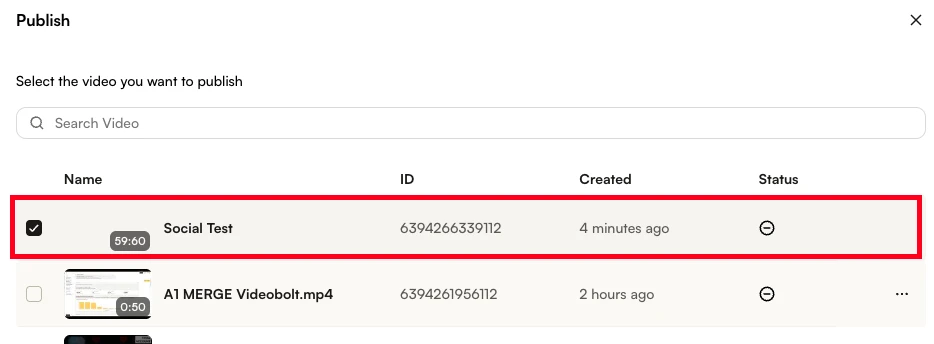
- Click Add.
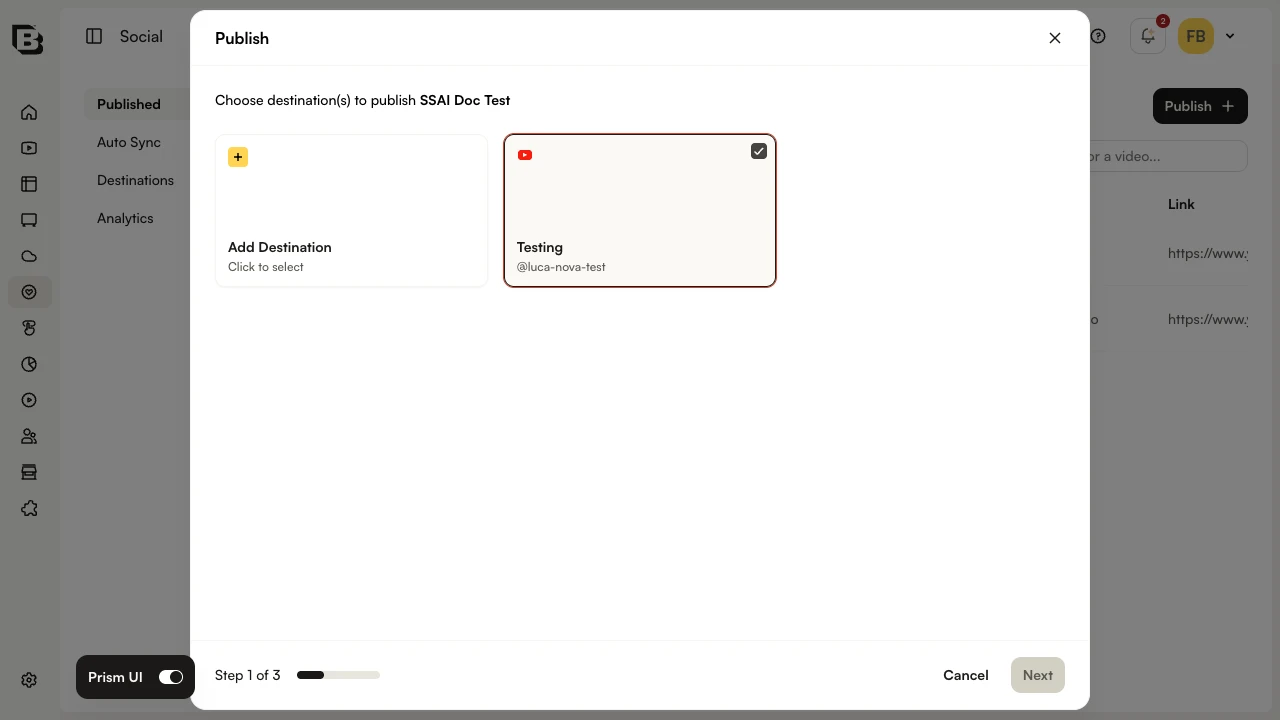
- In Step 1 of 3, select your Facebook destination card. A border and check icon confirm the selection. Click Next.
- In Step 2 of 3, optionally enter a Title and Status Message. These values will appear in the Facebook post announcing the live stream.
- In the Schedule section, set the event date and time and select the appropriate Time Zone.
- In the Live Settings section, configure the Facebook Live Video Settings as appropriate:
- Allow embedding — if checked, video can be embedded on third-party sites.
- Configure the Target and Rights sections as needed. The Rights section will only appear if the connected account has access to the Facebook Rights Manager.
- Add a custom thumbnail image. This image will appear in the Facebook post announcing the live event.
- Continue to Step 3 of 3, review the configuration, and click Publish to schedule the event in Facebook.
Previewing and broadcasting the live stream
Before previewing the event in the Social module, the live event should be started and visible in the Live module.
- In the Social module, open the published live event from the Published page and confirm the stream preview appears.
- Click the Preview Live Stream link, then click Preview. Click Play to confirm the stream that Facebook will broadcast.
- To broadcast the live stream to Facebook, click Broadcast to Viewers, then click Broadcast Stream. The preview will update to show the number of viewers.
Click Switch to Facebook player under the player to view the Facebook player. As Facebook comments are added by viewers, they can be viewed inside the Social module by clicking the Comment Feed tab.
Ending the live stream
- Return to the Social module and open your published event from the Published page.
- Click the End Social Live Event link, then click End Live Event.
- Return to the Live module to end the channel and stop your encoder.
- If you used a recurring channel, return to the Live module and deactivate it.
Completed events appear in the Social module on the Published page. Removing a completed event from there will also remove it from Facebook.