Getting Started with the Interactivity Module
To access the Interactivity module, login to Studio and click Interactivity in the primary navigation.

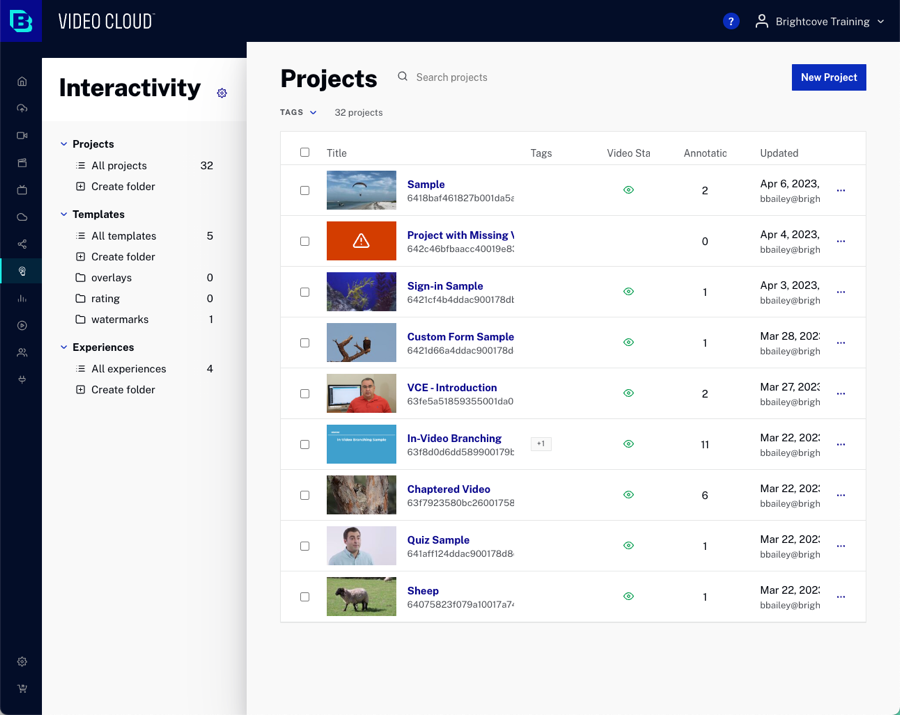
By default the Project listing will display. The body of the page will display:
- Title - Title of the project
- Tags - Tags associated with the project
- Video Status - Status of the video used in the project
- Annotations - Number of annotations in the project
- Updated - Last updated date and time and user ID that performed the update
Using the Interactivity module, you can:
Creating a new project
A Project is a single video with annotations. For information on creating a new project, see Creating and Managing Projects.
Creating a new template
A Template is a set of saved annotations designed to be added to many projects. For example, you could create a template that displays a company logo during the last 30 seconds of a video. Templates make it easy to add one or more annotations to multiple projects. For information on creating a new template, see Creating and Managing Templates.
Searching
The search field at the top of the page can be used to search projects and templates. The search context will change based upon what is being displayed in the Interactivity home page. The left navigation can be used to display either projects or templates. When searching, the title and video ID fields are searched.
Creating folders
For information on working with folders, see Working with Folders.
Configuring settings
The Interactivity settings can be used to style annotations using CSS and configure other annotation styling properties. To access the settings, click the settings icon (![]() ) at the top of the left navigation. For information on the settings, see Configuring Settings.
) at the top of the left navigation. For information on the settings, see Configuring Settings.
Experiences
The Experiences section is no longer displayed in the Interactivity module. Existing experiences are not being removed, but the section to access them will no longer be available.
