The Custom Form widget allows you to embed a form from any system such as Google Forms, Mailchimp, Typeform, Calendly, Eventbright and others on top of a video. The Custom Form widget can also be used to display external web content. In the following example, clicking on the call to action text will open a form over the video.
Before you get started
Before you can add interactivity to a player, you need an Interactivity-enabled Brightcove Player and you need to make sure an Interactivity project has been created. For information on how to do this, see Getting Started with Interactivity.
Adding a custom form widget
The Custom Form widget can be used to display a form during video playback. During playback, call-to-action text will be displayed and when clicked, the form will slide in and be displayed. Using an external form (like a Google Form) has the advantage of sending all the submitted data straight to that system. Note that no data submitted to the form will show up in the standard Brightcove Interactivity reports as it's routed directly to the external system.
Follow these steps to add a Custom Form (this topic uses a Google Form) widget to a project:
- Login to Video Cloud Studio.
- Open the Interactivity module.
- Click on a project Title to open it.
- In the bottom toolbar, click on the widget icon.

- Click the Custom Form widget.

- Click ADD. The widget is added on top of the project video.
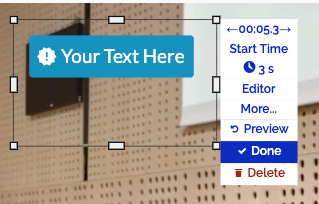
- Click and drag the widget to where you would like the text to appear over the video.
- Click on the Done link in the menu.

- Hover over the Your Text Here text and click CONFIGURE.
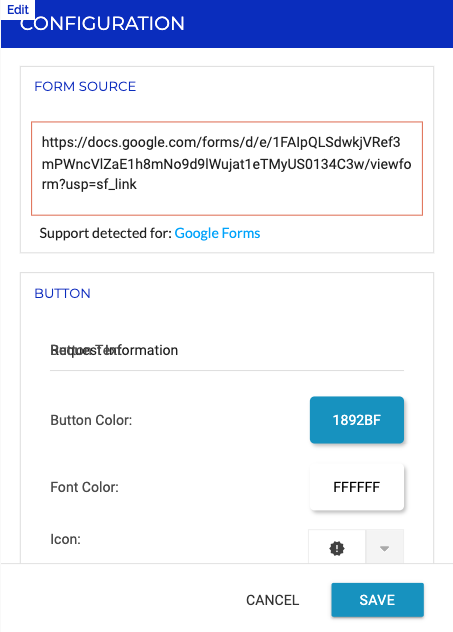
- In the FORM SOURCE field, paste in the form URL. Make sure the URL is publicly accessible.
- Update the Button Text, this is the call-to-action text that the viewer will click to open the form.

- Click SAVE.
- Click Edit to open the editor.
- Click the Start Time menu.
- Enter a Start time in seconds, as a percentage or in time format. Click .
- Click the clock icon to set the duration of the overlay. Click .
- Click Done.
Get a preview link to the video and confirm that the call-to-action and form appear.
Displaying a web page
The Custom Form widget can also be used to display content from another web page. The steps are the same as when adding a form but for the URL, use the URL of the page to display. In this example, a page from Wikipedia is displayed when the call-to-action text is clicked.
Displaying a buy now page
The Custom Form widget can also be used to display a "buy now" type of shopping page. In this example, a shopping page is displayed when the call-to-action text is clicked.
Tips
- Using an external form (like Google Forms) with this annotation has the advantage of sending all the submitted data straight to that system. Note that no data submitted to the form will show up in the standard Brightcove Interactivity reports as it's routed directly to the external system.
- Consider setting the start time to 5 or 10 seconds (near the beginning) and setting the duration to Until the end of the video. This will allow the viewer to click the CTA at any point in the video while keeping the form out of sight until the CTA is clicked.
