Introduction
Brightcove extends the Catalog and Cloud Playout product and offers your owned and operated app, Beacon App, or supported FAST platforms to build schedules of content to be syndicated to FAST destinations. This helps you with additional offerings to monetize content.
Scheduled Channels offers a powerful, end-to-end solution for planning content in a linear channel, including:
- Select an insert point and import a video
- Quickly insert all videos within a playlist
- Navigate across days in the calendar as you add content
- The insertion point moves as you add additional content
- Make changes in the time slot and manage the programming with single and bulk actions
- Delete time slot
- Move schedule content
Recommendations
- The slate for the gap must be longer than the ad pod duration. For example, if you set the ad pod duration to 2 minutes, the slate length must be longer than 2 minutes
- Should be a publicly accessible MP4 URL (open CDN/ non-time bound/ always available)
- It should be dynamic, with motion
- Duration should equal the max ad pod duration used within the channel
- CP uses the default slate video (30 minutes long, coming back shortly) if not provided by the user
- It must be a minimum of 5 seconds for a gap. Gaps less than 5 seconds will not be filled with slate - Short videos < 5 seconds are not supported
- A minimum of 15 minutes is needed to represent a slot on an EPG
- MP4 is a must for playback:
- Handling of MP4 unavailability - depends on the last asset
- If the last asset was a gap filler, that will continue to loop; if not, black frames are used to fill the duration of the asset
- 16x9 images are a must for EPG
- There should be at least 10 minutes between the first slot and the channel start time
- A channel can take a maximum of 10 minutes to start.
Creating Scheduled Channels
To create a new Cloud Playout Scheduled channel, follow these steps.
- Login to Video Cloud Studio.
- In the left navigation, click Cloud Playout.
- Navigate to Scheduled Channels.
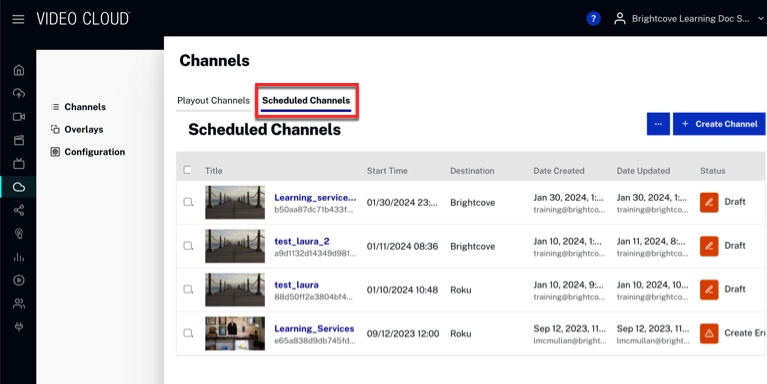
- Click .
- Enter the channel Configuration details:
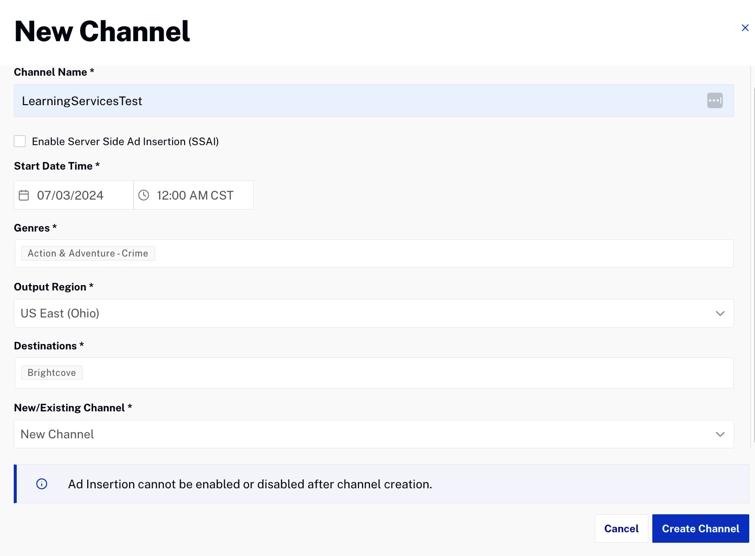
- Channel Name - Name for the channel. The name must have English characters and the following special characters are allowed: _ . : / = + -
- Enable Server Side Ad Insertion (SSAI) - Enable Server-Side Ad Insertion (SSAI). SSAI cannot be enabled or turned off after channel creation.
- Start Date Time - Time when the channel will start playing out. This time can be updated only when the channel is not in running state.
- Genres - Add one or more genres that describe the content of your channel.
- Output Region - The region where the channel will be created. Brightcove recommends selecting a region geographically closest to where the majority of your audience is expected.
There are some additional factors that will govern the region selection
- US East (N.Virginia)
- US East (Ohio)
- US East (Oregon)
- Asia Pasific (Tokyo)
- Asia Pasific (Seoul)
- Asia Pasific (Sidney)
- Asia Pasific (Mumbai)
- EU (Ireland)
- EU (London)
- EU (Paris)
- EU (Stockholm)
- South America (Sao Paulo)
- Destinations - Add Brightcove as a destination.
- New/Existing Channel - Create a new channel or select an existing channel.
- Click . The new channel will be created with a status of DRAFT.
These are the currently supported output regions:
Your channel will appear in Brightcove Live module for monitoring, publishing and embedding into your viewer experiences.
To learn how to manage the Schedule Calendar, see Managing the Schedule Calendar.
Deleting a Scheduled Channel
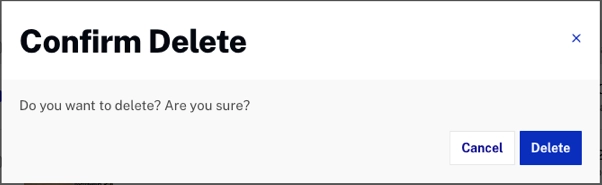
To delete a Scheduled Channel, follow these steps:
- Select a channel by checking the corresponding box. And then, click
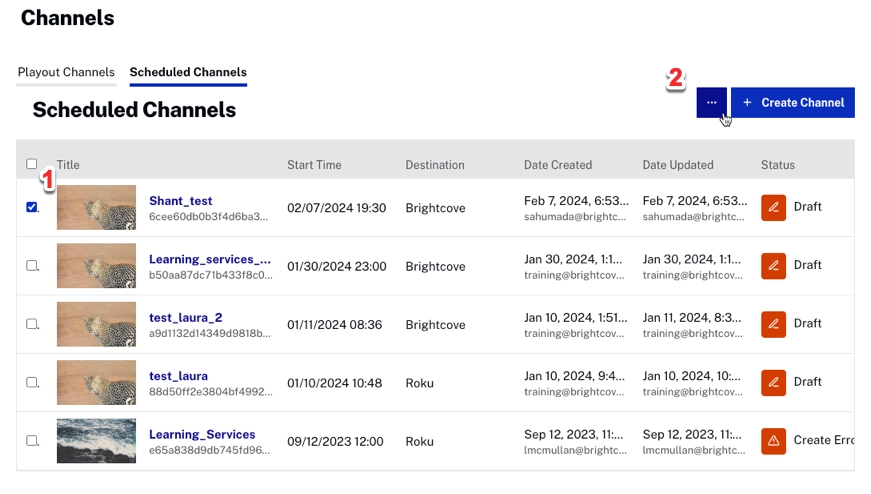
- Click Delete Channel.
- Confirm the delete. Click .
Edit a Scheduled Channel
To edit a Scheduled Channel, follow these steps:
- Select a channel by checking the corresponding box. And then, click
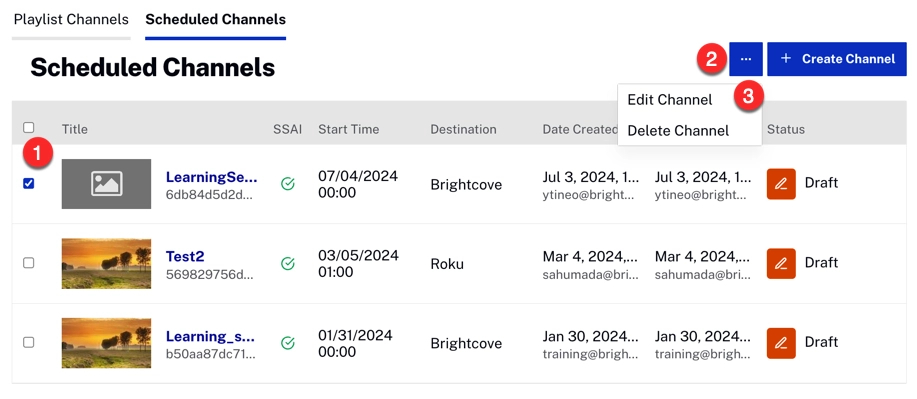
- Click Edit Channel.
- Notice how you can modify the Metadata, Channel Output and Ads & Gaps Settings of the channel.
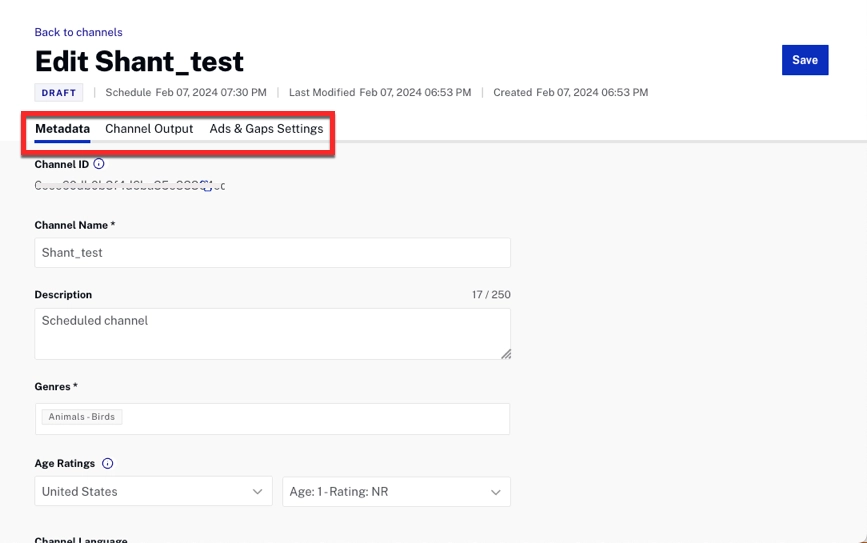
- Metadata: sets the channel-level metadata.
- Channel Output:
- Edit Start Time
- Set the output region
- Select the destination
- Add destination and edit the new or existing channel
- Ads & Gap Settings:
- Set the default ad pod duration.
- Set the slate for gap (using current slate configurations).
- Edit Slates.