The Directed Migration Tool provides a way to specify that a Brightcove Player should be loaded instead of a Smart Player. The tool provides an easy way to publish videos inside of Brightcove Players instead of using legacy Smart Players. No changes to your existing publishing code is required.
This topic contains the following sections:
Directed Migration requirements
The following requirements apply when using the Directed Migration Tool:
- The Directed Migration UI only shows up when you have 3 or more Smart Players in your account
- You should create a new Brightcove Player that has the styling, customizations and plugins that are compatible with the Brightcove Player
- The Directed Migration Tool is not supported for players with playlists.
- Any Smart Player API code in your existing page will no longer function once the player is replaced.
Limitations
Note the following limitations of the Directed Migration Tool:
- Directed Migration will work when using the Smart Player embed publishing code or with shortened or custom URLs (bcove.me or link.brightcove.com).
- Directed Migration will not work with the Flash-only embed code from the Legacy Studio.
Creating a mapping
Mappings are used to specify that a Smart Player should be replaced with a Brightcove Player. To create a new mapping, follow these steps:
- Open the Admin module.
- Click Player Settings.
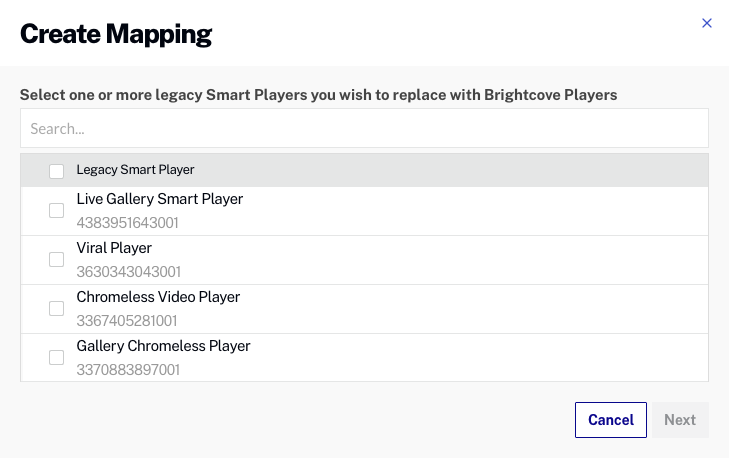
- Click Create Mapping . A list of Smart Players in the account will be displayed.

- Select one or more Smart Players to replace with a Brightcove Player. Click Next .
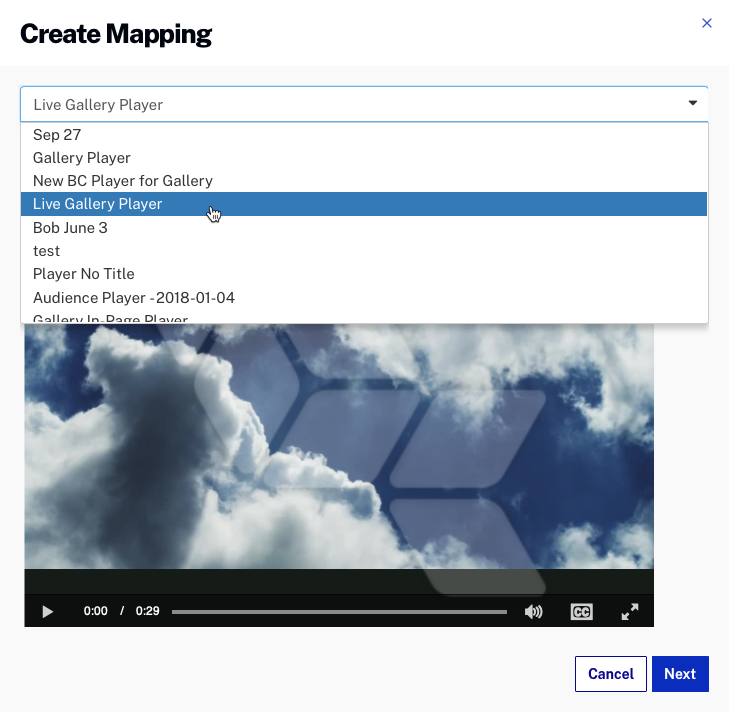
- Select a Brightcove Player to use in place of the Smart Player(s). When a Brightcove Player is selected, a preview of the player will be displayed.

- Click Next . Instructions for testing player mappings will be displayed.
Note: Player mappings can take up to 5 minutes to take effect.
- Click . A list of current mappings will be displayed.

After creating a mapping, the status will be Testing . Once the mapping has been tested and committed, the status will be Committed. Mappings marked with a status of Committed will render a Brightcove Player instead of the Smart Player.
Testing player mappings
You should test any player mappings that are created before they are committed. To test a player mapping, follow these steps:
- Find a page that displays your legacy Smart Player.

- Add the
enableMapping=trueparameter to the page URL.- If the page URL doesn't have URL parameters, add
?enableMapping=trueto the end of the URL. For example:
https://www.mysite.com/videos.html?enableMapping=true - If the page URL has URL parameters, add
&enableMapping=trueto the end of the URL. For example:
https://www.mysite.com/videos.html?myparams=true&enableMapping=true
The newly mapped Brightcove Player should display and the video should play.

When you are satisfied with how the player is working, return to Video Cloud Studio.
- If the page URL doesn't have URL parameters, add
- Select the checkbox next to the player mapping and click Commit Mapping to make the new Brightcove Player visible to all site visitors.
Editing player mappings
To edit a player mapping, follow these steps:
- Open the Admin module.
- Click Player Settings. A list of player mappings will be displayed.
- Select the checkbox next to the player mapping to edit. Click Edit Mapping .
- Select a new Brightcove Player to map to. Click Next and then to save the changes.
Make sure you test any changes to player mappings.
Deleting player mappings
To delete a player mapping, follow these steps:
- Open the Admin module.
- Click Player Settings. A list of player mappings will be displayed.
- Select the checkbox next to the player mapping to delete. Click Delete Mapping .
- Confirm the delete by clicking .
