Through the use of variables and display rules it is possible to create interactive videos that modify the viewing experience based on a viewer’s input. Annotations are made dynamic through the use of JavaScript variables. Variables have two primary functions:
- To display dynamic content in a text commentary, for example,
Welcome Back, {{userName}}! - To be used in display rules to control whether an annotation is displayed or not, for example, "Display Rule:
allowed_to_see==true"
This topic will explain how to create and use variables for a dynamic, adaptive video experience for viewers.
Variable types
There are different types of variables available when using Brightcove Interactivity.
- Standard variables - Variables explicitly set when an annotation is clicked, a quiz pass/fail or by time triggered actions (these variables are manually created)
- Quiz variables - Variables automatically created by quiz annotations
Standard variables
To define a standard variable on an annotation:
- Click on an annotation's Edit menu.
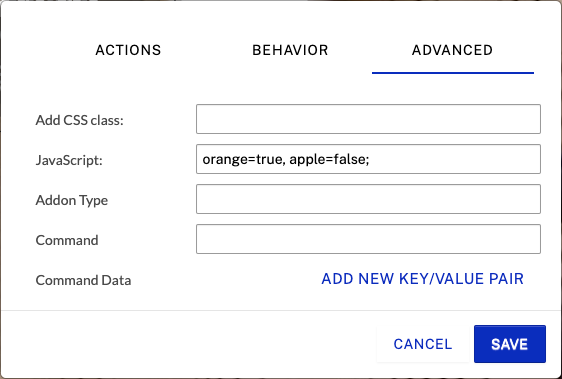
- Click Link and then click the Advanced tab.
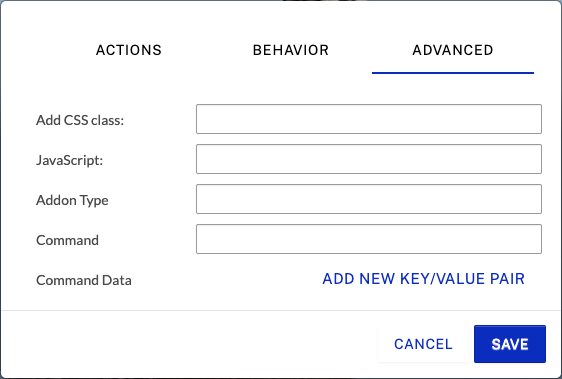
- In the JavaScript field, enter a new JavaScript variable name or variable assignment.
- Click .
When the annotation is clicked by a viewer, the variable assignment code will be executed.
Variable name requirements
- Variable names must begin with a letter, underscore ( _ ), or $
- Use = for assignments and double quotes for quoted strings
- Commas are reserved for delimiting multiple variables
- Multiple variables have to close with a semicolon
Examples
| Example | Result |
|---|---|
my_var=true |
When clicked, my_var will be set to TRUE |
my_var=20 |
When clicked, my_var will be set to 20 |
my_var="Hello World" |
When clicked, my_var will be set to Hello World |
my_var1=true, my_var2=false; |
Multiple variable assignment |
Quiz variables
Every question defined in a Quiz annotation will automatically create two variables:
- The value of the answer provided by the viewer.
- Whether the answer provided by the viewer was correct.
The automatically created variables are named quiz_[annotation-id]_[question index], for example quiz_123_1 would be the answer to the first question in the quiz with id 123. The variable defining if the correct answer was provided will be named quiz_[annotation-id]_[question index]_correct.
Displaying variables
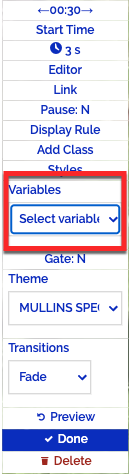
Once variables have been defined they can be used to display dynamic content or to create rules which can be used to show or hide annotations. When a variable is selected from the Variables dropdown, an expression will be added to the text overlay that will resolve to the variable when
viewed. The resolved variable will equal the answer that the viewer provided to the question.
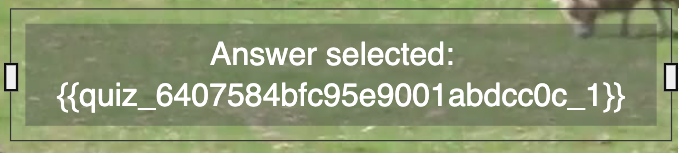
Variables are identified in the text as anything occurring between "{{" and "}}". If you are using quiz variables, the variable expression will be automatically added via the Variables dropdown. Otherwise, you will need to enter the variable name that was defined. For example, "My name is: {{my_name}}"
Overview of display rules
Display Rules are JavaScript expressions that test variables for the purpose of conditionally displaying annotations. If the expression evaluates to TRUE, the annotation will be rendered. If the expression evaluates to FALSE or NULL, the annotation will not be rendered. Display Rules can be added to any annotation type. Common use cases include:
- Display an annotation when a viewer clicks on a different annotation
- Display an annotation when the viewer gets a quiz question right or wrong
- Display an annotation based on a parameter passed in from an external API
Display rules require that you are comfortable working with HTML, JavaScript and CSS. Codeacademy offers free HTML/CSS and JavaScript courses that may be helpful to beginners.
Adding a display rule
To add a display rule to an annotation, follow these steps.
- Login to Video Cloud Studio.
- Open the Interactivity module.
- Click on a project Title to open it.
- In the list of annotations, locate the annotation and click the edit icon (
 ).
). - In the Edit menu, click More...
- Click Display Rule.
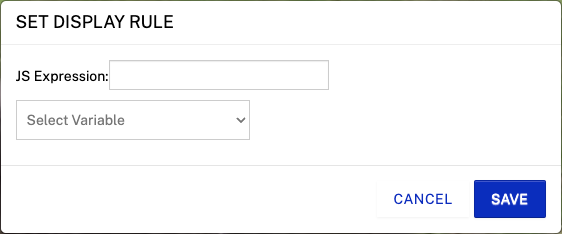
- Enter the display rule. The expression entered in this dialog will be evaluated prior to rendering the annotation.
- Click .
- Click Done.
Display rule syntax
Testing for a set variable
Rule: [variable name] eg. my_var
This is the same as writing my_var=true. This will be true if the resolved variable is defined and it’s value is not false.
Testing equality
Rule: [variable name]=="value" eg. my_var=="Kyle"
This will be true only if the resolved variable is exactly equal to the string value between the single quotes.
Testing for correct quiz answers
Rule: [quiz variable name]_correct eg. quiz_123_1_correct
This will be true only if the resolved variable is equal to the correct answer of the quiz question.
Testing for incorrect quiz answers
Rule: [quiz variable name] && ![quiz variable name]_correct eg. quiz_123_1 &&
!quiz_123_1_correct
This will be true only if the resolved variable is NOT equal to the correct answer of the quiz question.
Example
Here's a basic example. Clicking on one annotation will make another appear.
In this example, a triggered action is set at the beginning of the video to set a JavaScript variable apple to true.
The image and text annotations are configured with the same start and end times.
The apple and orange images are both image overlays. They both have display rules set so they only show if their respective JavaScript variable (apple or orange) is set to true. For example, here is the display rule for the orange.
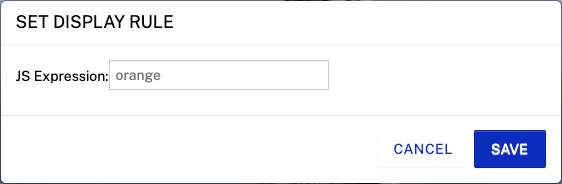
This will cause the orange image overlay to only display when the variable orange = true.
The text overlay Click here to change the image to display an orange is configured with a display rule to display when apple = true. The Link setting is configured to switch the variables when clicked.
So clicking the text will set orange to true which will make the alternate text overlay and orange image both appear.