Creating Custom Lead Forms for HubSpot
The Campaign module provides the ability to create custom lead forms which allow you to capture viewer information as videos are played inside of Brightcove players. The lead data is sent to, and processed by, HubSpot.
To create a custom lead form, the following steps must be performed.
Creating a form in HubSpot
HubSpot forms can be used to generate lead information from website visitors. These forms can also be displayed inside of Brightcove players. The steps below will create a simple form to capture viewer information. For complete details on HubSpot forms, see the HubSpot documentation.
- Login to your HubSpot account.
- Click Marketing > Forms. If you are using the Classic menu, click Contacts > Forms.
- Click Create form.
- Click Embedded form and then click Next. By default, the form will contain an Email field and a Submit button.
- Make sure Blank template is selected. Click Start.
- Click the default name in the header and name the form. Press Enter to save the changes.
- Click the default name in the header and name the form. Press Enter to save the changes.

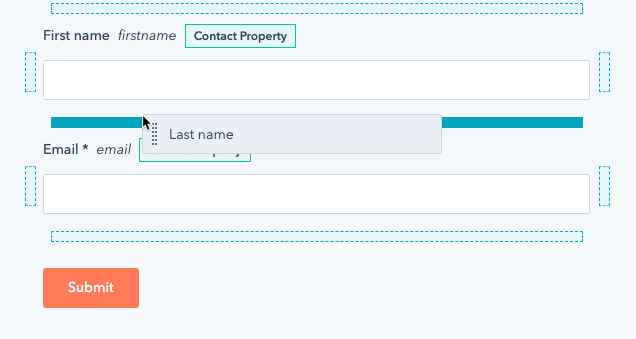
- The left side of the page contains a list of fields that can be added to the form. Drag and drop the First name and Last name fields that you want on the form to the right side of the page.
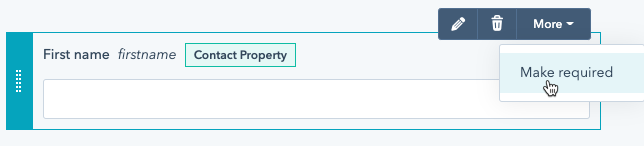
- To make a field required, hover over it and click More > Make required. Required fields display a * next to the field label.
- Click the Options link at the top of the page.
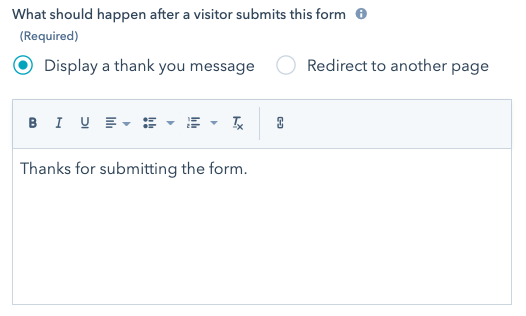
- For What should happen after a visitor submits this form, click Display a thank you message. Keep the default message as it will never be displayed.
- Click the Style & preview link at the top of the page. By default, a Desktop preview will appear.
- Click Publish at the top of the page to publish the changes to the form.
Copying and editing the form embed code
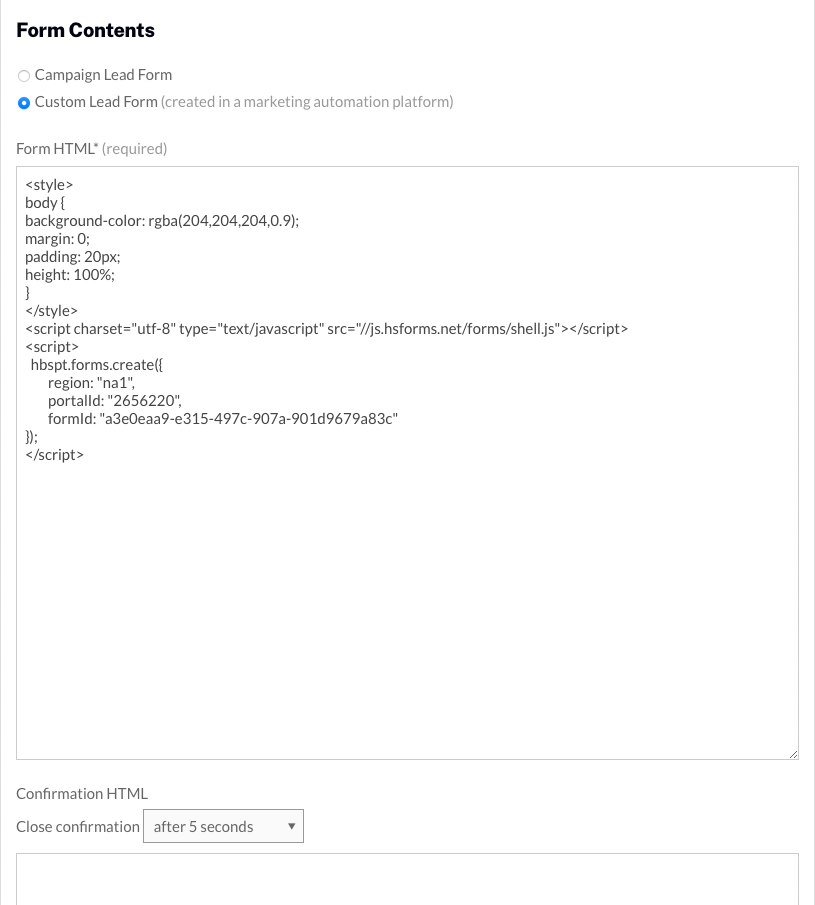
To use the form inside of the Campaign module, you will need to copy and edit the form embed code. Also, you may want to do some basic styling to the form. In the steps below, we will copy the form embed code to an HTML editor and then make some styling changes to the form.
- Click Share in the upper right of the page and copy the Embed code to the clipboard.

- Paste the embed code into your HTML editor of choice.
- The embed code needs a small change so Campaign knows to close the form when it is submitted. Locate the line that has
formId:Add a comma at the end of the line. - Add this line below the
formId:line.onFormSubmit: bcLeadForm.submit - By default, when the form is displayed inside of a Brightcove Player, the form will display on a transparent background over the player. Add the following CSS to the embed code to change the background color to grey.
<style>

          body {

          background-color: rgba(204,204,204,0.9);

          margin: 0;

          padding: 20px;

          height: 100%;

          }

          </style>
Creating a custom lead form in the Campaign module
Once the form embed code has been edited, create a custom lead form in the Campaign module and associate the lead form with a Campaign-enabled player.
- Open the Campaign module.
- Click Lead Forms in the left navigation. If any lead forms have been created, they will be displayed.
- Click .
- Give the lead form a descriptive Name.
- Select a Form Language.
- Select the Form Timing. The form timing determines when the lead form will be displayed.
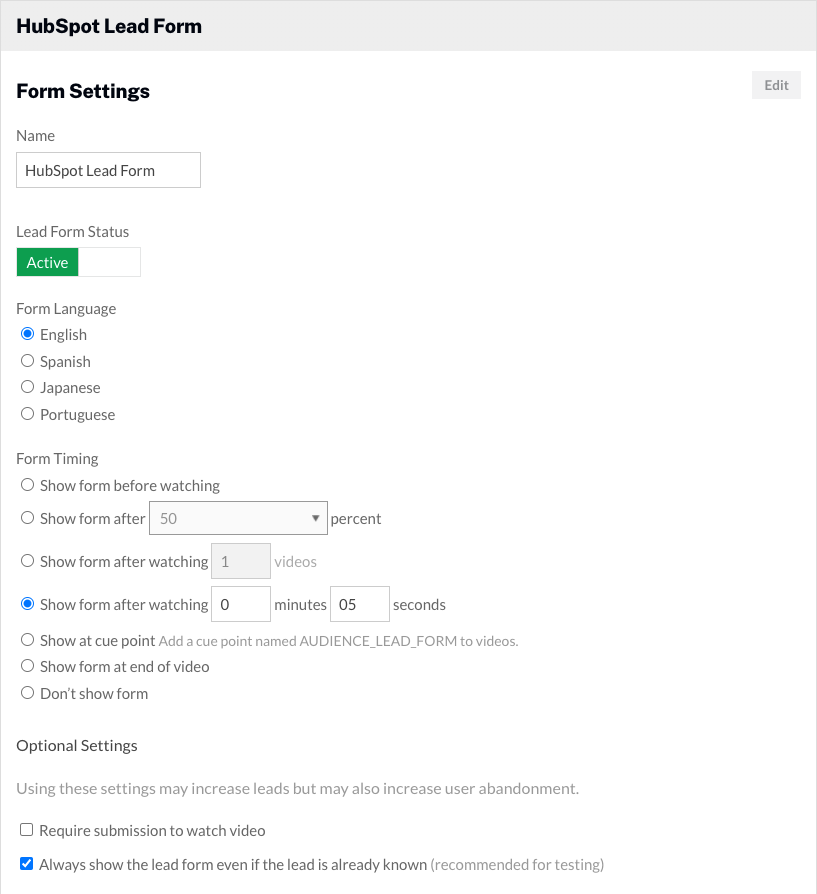
- Set the form type to Custom Lead Form.
- Paste in the Form embed code
.
- (Optional) Click to open a preview of the form.
- Click to save the lead form.
Assigning a lead form to a player
Once the lead form has been created, it needs to be assigned to a player. Follow these steps to assign a lead form to a player.
- Click Campaign Players in the left navigation.
- Locate your player and use the Lead Form dropdown list to select the lead form.
The setup is now complete and you are ready to capture lead information. When a video is published using a Campaign-enabled player, the lead form will appear according to the form timing settings.
Validating the form data in HubSpot
Leads captured using the custom lead form will be added as contacts in your HubSpot account. An easy way to view data captured by the lead form is to create a Smart List in HubSpot.
- Login to your HubSpot account.
- Click Marketing > Forms.
- When you mouseover a form, an Actions menu will appear. Click Actions > View submissions. A list of form submissions will appear.
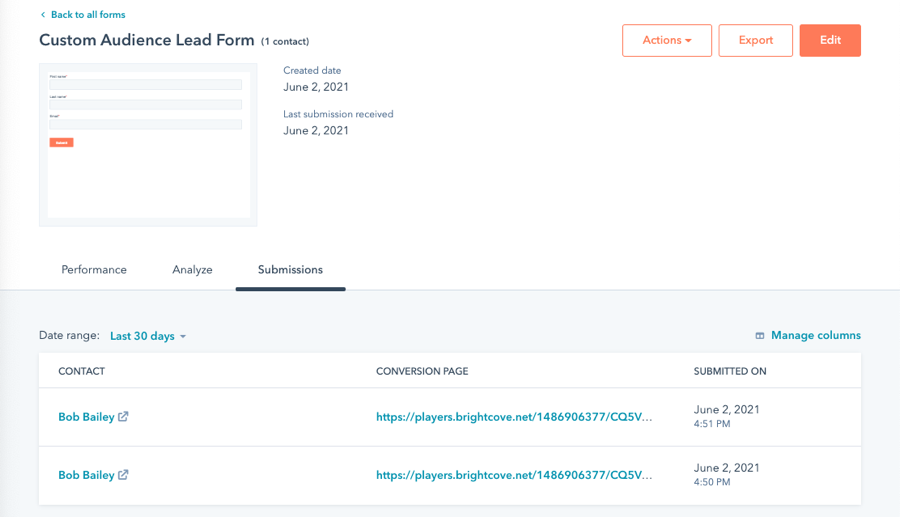
- When you mouseover a row, click View submission to view the form data.
