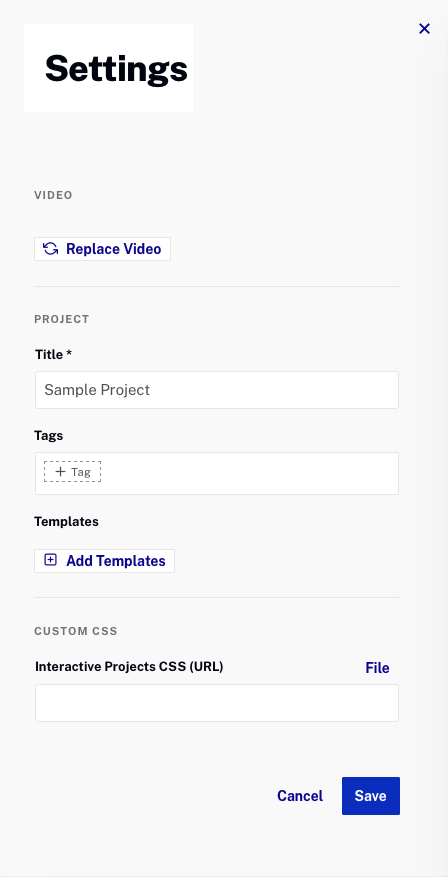
The project settings can be used to edit the project title, add tags, add templates, assign a custom CSS file and replace the video associated with a project. Follow these steps to configure the project settings.
- Open the Interactivity module.
- Click a project Title or click the action menu (...) associated with the project and click View.
- Click .
- Edit the settings as needed. When done click .

Video settings
The Video setting controls the video that is behind the annotations. You may need to change the source video if you copied the project and want to assign a different video. Follow these steps to change the video.
- Click .
- Select a new video to use.
- Click .
Project settings
Title
Title of the project
Tags
Tags are commonly used for:
- Organizing projects into groups; Tags can help facilitate searching projects and can be used as a report filter
- Automatically adding annotations to videos; for information see Applying Templates to Projects
Tags should be:
- All lower case
- Contain no spaces
- Separate multiple tags with a comma
Templates
The Templates section will list all templates applied to the project. Follow these steps to apply a template to a project. For information see Applying Templates to Projects.
Custom CSS settings
Custom Annotation CSS URL
Many customers apply a custom CSS to their project to change the colors, fonts or other styles of their annotations. You can either provide the URL to a CSS file or click File and browse and select a CSS file to use. A default CSS file can be downloaded from the settings page. Settings in the project CSS file will override what is specified in the account level CSS file.
