Brightcove Video Editor
This editor is ideal for a variety of short form use cases.
Welcome to the Editor
Video Editor Permissions
You can edit a standard user and grant or remove their access by following the next process:
- Navigate to the Admin Module
- Select the user in question
- Check the Video Editor feature
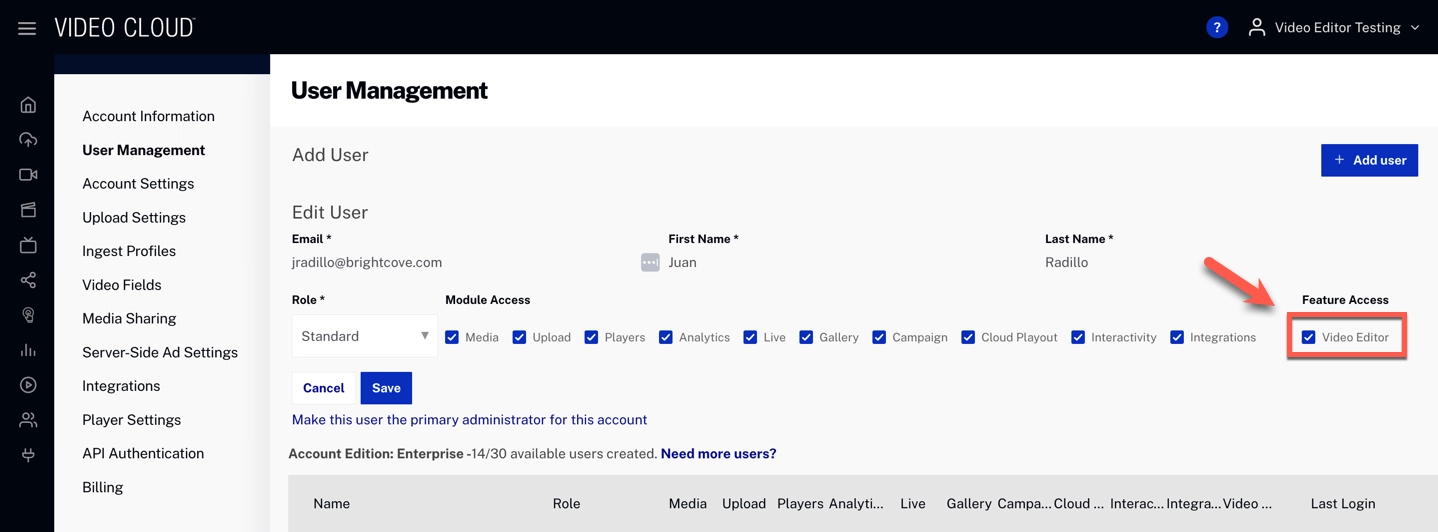
- Click Save
Using the Correct Ingest Profile
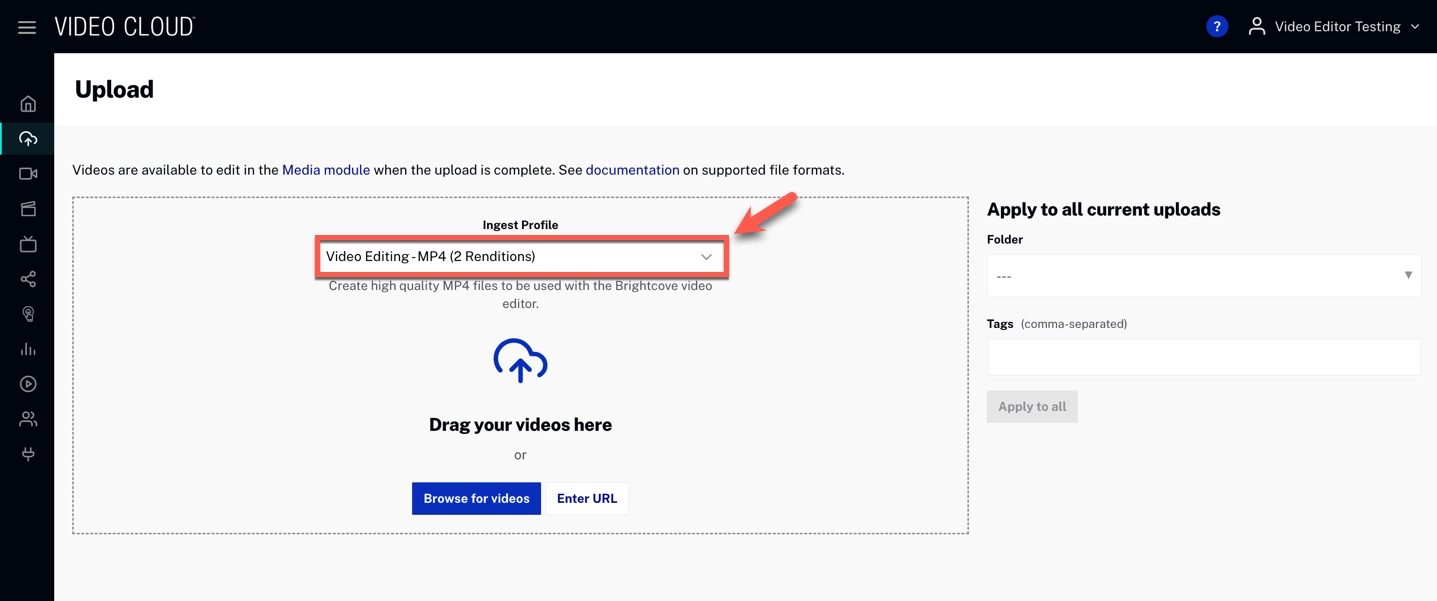
To use the Brightcove Video Editor, your video should have MP4 renditions.
There are multiple ways to achieve this:
A. Upload a video with the Video Editing With MP4 Ingest profile:
When uploading your video, select the Video Editing With MP4 ingest profile.
B. Adding MP4 renditions to existing ones:
To add the necessary MP4 renditions needed to work with the editor for an existing asset, please use the Create MP4 button.
- Navigate to the Media module.
- Select the video you would like to work with.
- Scroll down to the Video Files section and click Create MP4
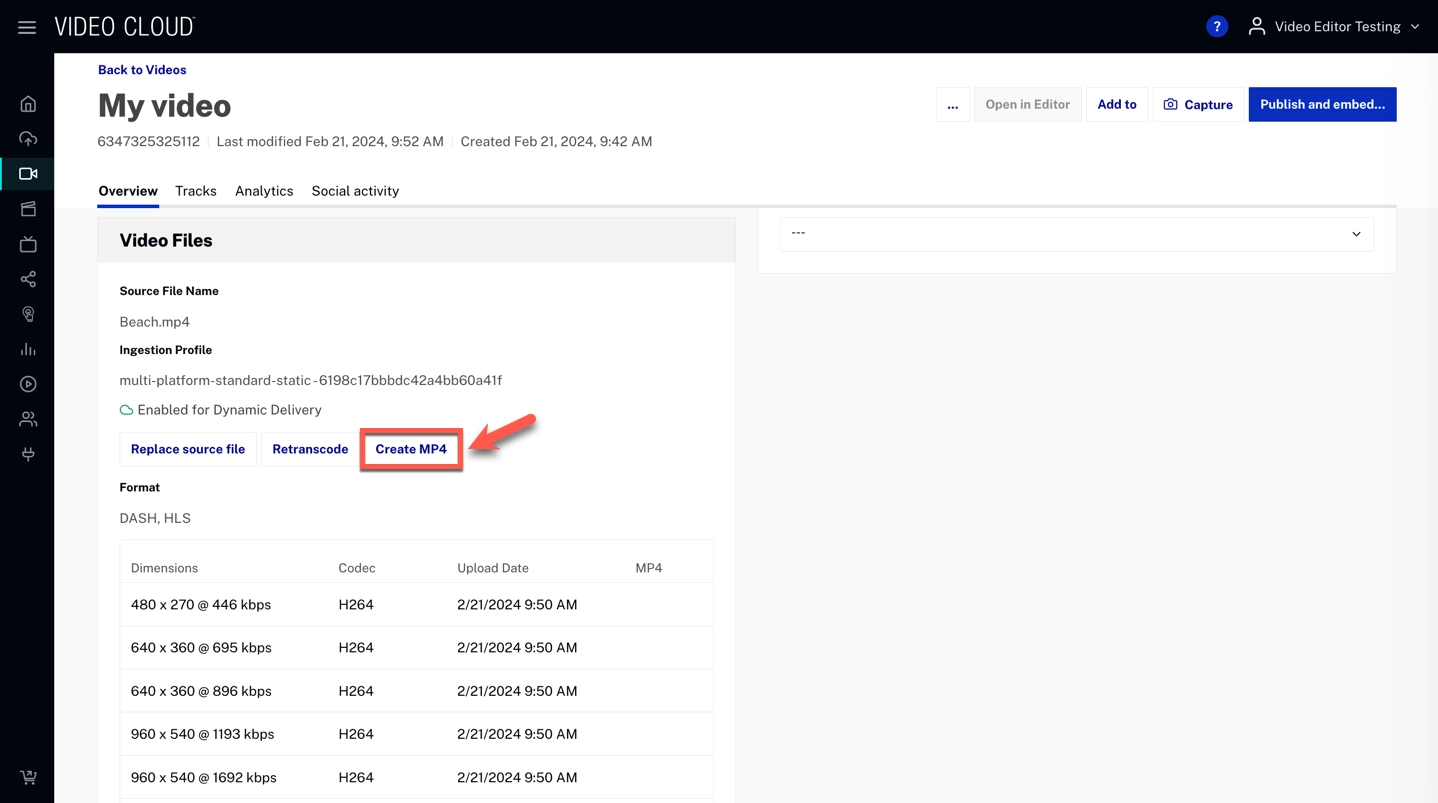
- Select Video Editing - MP4 as your ingest profile
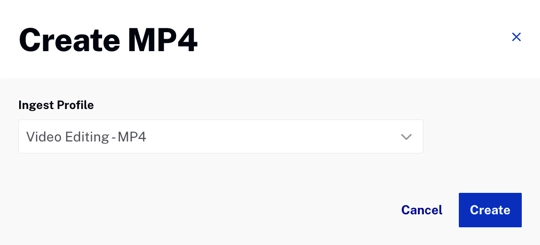
- Click Create
C. Retranscoding your video:
You can retranscode an existing video with a profile that generates MP4 renditions. Video Editing - MP4 is our recommended profile for editing purposes.
However, this will wipe out any existing renditions and create new ones, which may impact videos that are already published live on your site with HLS/Dash. Learn more about re-transcoding here.
Using a template
You may create new videos from scratch or use one of the numerous templates available. You can use templates for horizontal, vertical, and square aspect ratios.
To create a new video, follow the next steps:
- Navigate to the Media module.
- Open any existing video and click Template Editor at the top of the video details page to start a new composition from a template.
- Select the template you want to use. If you want to create a video from scratch, select the blank template. If you prefer to use an existing template, Select one of the other existing templates instead.
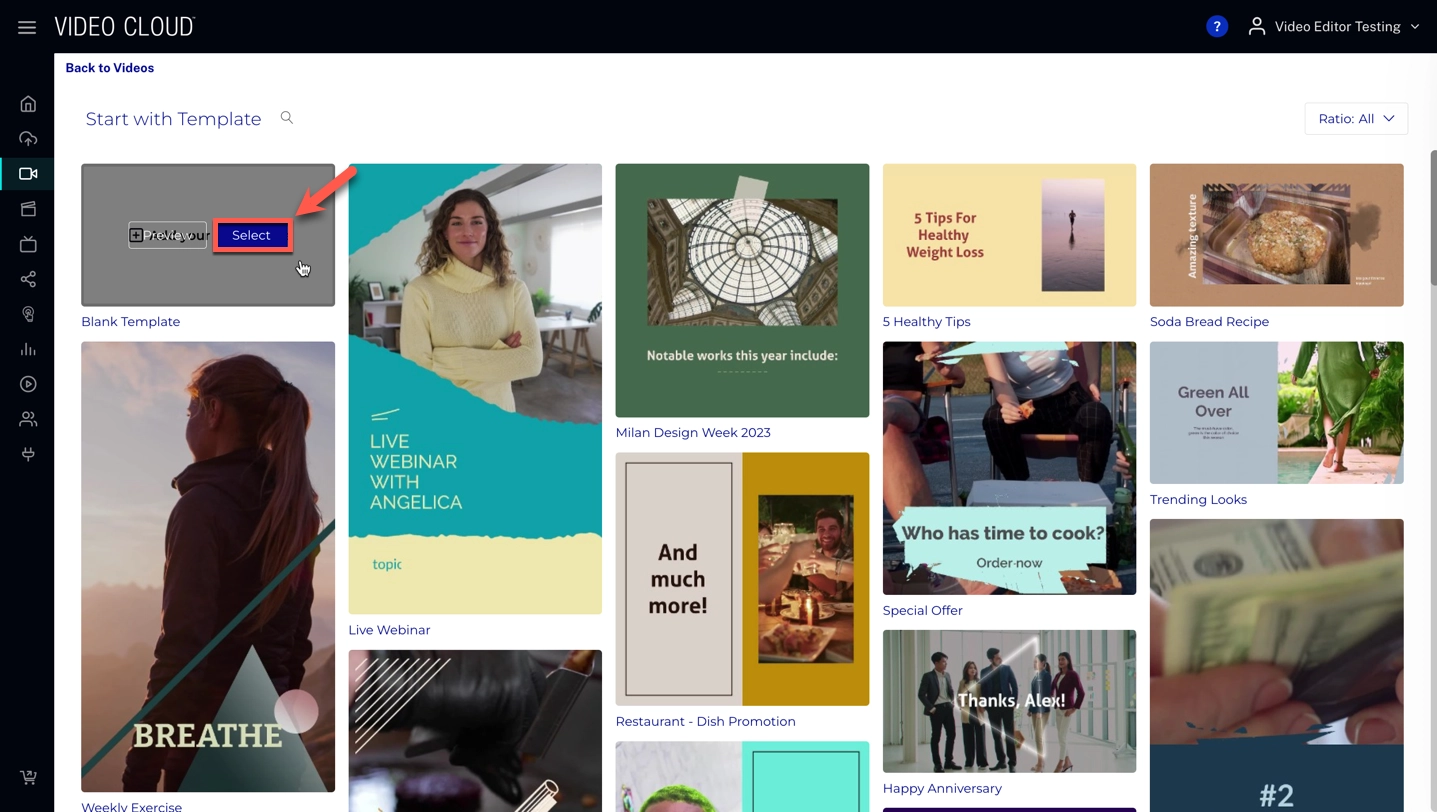
- Once you have made your desired changes, click Process & add to library
Editing an existing video
To start editing an existing video, follow the next steps:
- Navigate to the Media module.
- Open the video you would like to work with by clicking its title.
- On the video details page, click Template Editor in the top-right of the page.
- Click Continue
-
By following this process, you'll be able to interact with the video editor.
- Once you have made your desired changes, click Process & add to library
Re-opening a draft
You can open a draft, make changes, and republish as many times as you need.
- Navigate to the Media module.
- Open the draft video by clicking its title.
- Click Template Editor at the top of the video details page to reopen the draft.
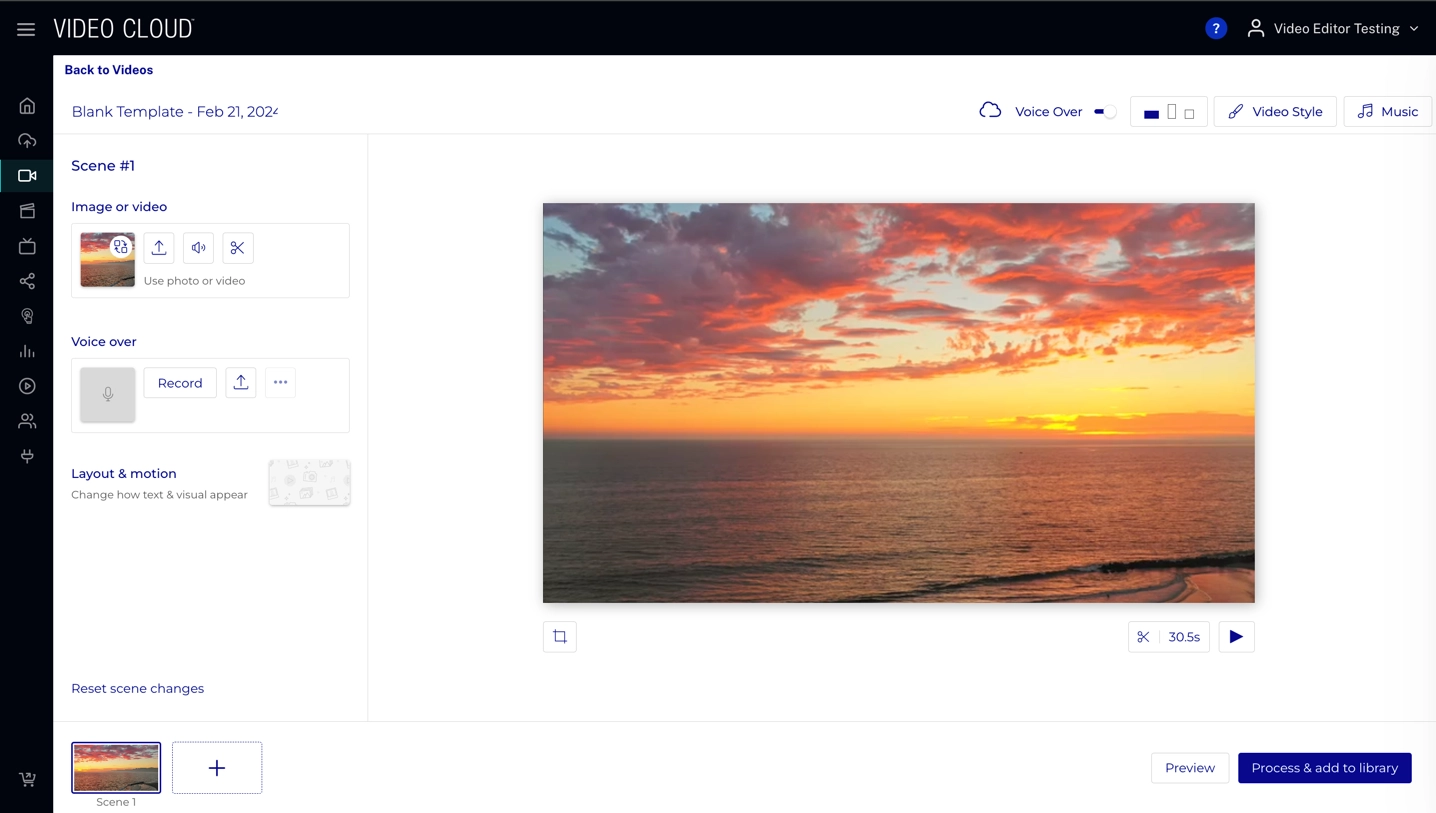
Navigating and using the video editor
Some of the features that have been added to the Brightcove video Editor are:
-
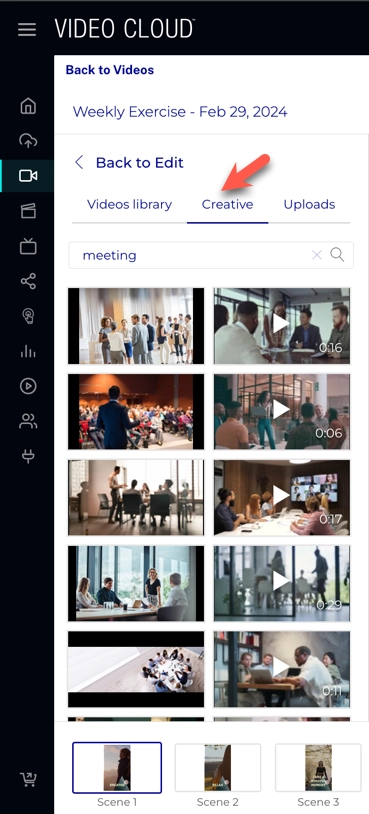
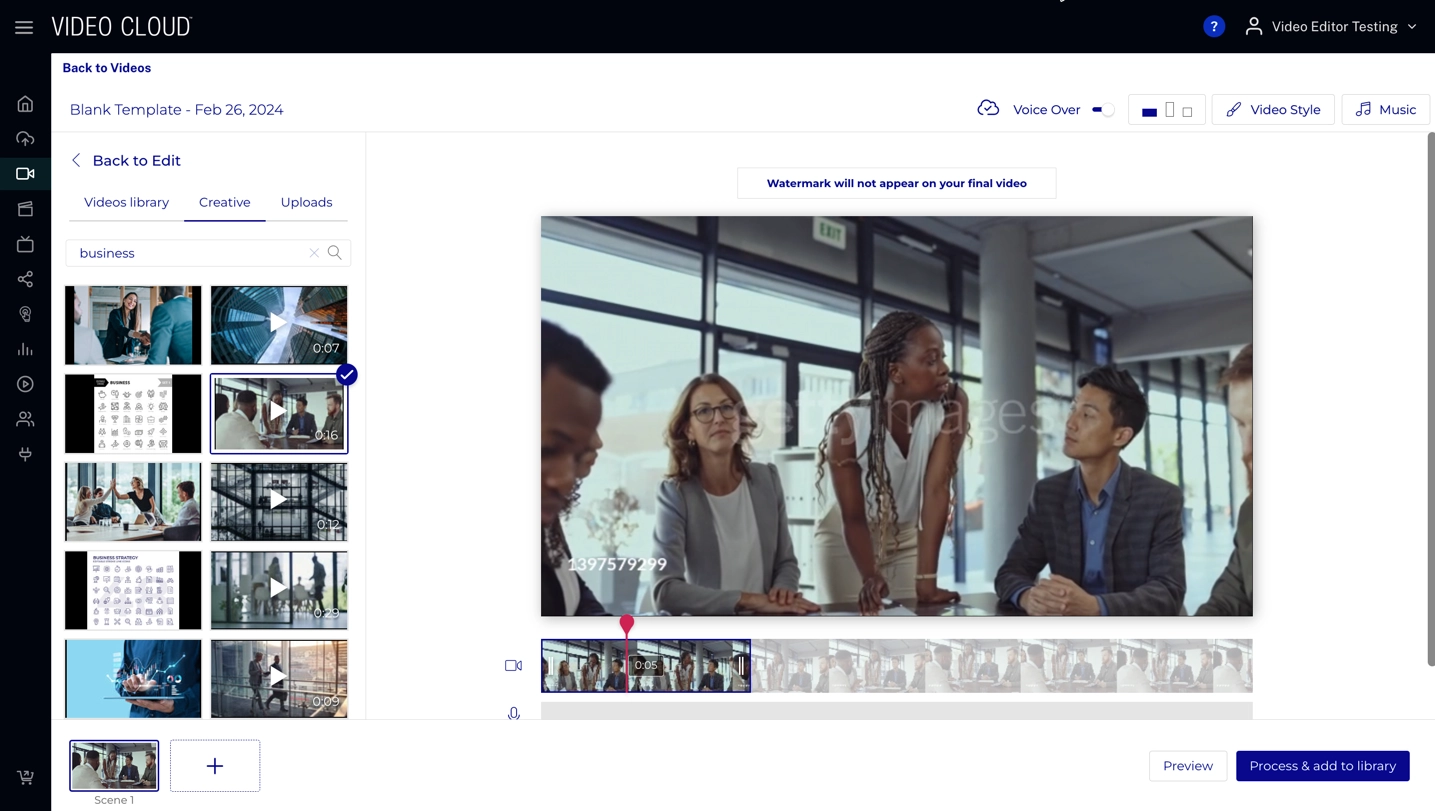
Add an image or video asset
This process will let you add a video or image asset to a Scene
- Click the Replace Button
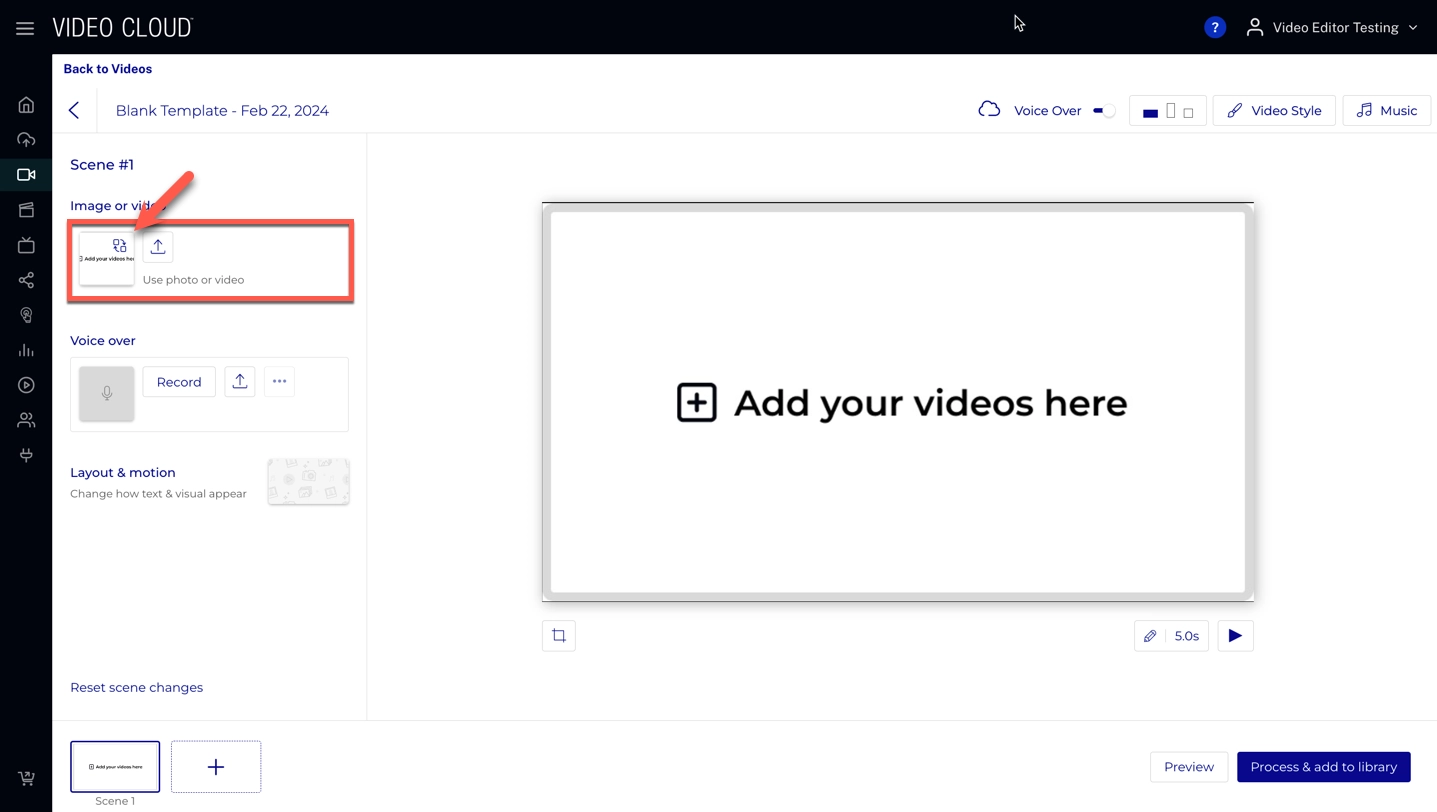
- In the Videos library tab, you can upload assets from your video library.
Search the Creative tab for stock images and videos, or submit your files from the Uploads tab.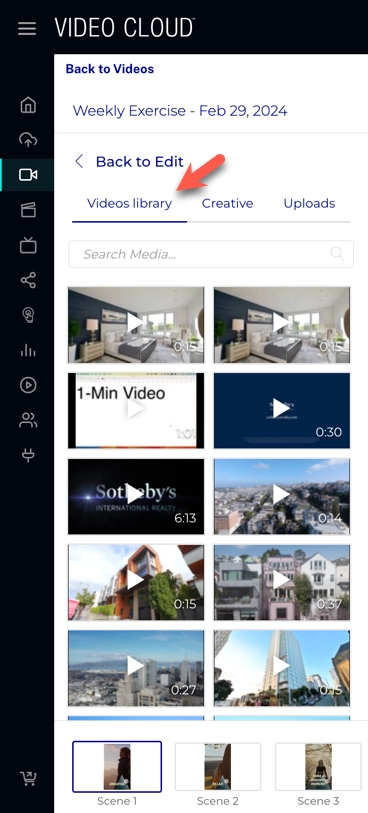

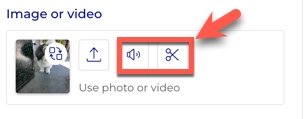
- Crop the added video to match your desired length, and click Apply
- Once you have a video asset uploaded, you can click the icon to mute the audio or the icon to crop the video
- Click the Replace Button
-
Crop a video
This process will let you display only a selected part of a video asset
- Click the Icon
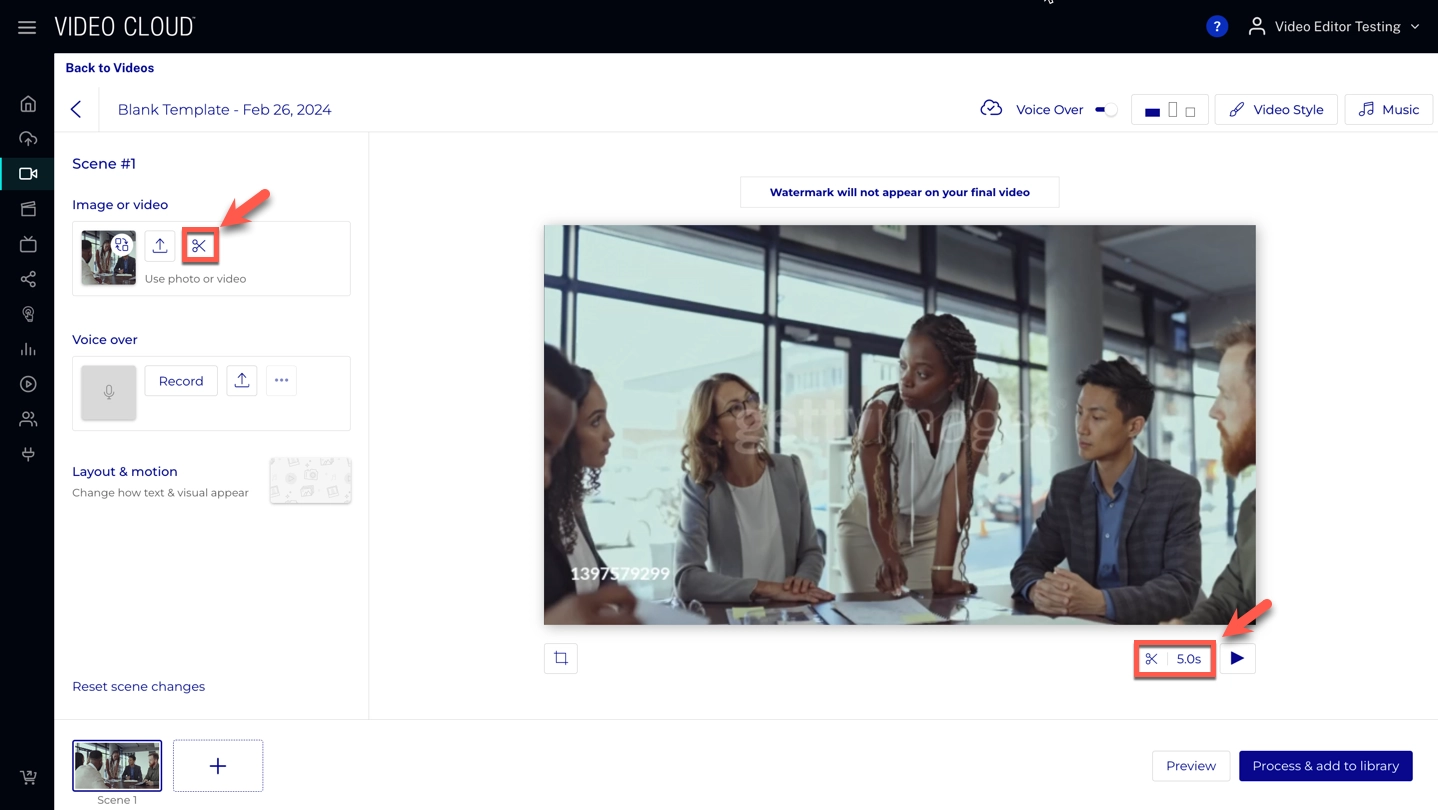
- Select the video section that you desire in your timeline, and click Apply
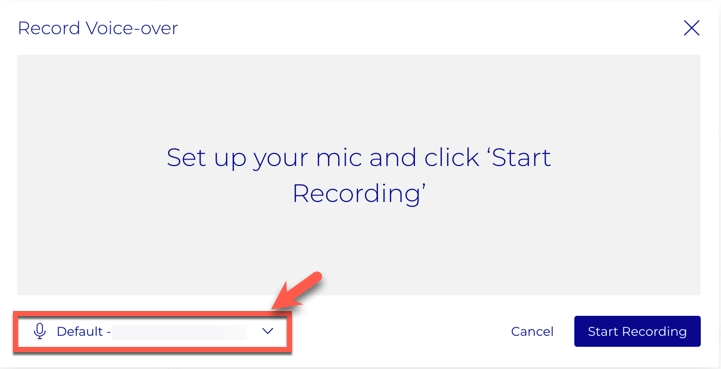
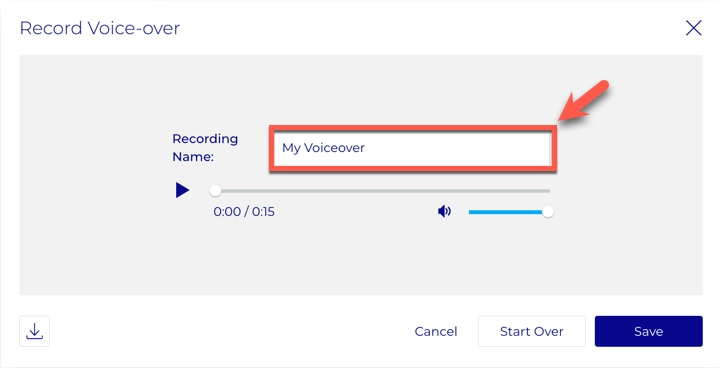
Record a voiceover
With this feature, you will be able to add a voiceover recording to your video.
- Click Record

- Select your microphone and Click Start Recording
- Once you are done, Click Stop Recording
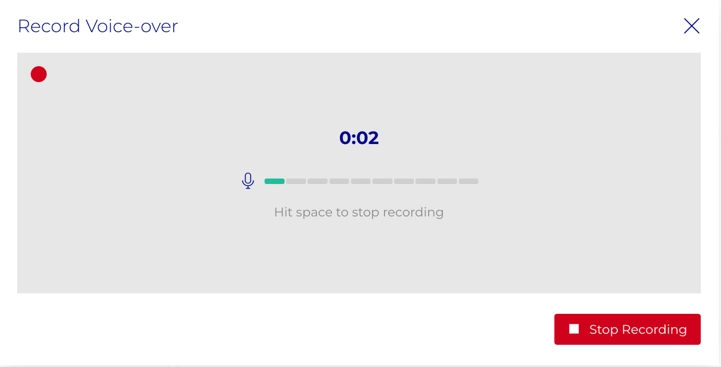
- Enter a name and Click Save
- Click the Icon
-
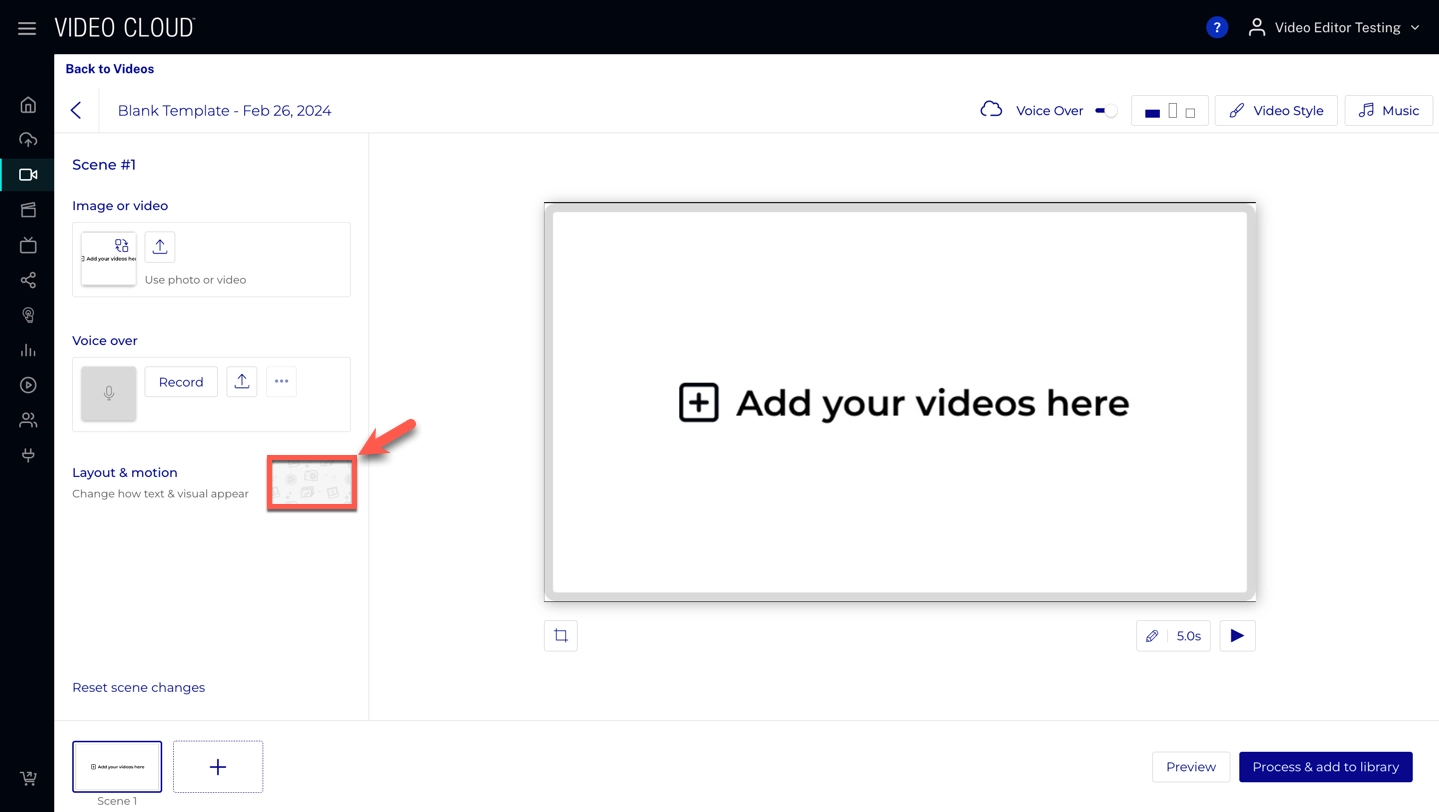
Change layout
These layouts allow you to show different types of overlays on the screen and modify the text that you want to present with them.
- Click the Layout Button to select a different layout for your scene.
-
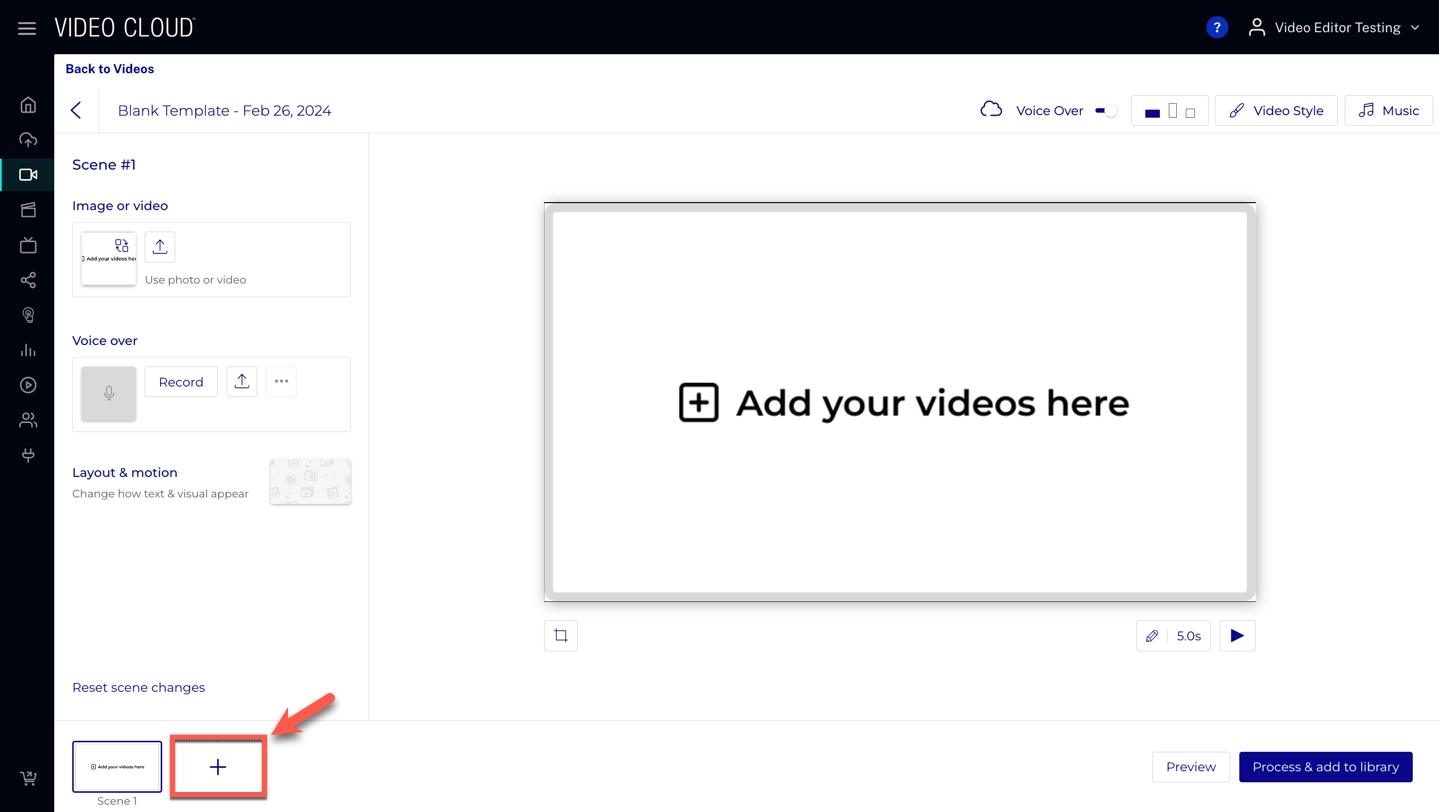
Add Scenes
Here, you can add multiple additional scenes to your video.
- Click the + sign to add a new scene.
-
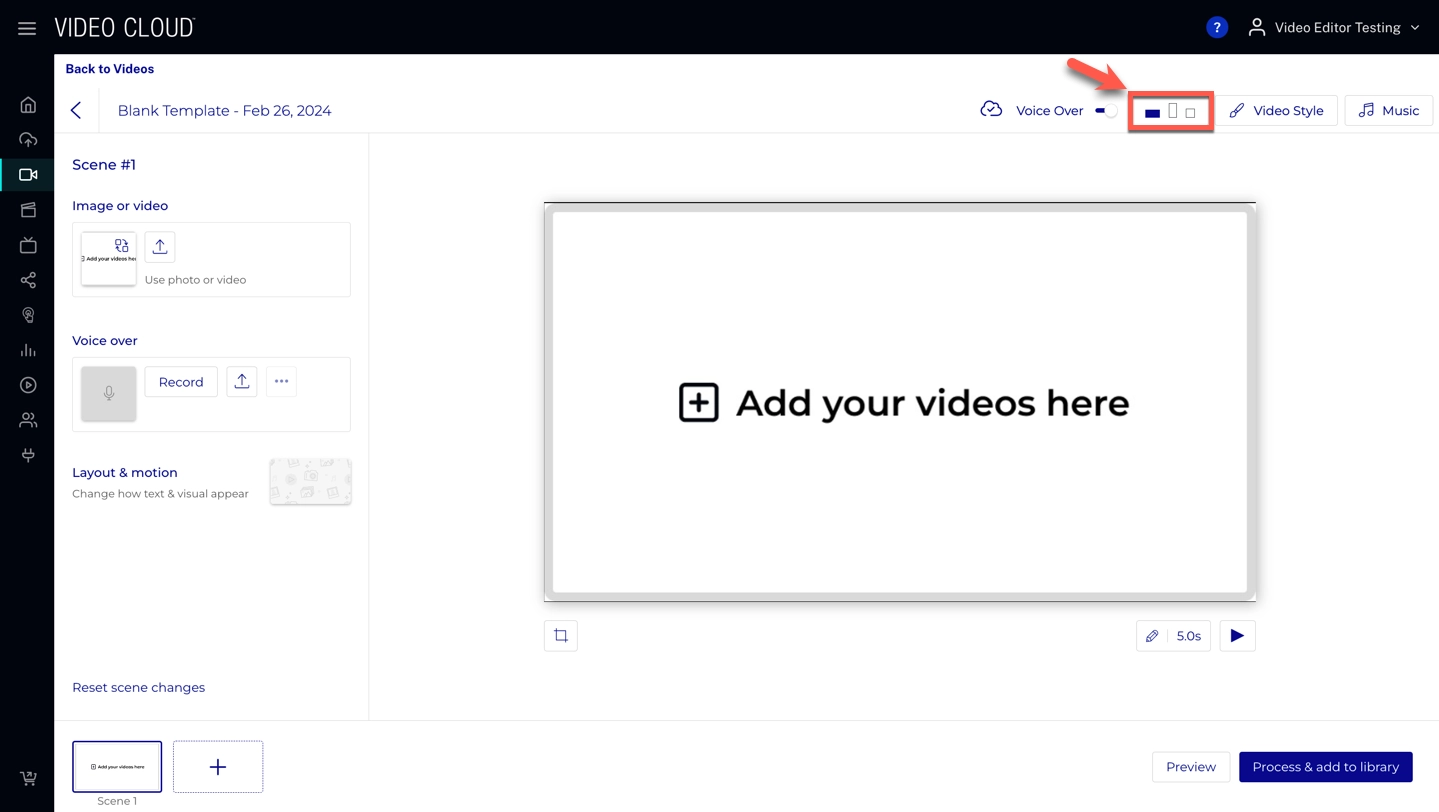
Change aspect ratio
Here, you can change the aspect ratio of your video.
- Click your desired view to change the aspect ratio.
-
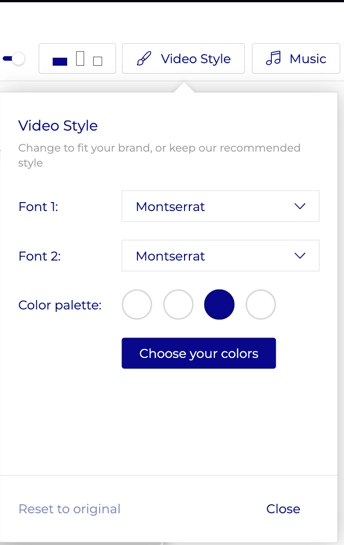
Change styling
In this section, you can customize the look and feel of your video to match your brand.
- Click the Video Style button to change the look of your video.
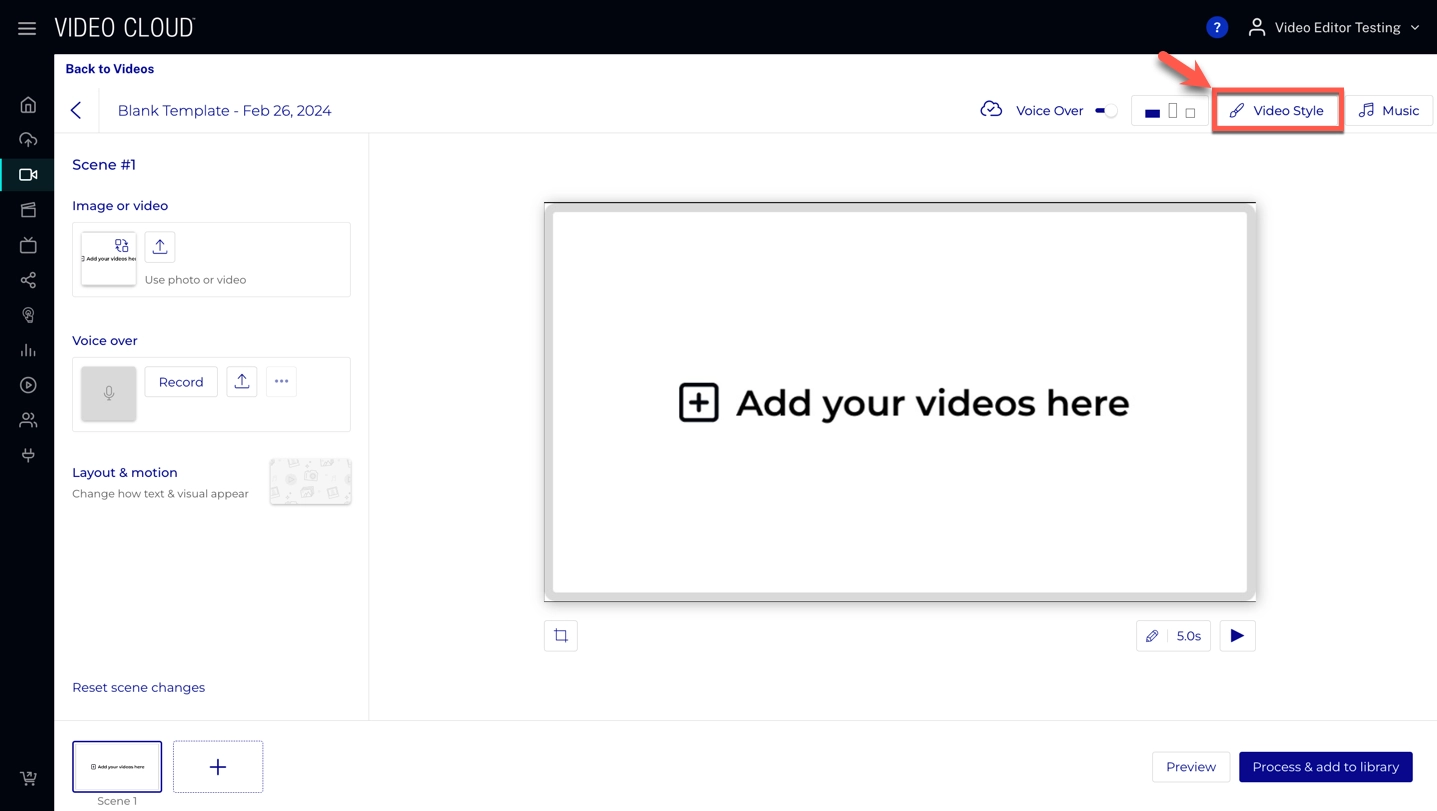
- You'll be able to change both the font and the color scheme.
- Click the Video Style button to change the look of your video.
-
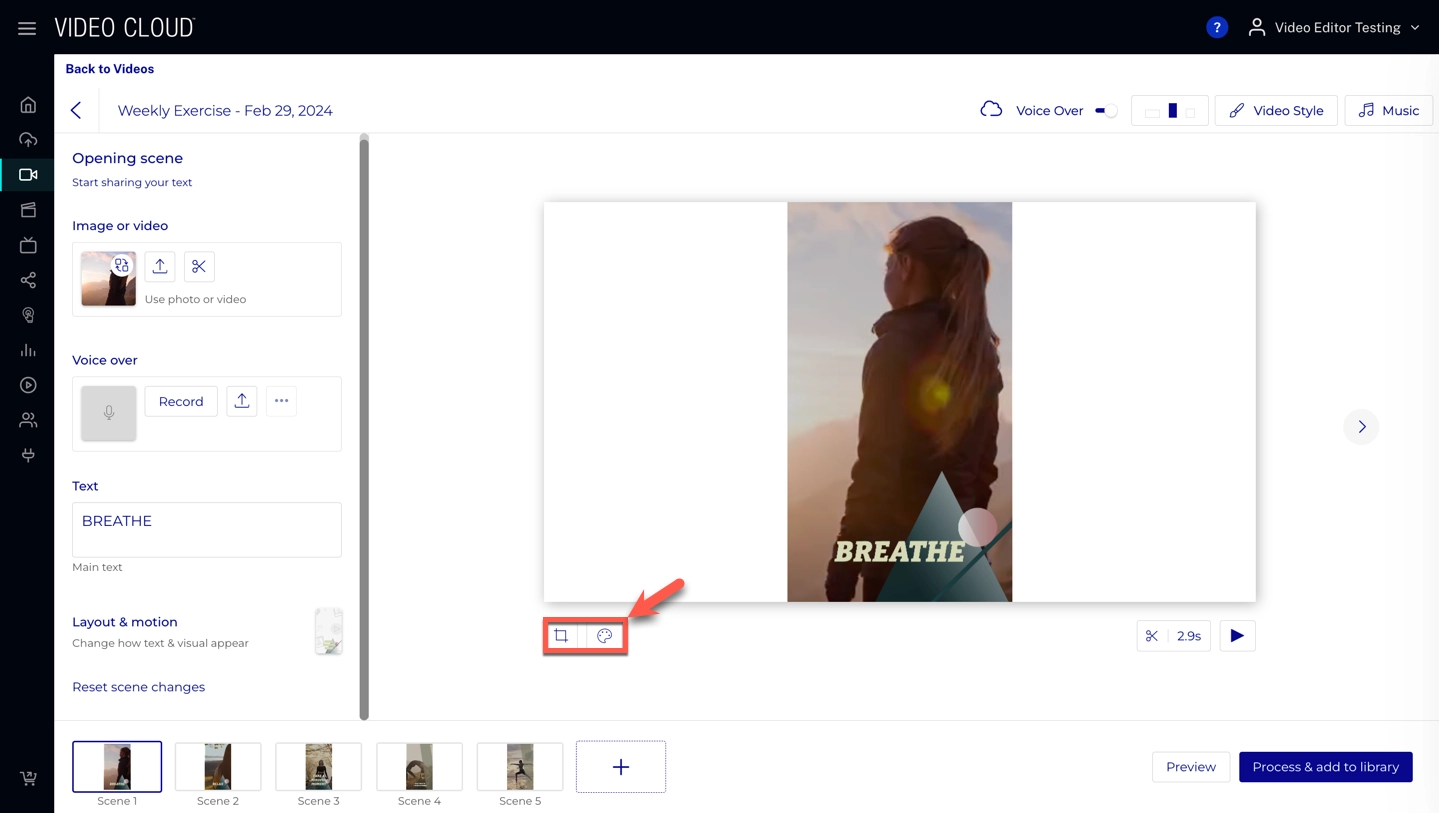
Crop and change color
Click to apply another color combination to a particular scene.
Click to crop and select what you would like to showcase in your scene.
-
Add Music
Here, you can add music to your video.
- Click Music
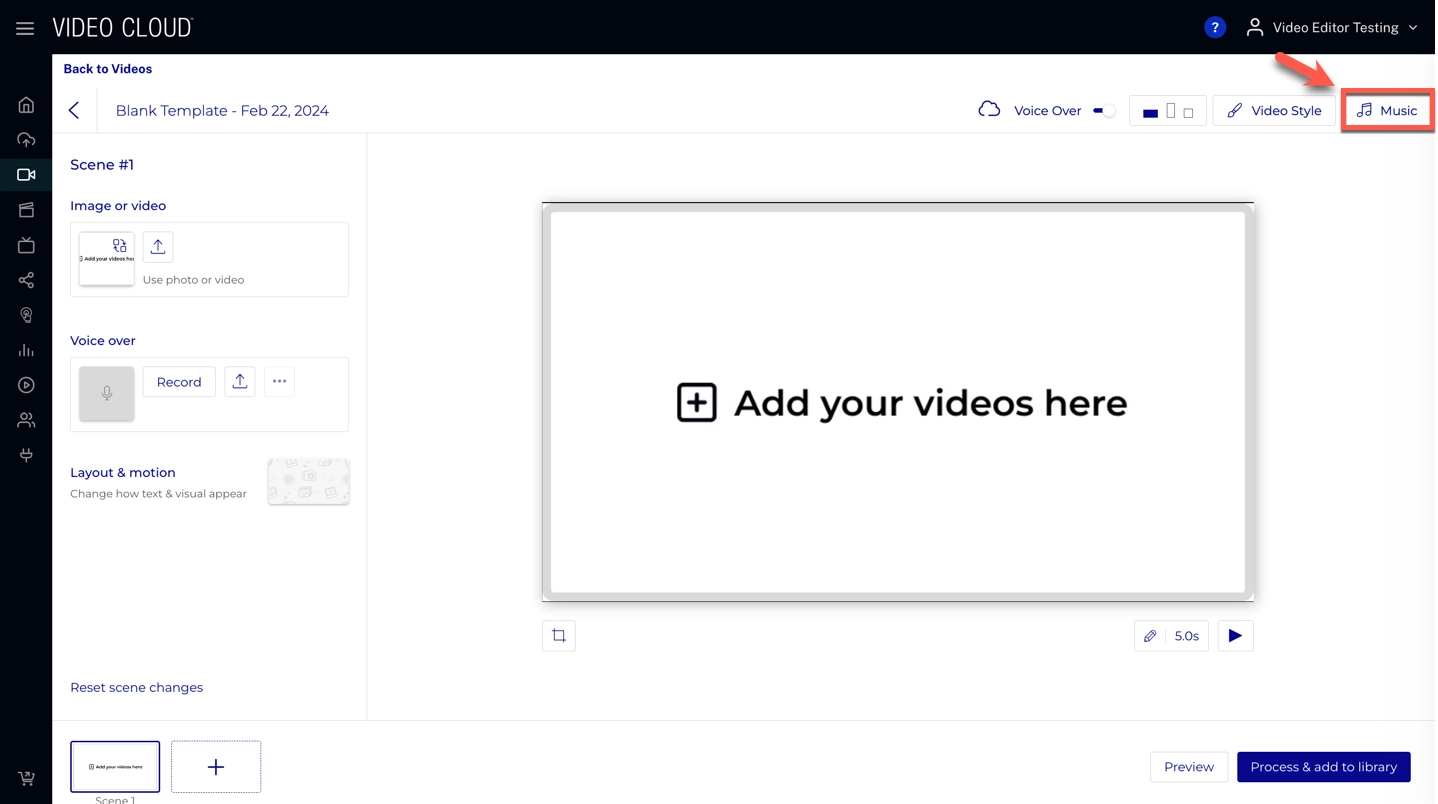
- Search for the music you would like to add and click Select
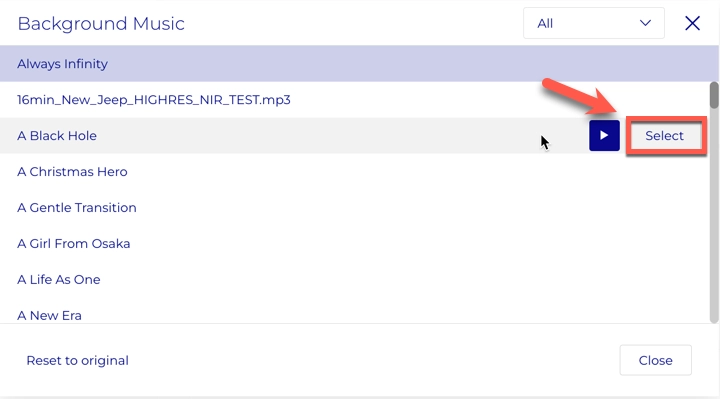
- Click Music
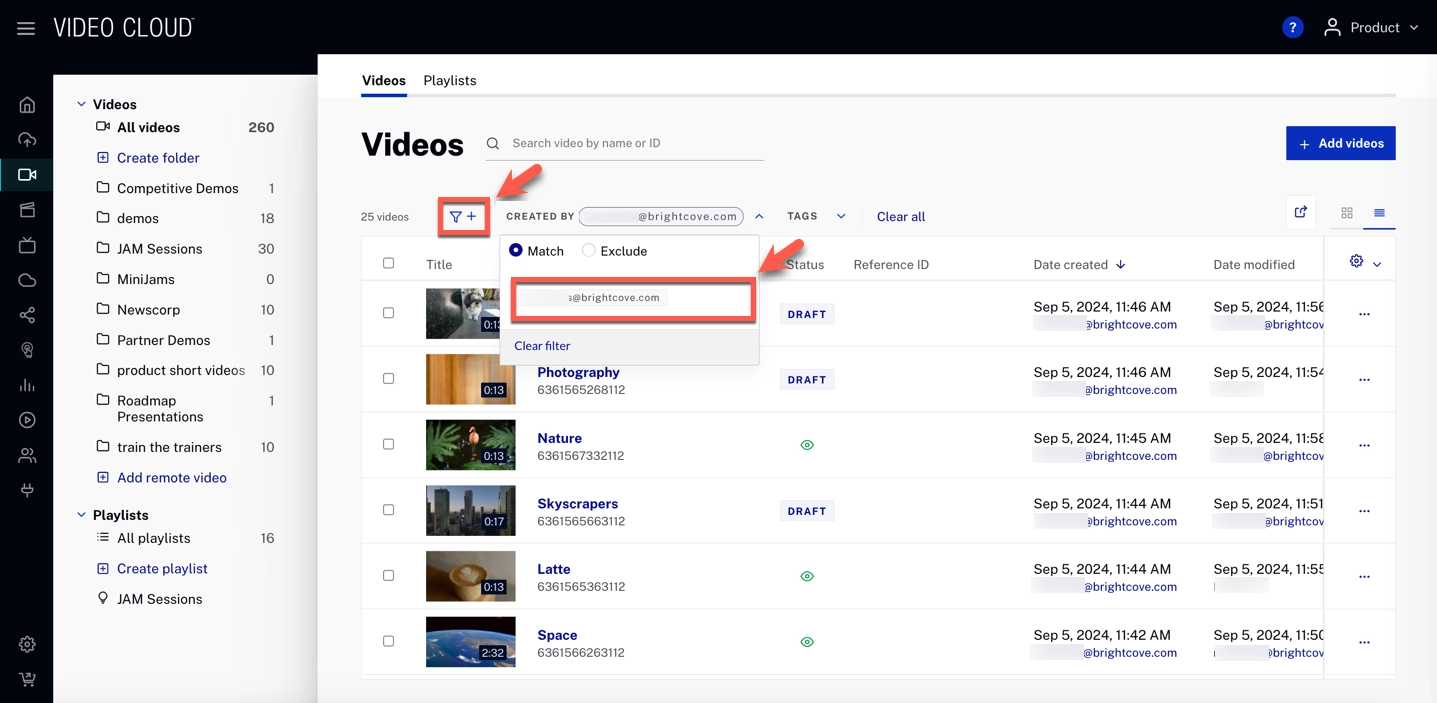
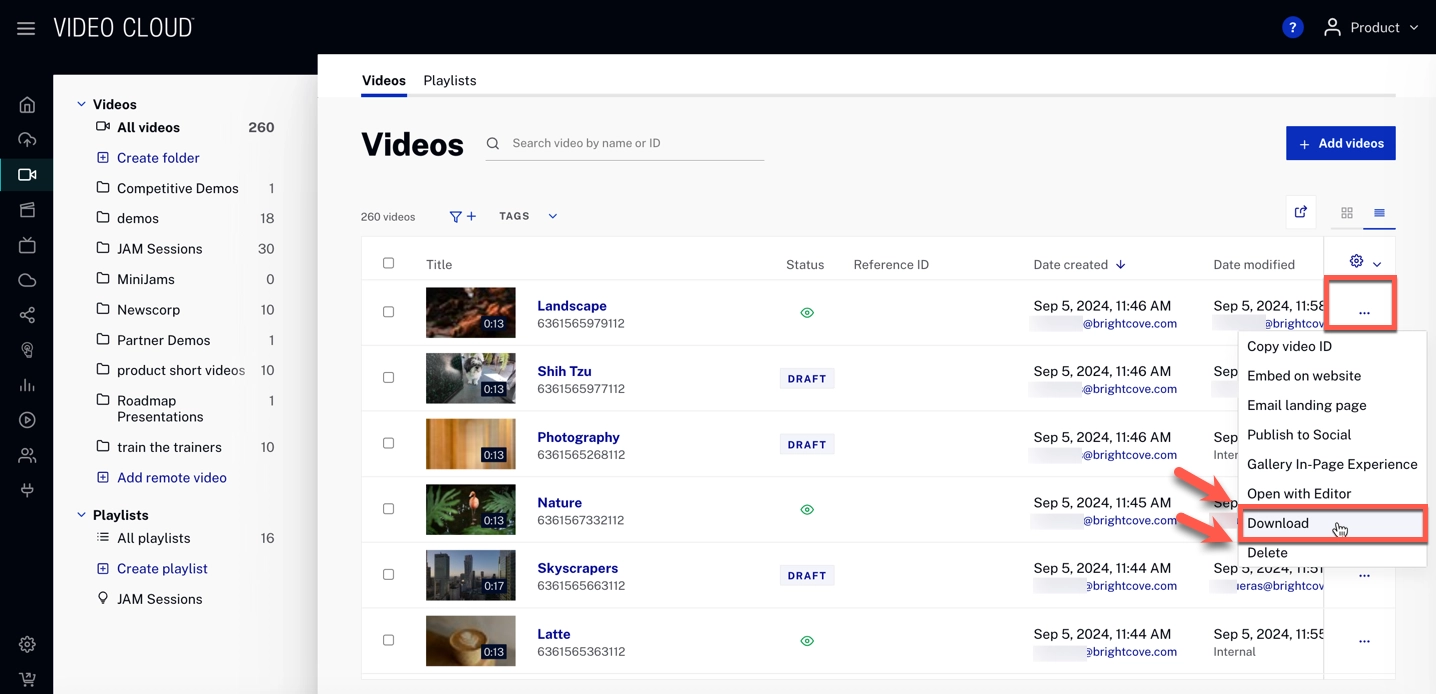
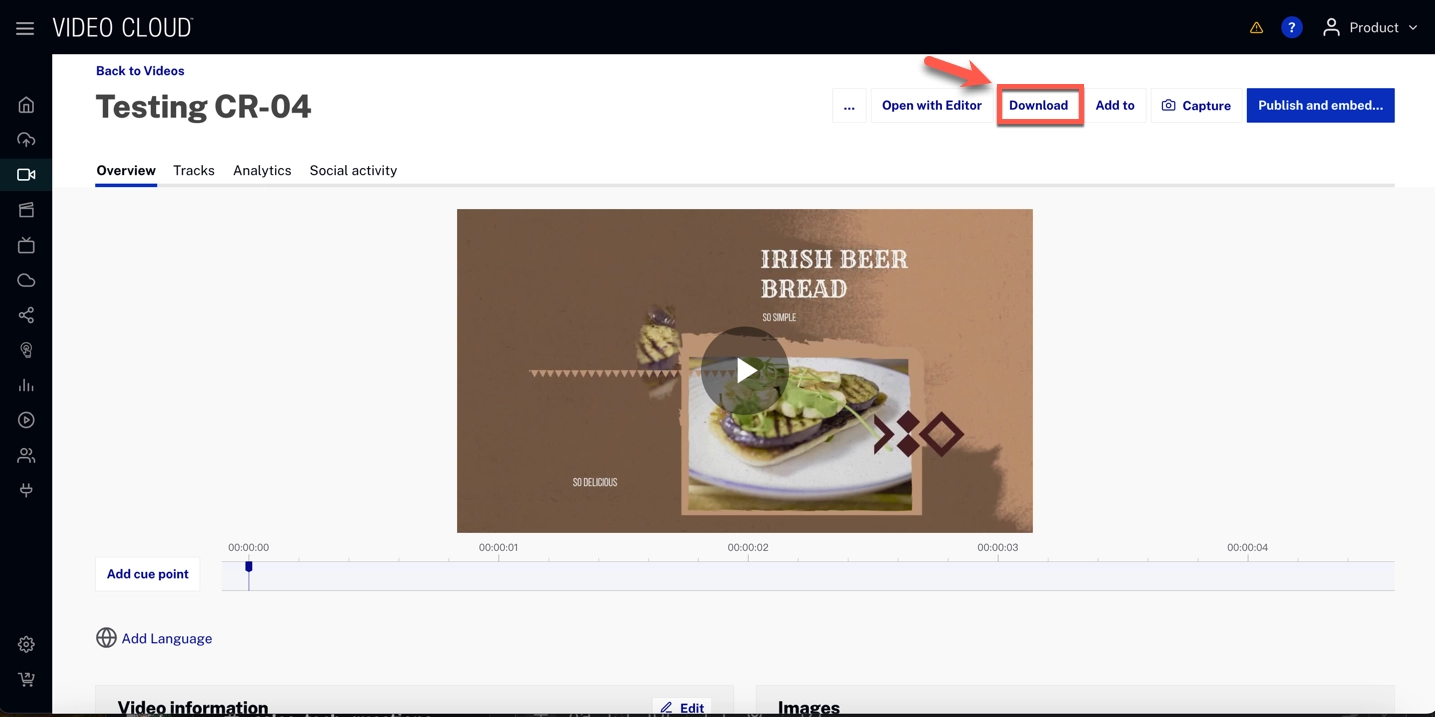
Downloading an MP4
You can download an MP4 of your edited video by following the next process:
- Navigate to your video library.
- Click on "..." of the video in question to show the dropdown menu.
- Select Download.
-
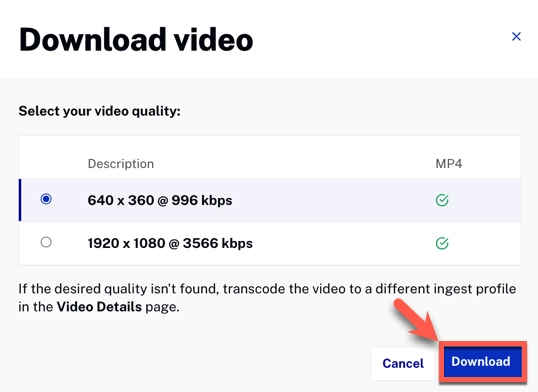
Select your desired rendition and click Download
Additional Notes
- When you leave an editing session, the system will save a draft for you, which you may recover from Video Cloud.
- If you were editing an existing video, you would see that asset in Draft status. When you publish it, a new asset will be created, and the original will remain the same.
- If you were editing from a template, your draft will lack complete Video Cloud functionality until the final video is published.
- A first user must publish or discard a draft before a second user can edit that same asset.