Introduction
The Schedule Channel is a calendar based visual tool that helps you plan, organize, and schedule your media content in advance. Here, you can see how to manage the calendar and add and re-order content items.
Schedule Content
To start scheduling content, follow these steps:
-
After you create your channel, click .
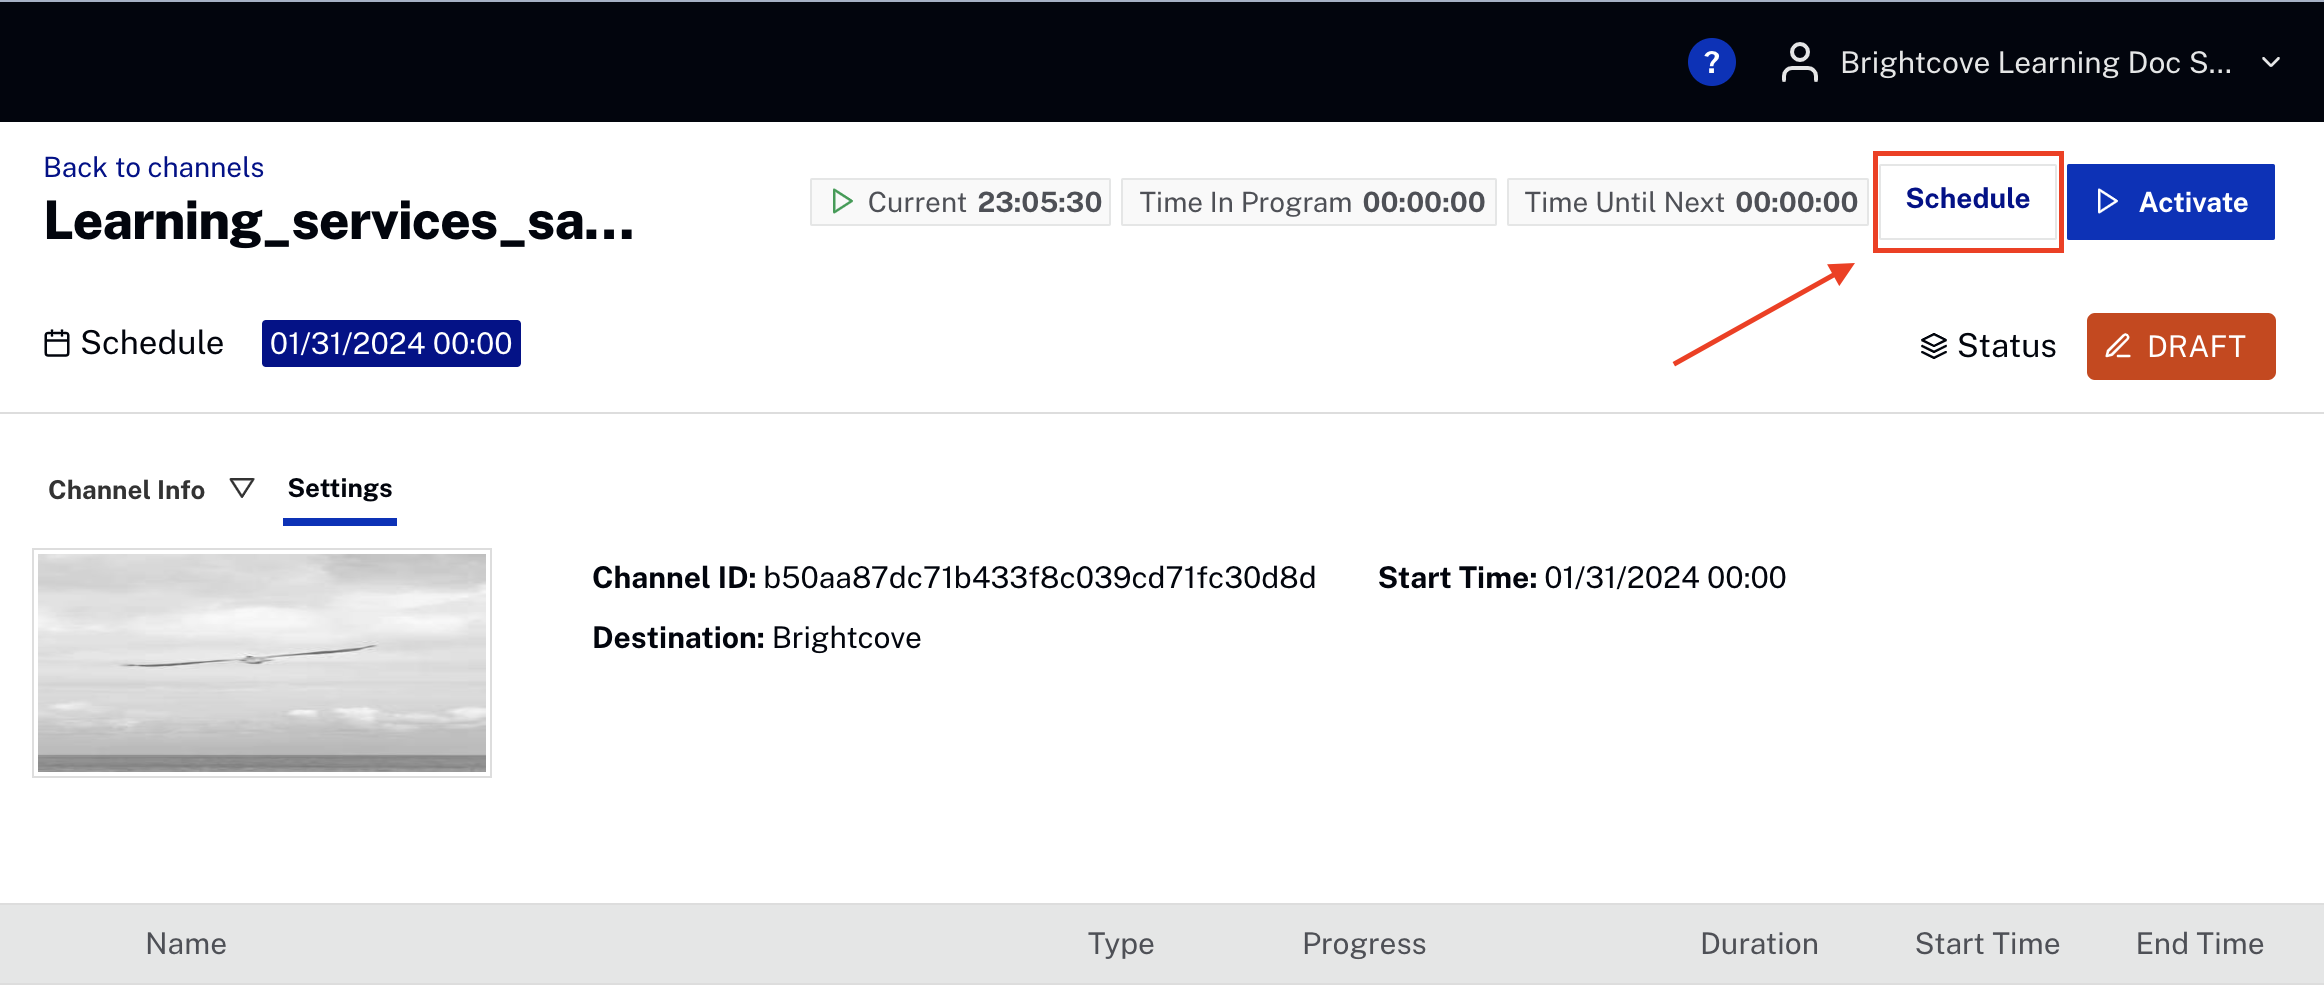
Scheduled channel menu. -
Notice how the main pointers help you locate where and when to add your content in the calendar section.
- The green division reflects the current time on the calendar timeline. This division can't be moved or selected.
- The yellow division reflects the selected time on the calendar timeline. This division helps you select the time when you want to add content. You can move this division as long as it is greater than the current time.
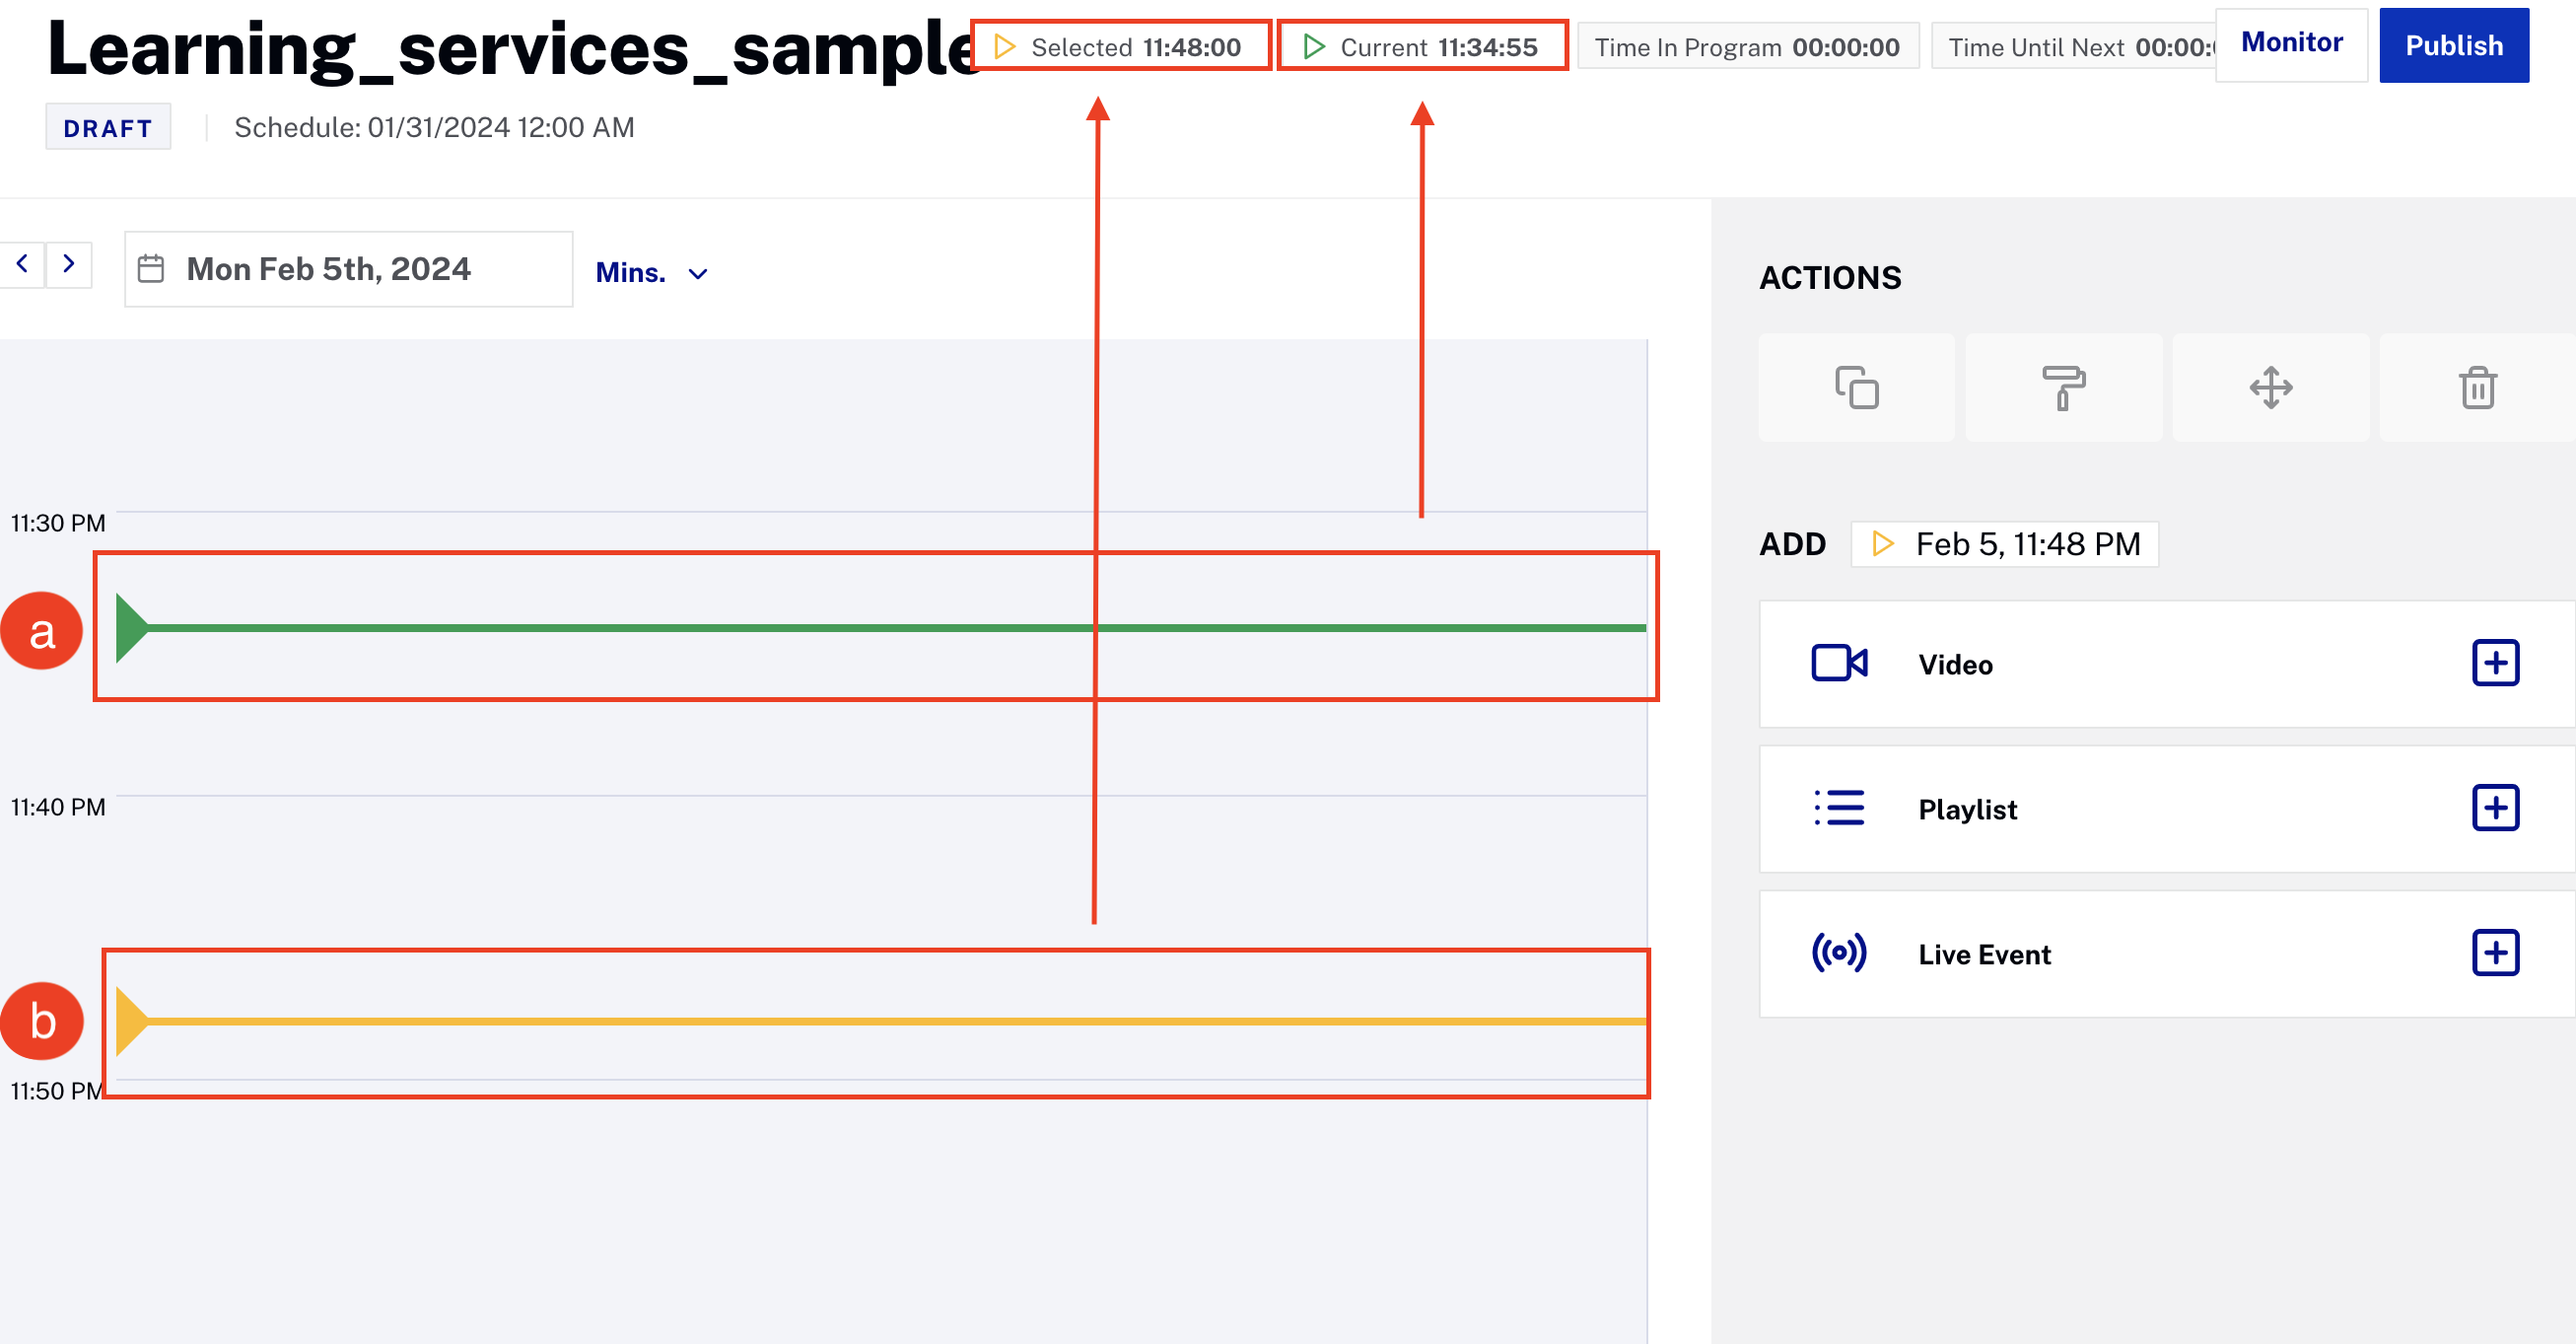
Schedule Calendar pointers example. -
The calendar view allows you to change the time displayed between hours and minutes.

Schedule view. -
On the right side you can add videos, playlists, or live events. Once content is added and selected, the action options above are enabled to copy, paste, move, or delete an asset.
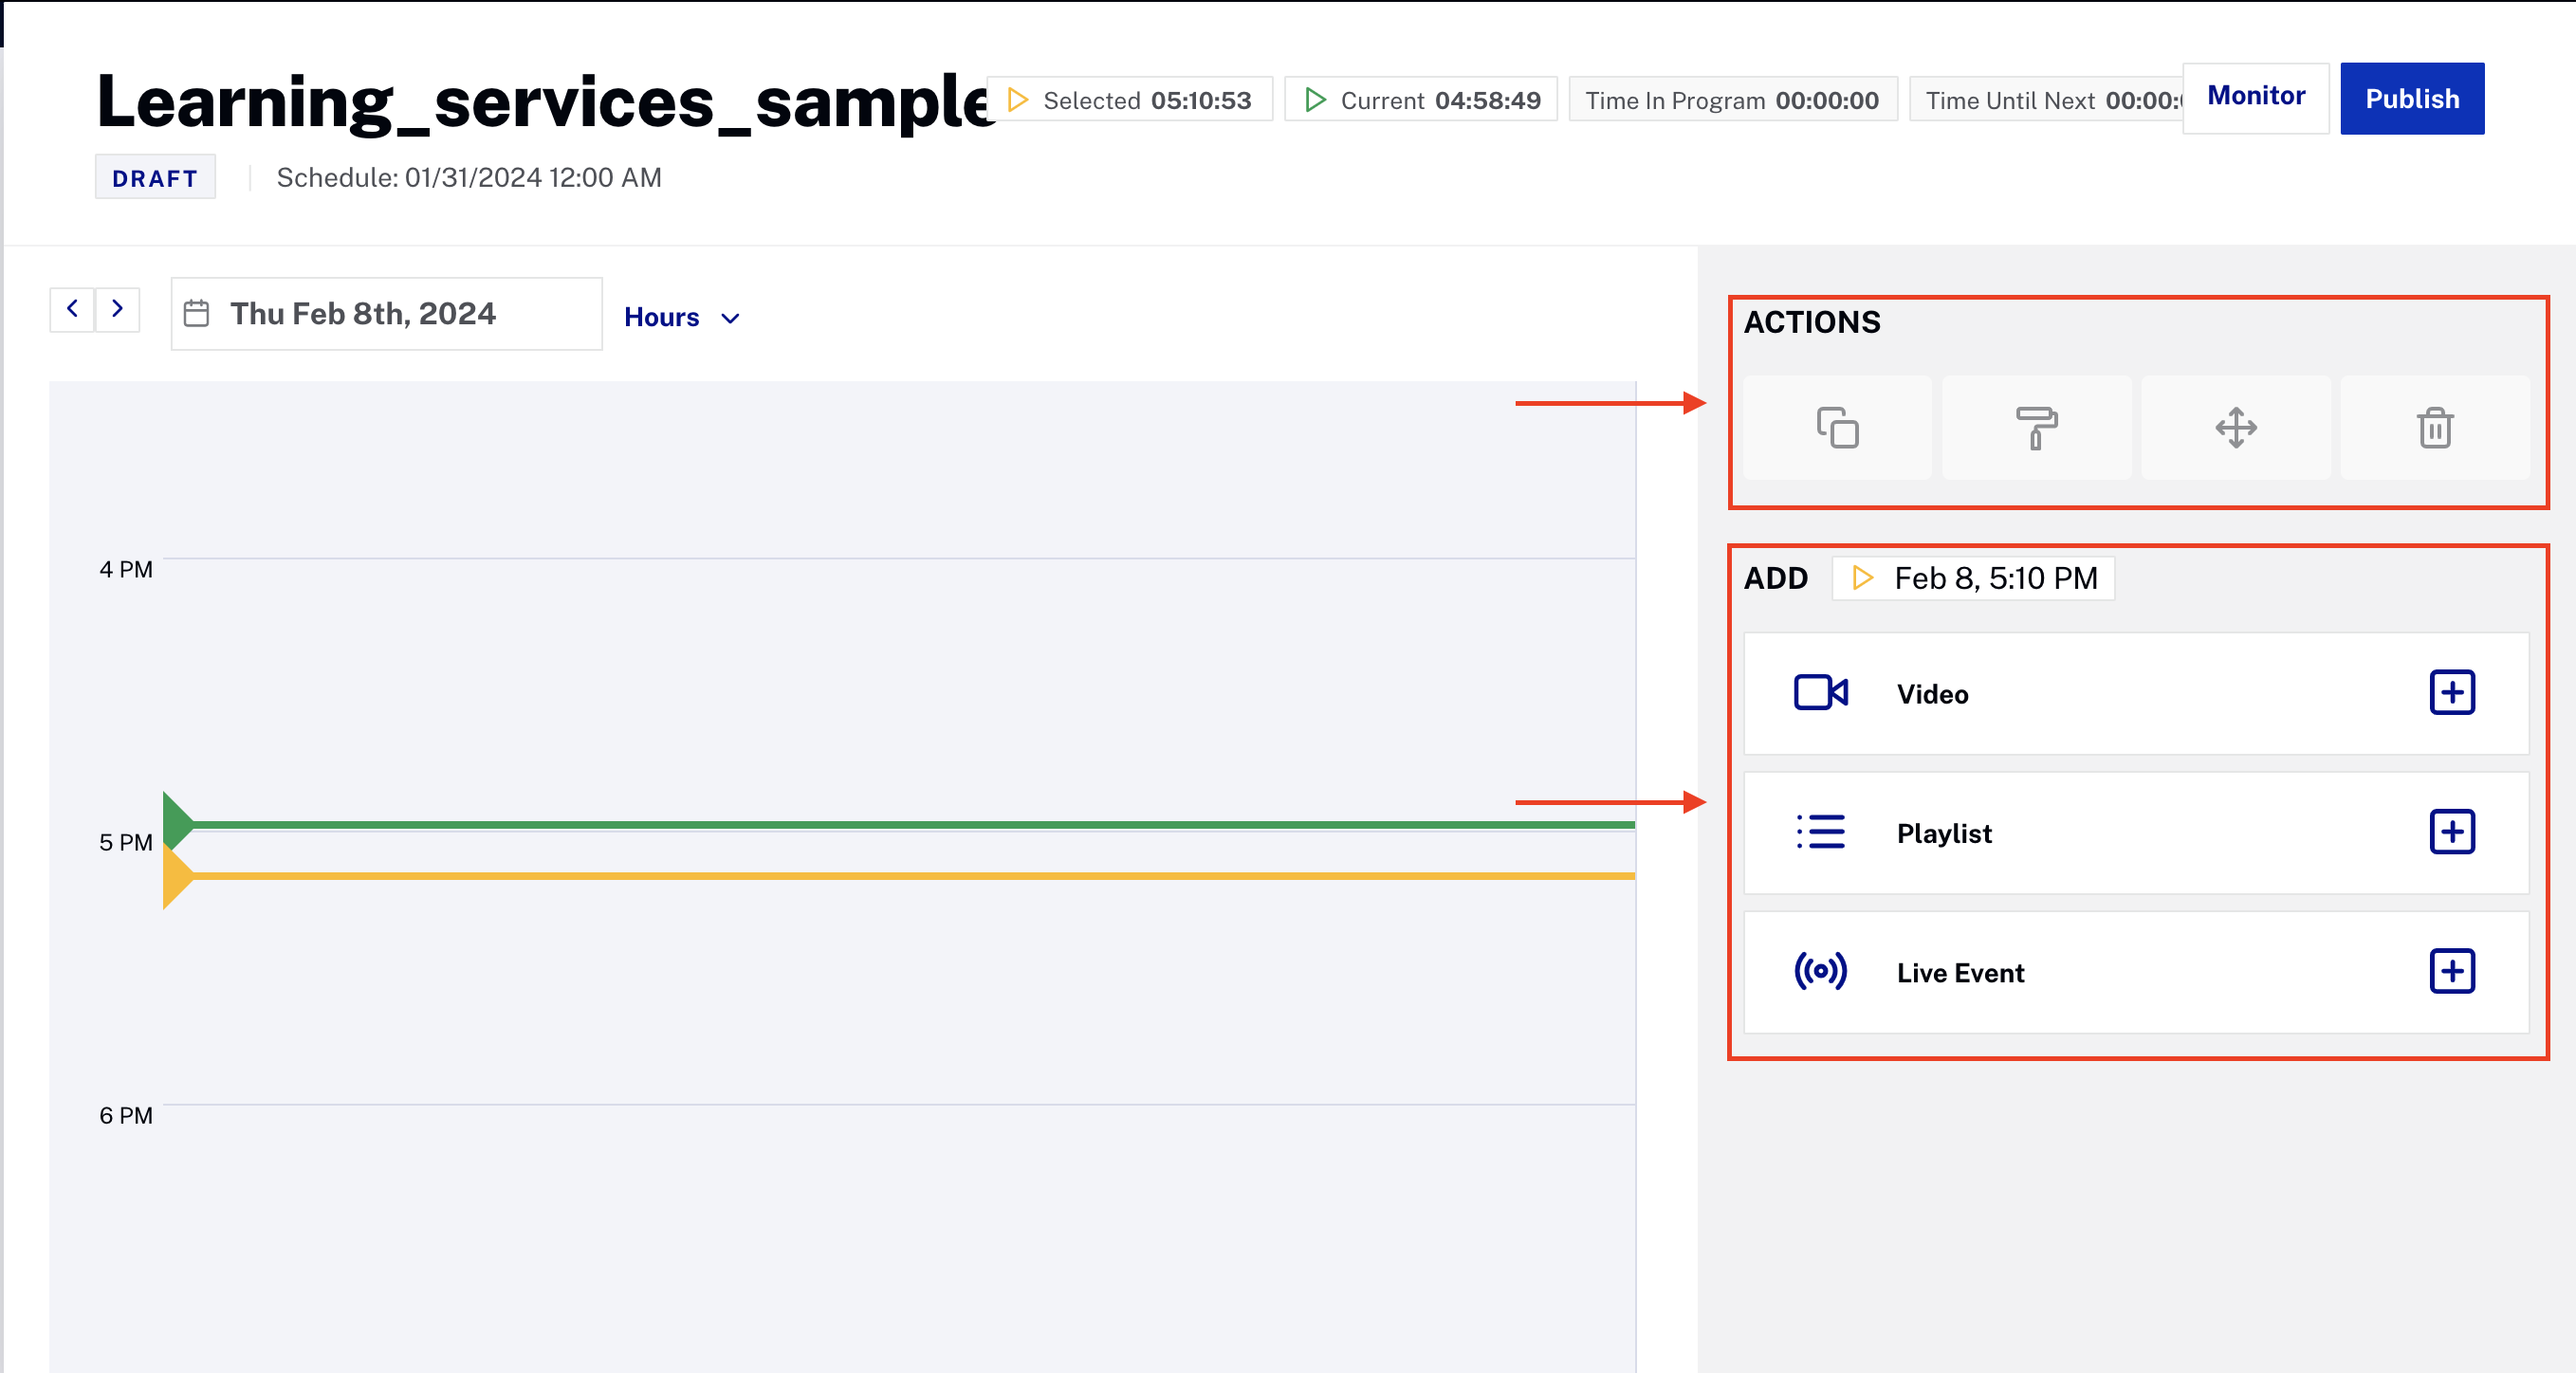
Actions & Add sections.
Adding content
Videos and playlists (manual or smart) can be added to the schedule. In addition, you can add live events. The following sections provide steps for adding each kind of content.
Adding Videos (VOD)
To learn how to add Videos, follow these steps:
- Click the video option on the right side to select a video.
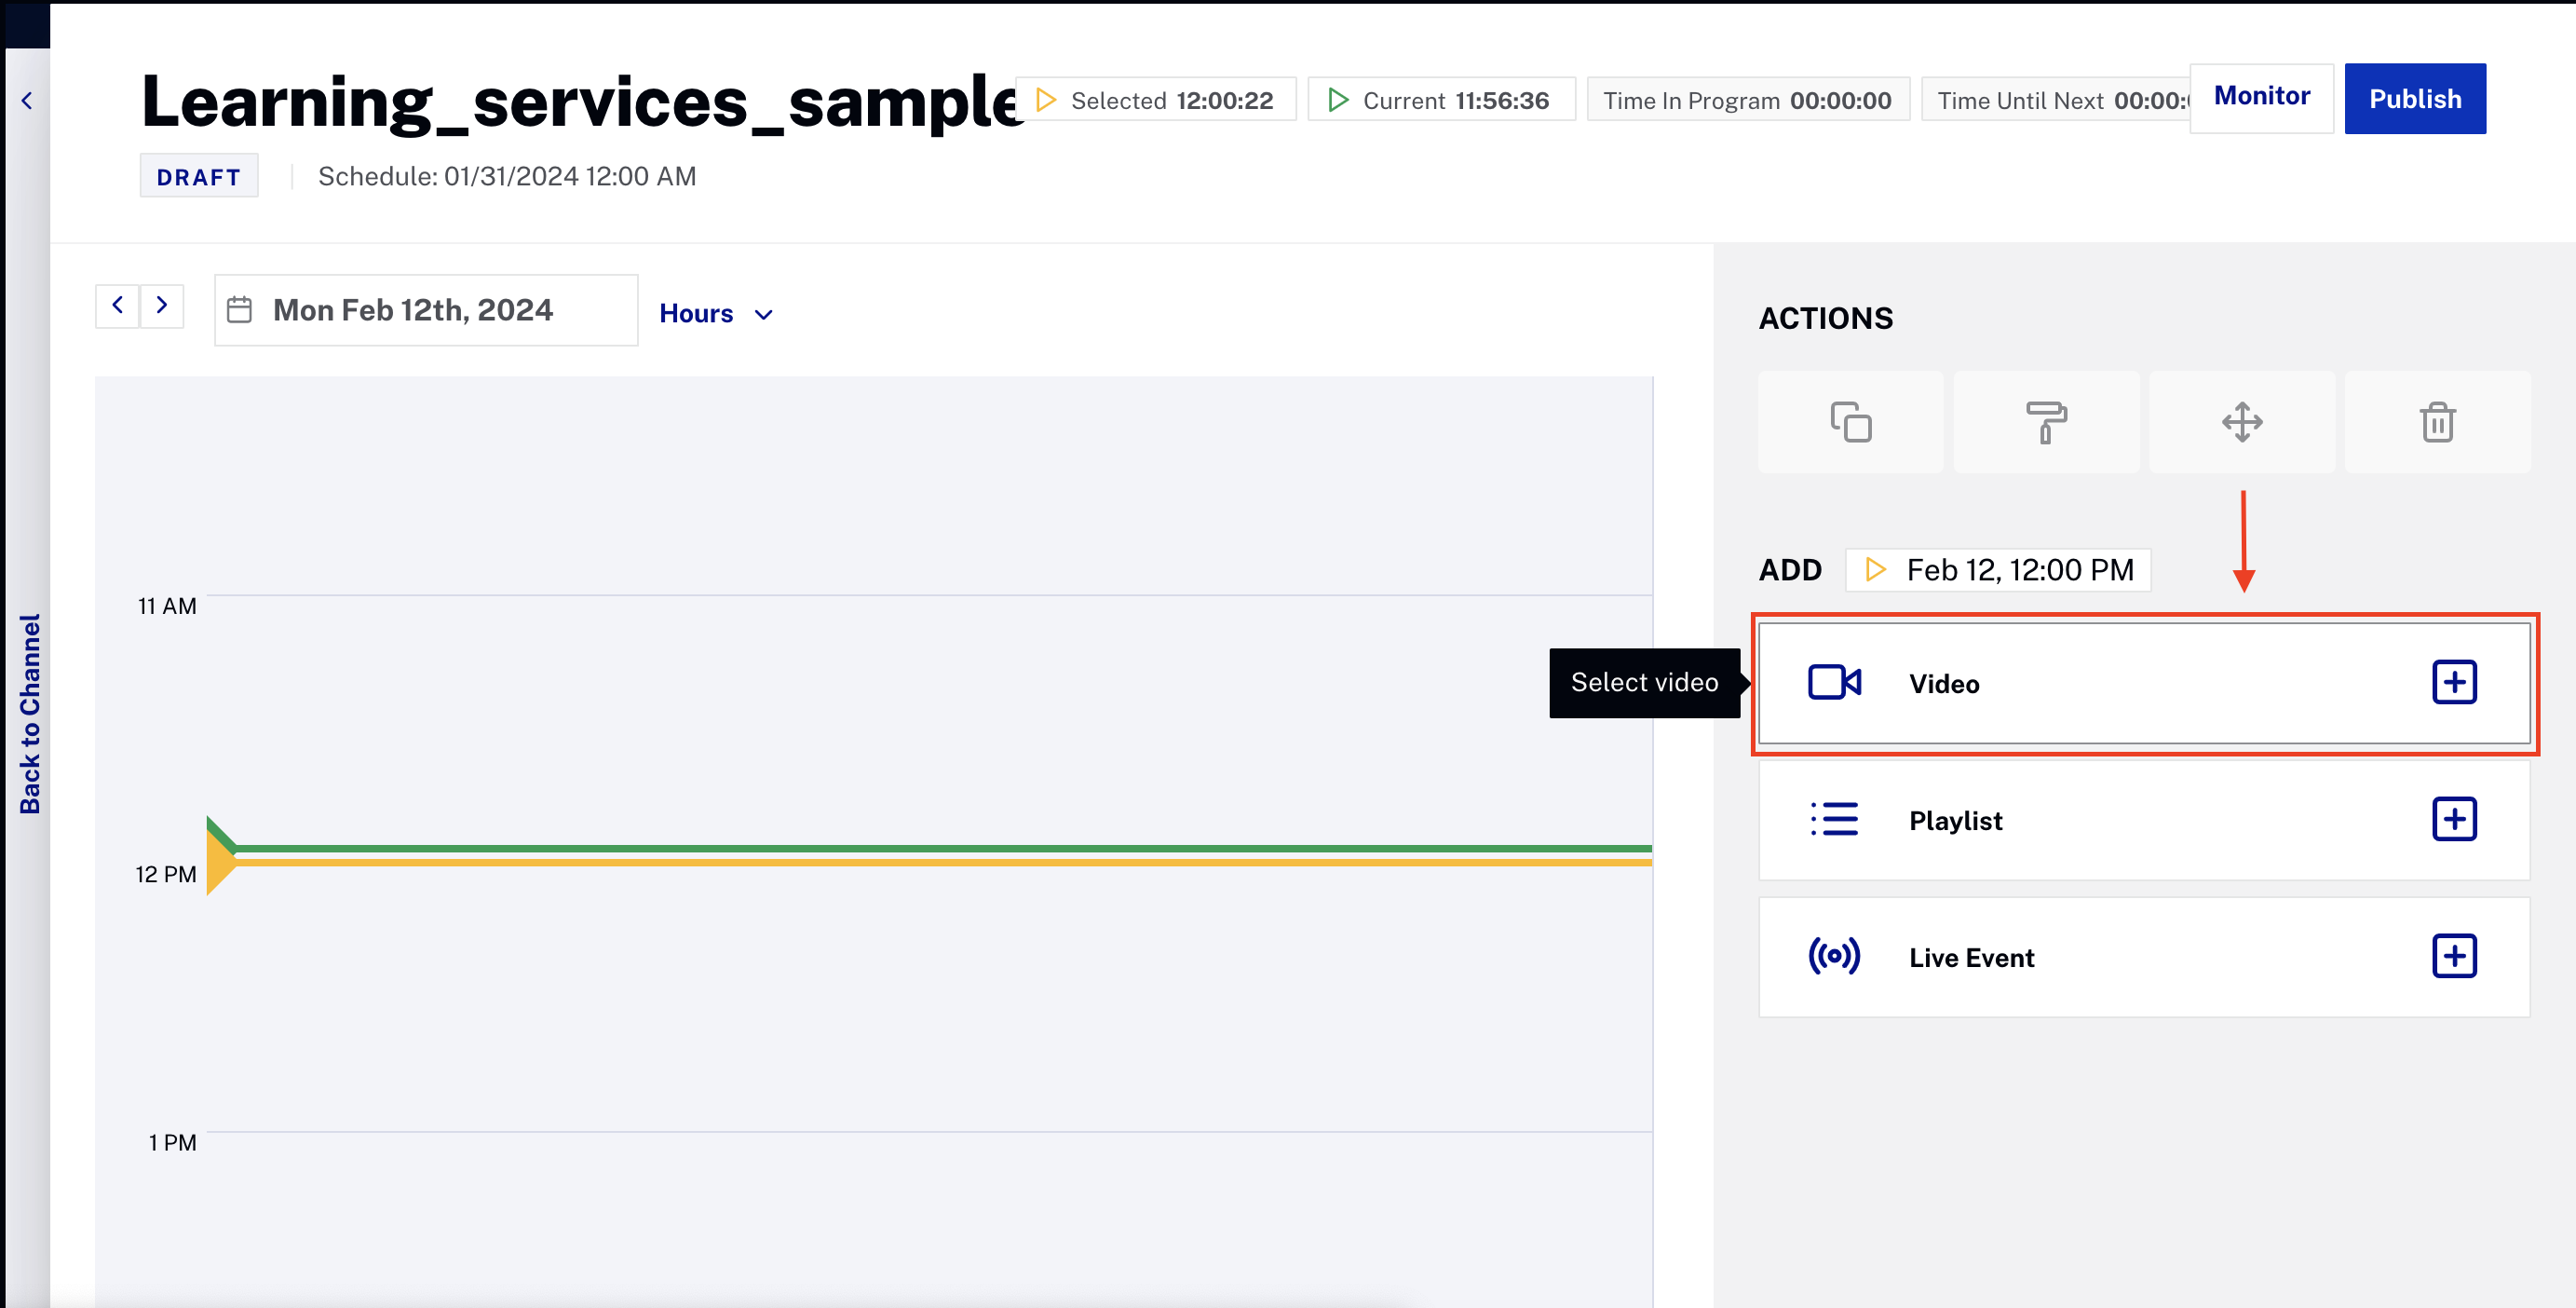
Select video option -
Use the Search tab to find the videos you want. In addition to searching on general terms, you can filter by Tags or Dates.
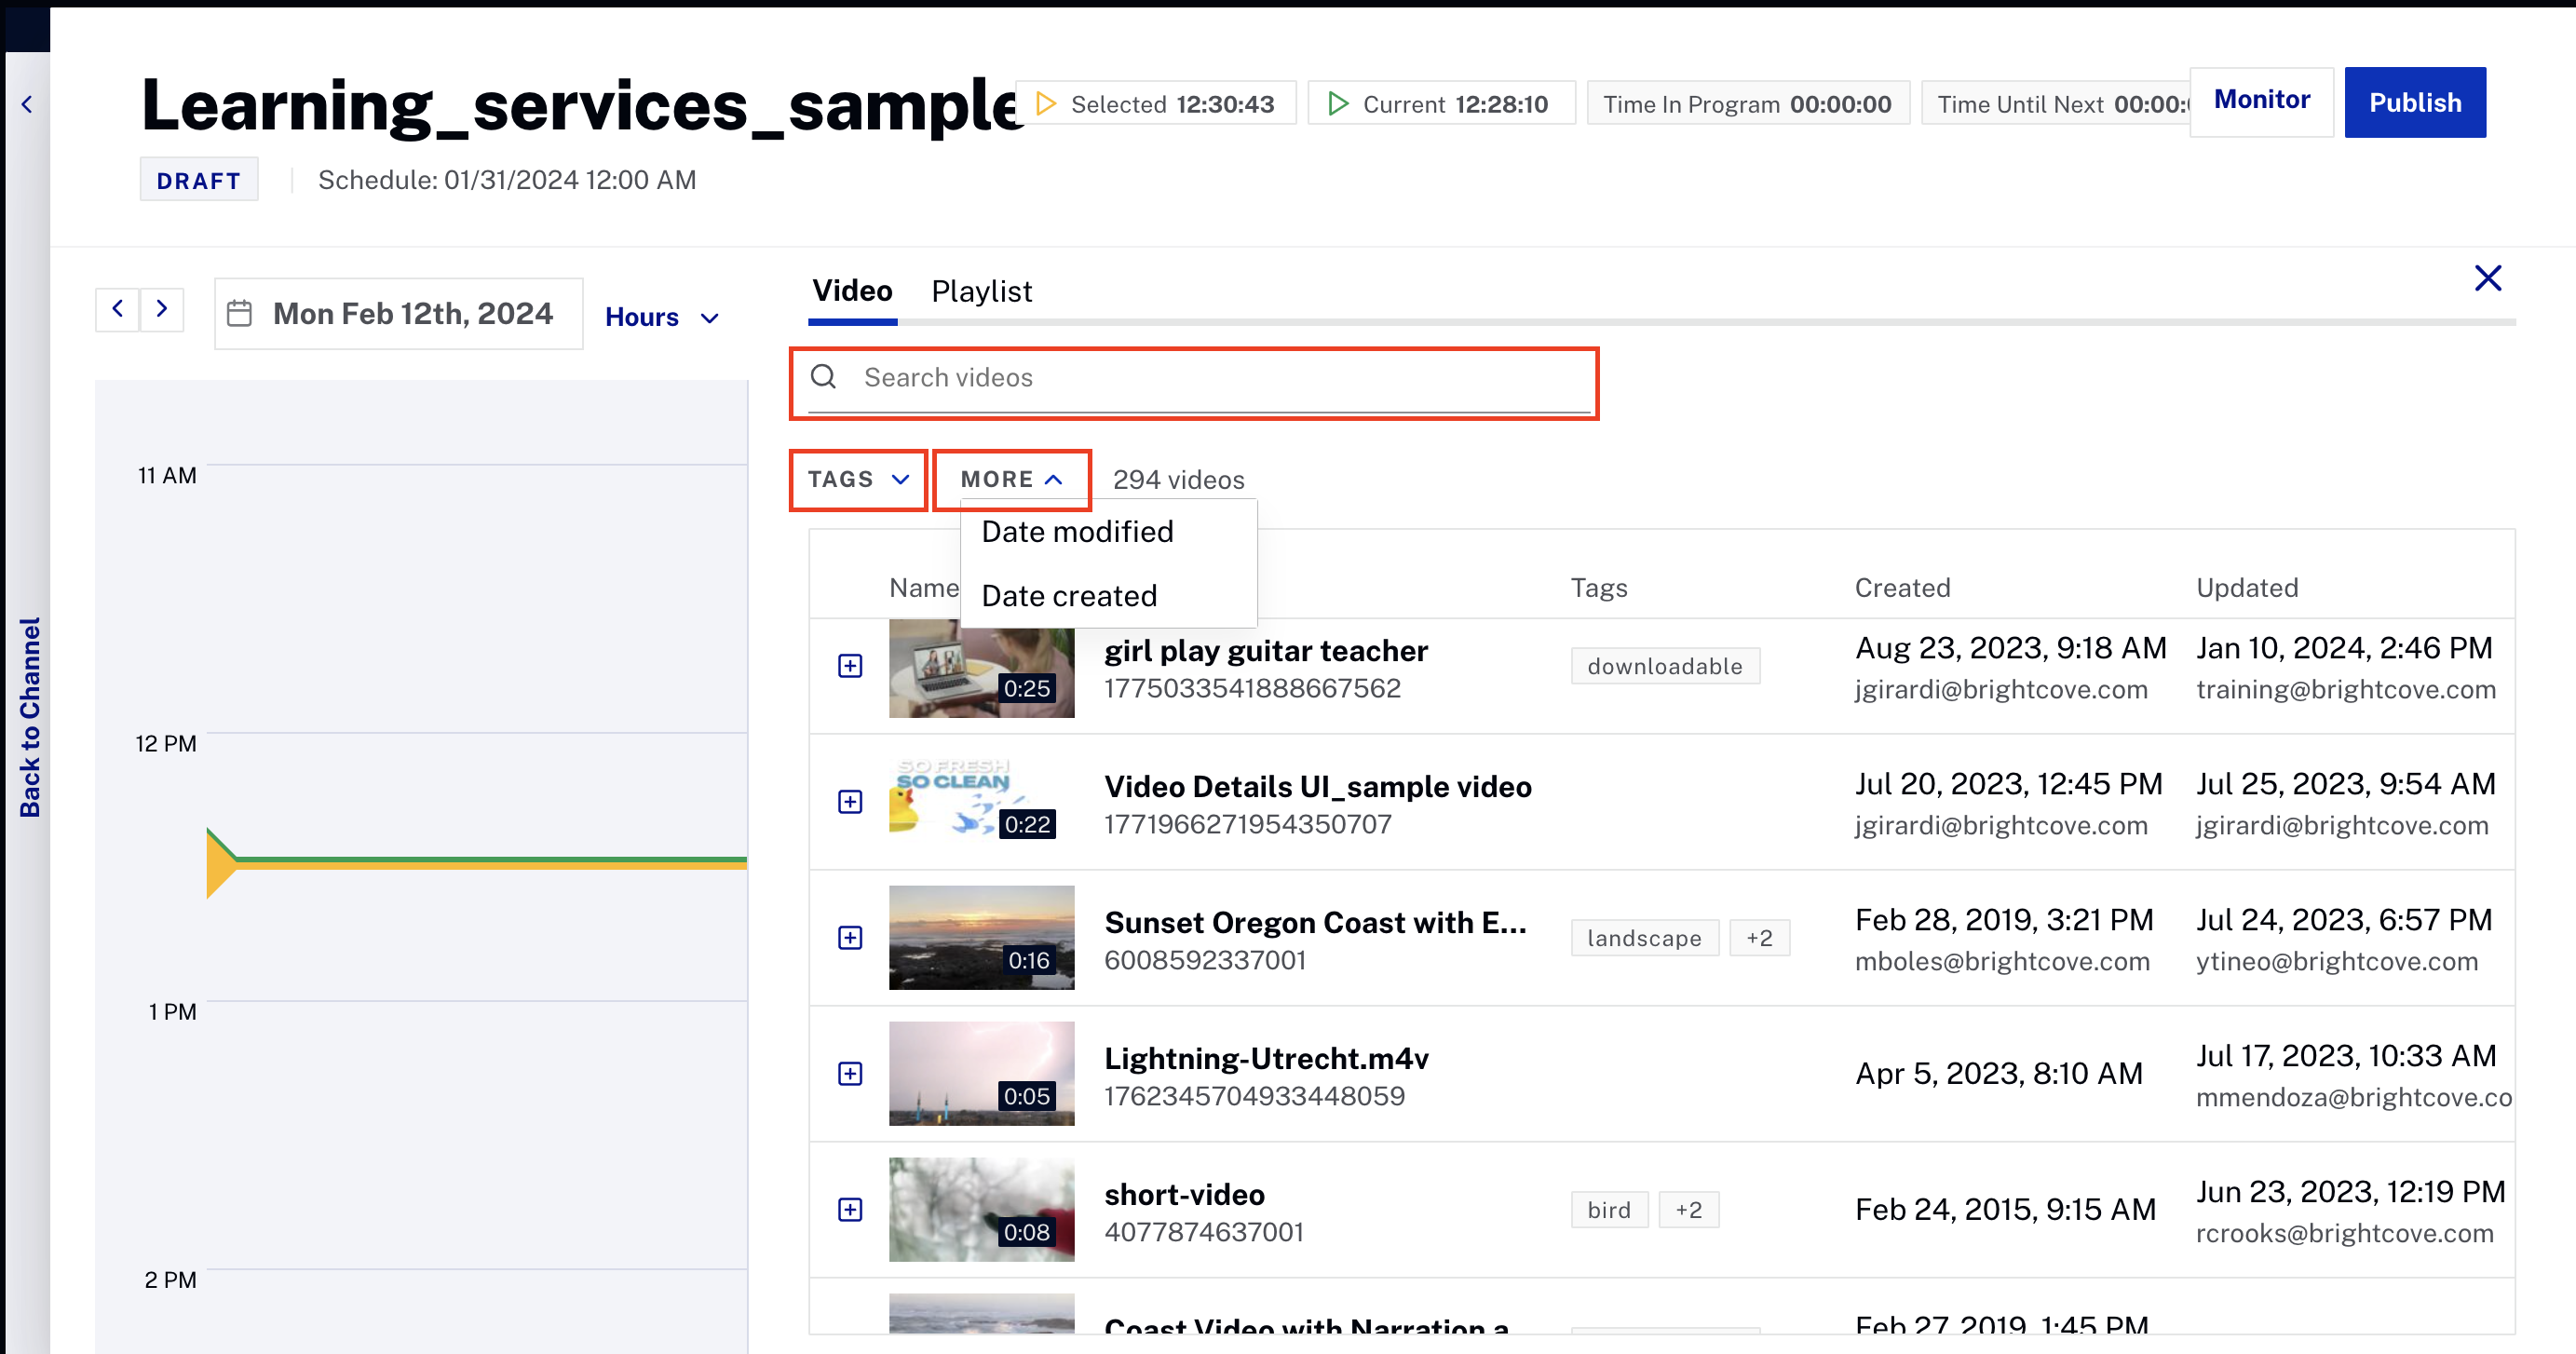
Search options -
Add your selected video to the schedule by clicking on the plus icon.
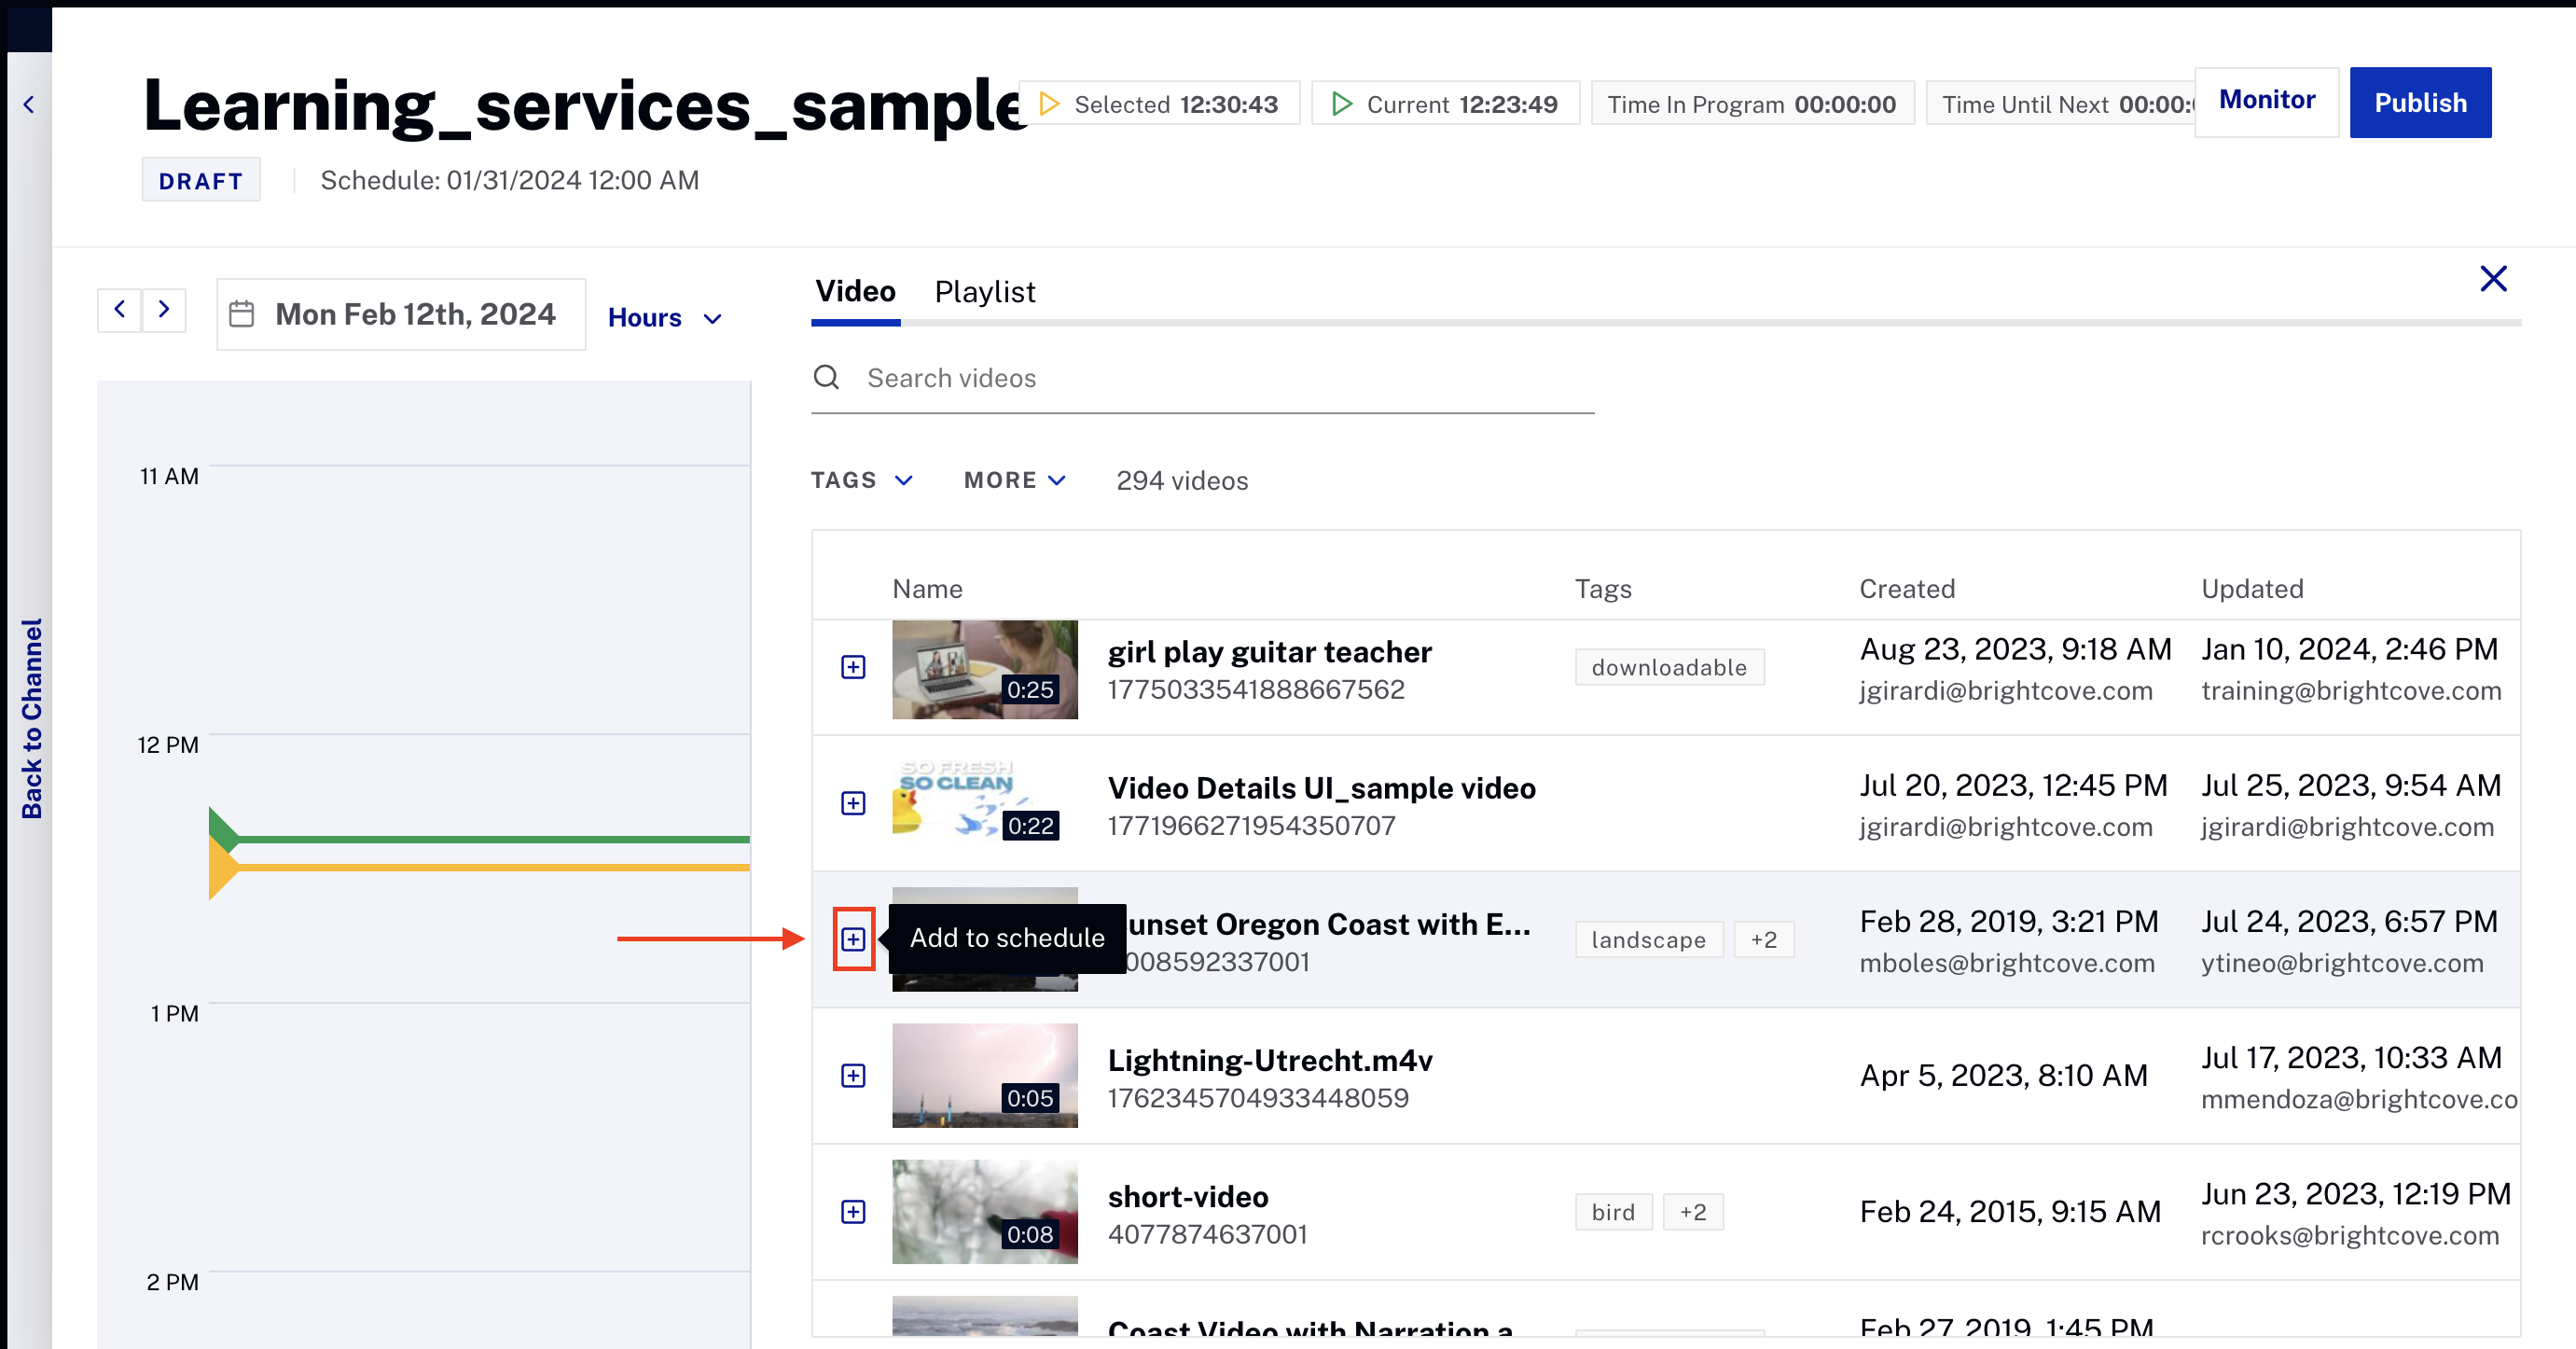
Adding a video -
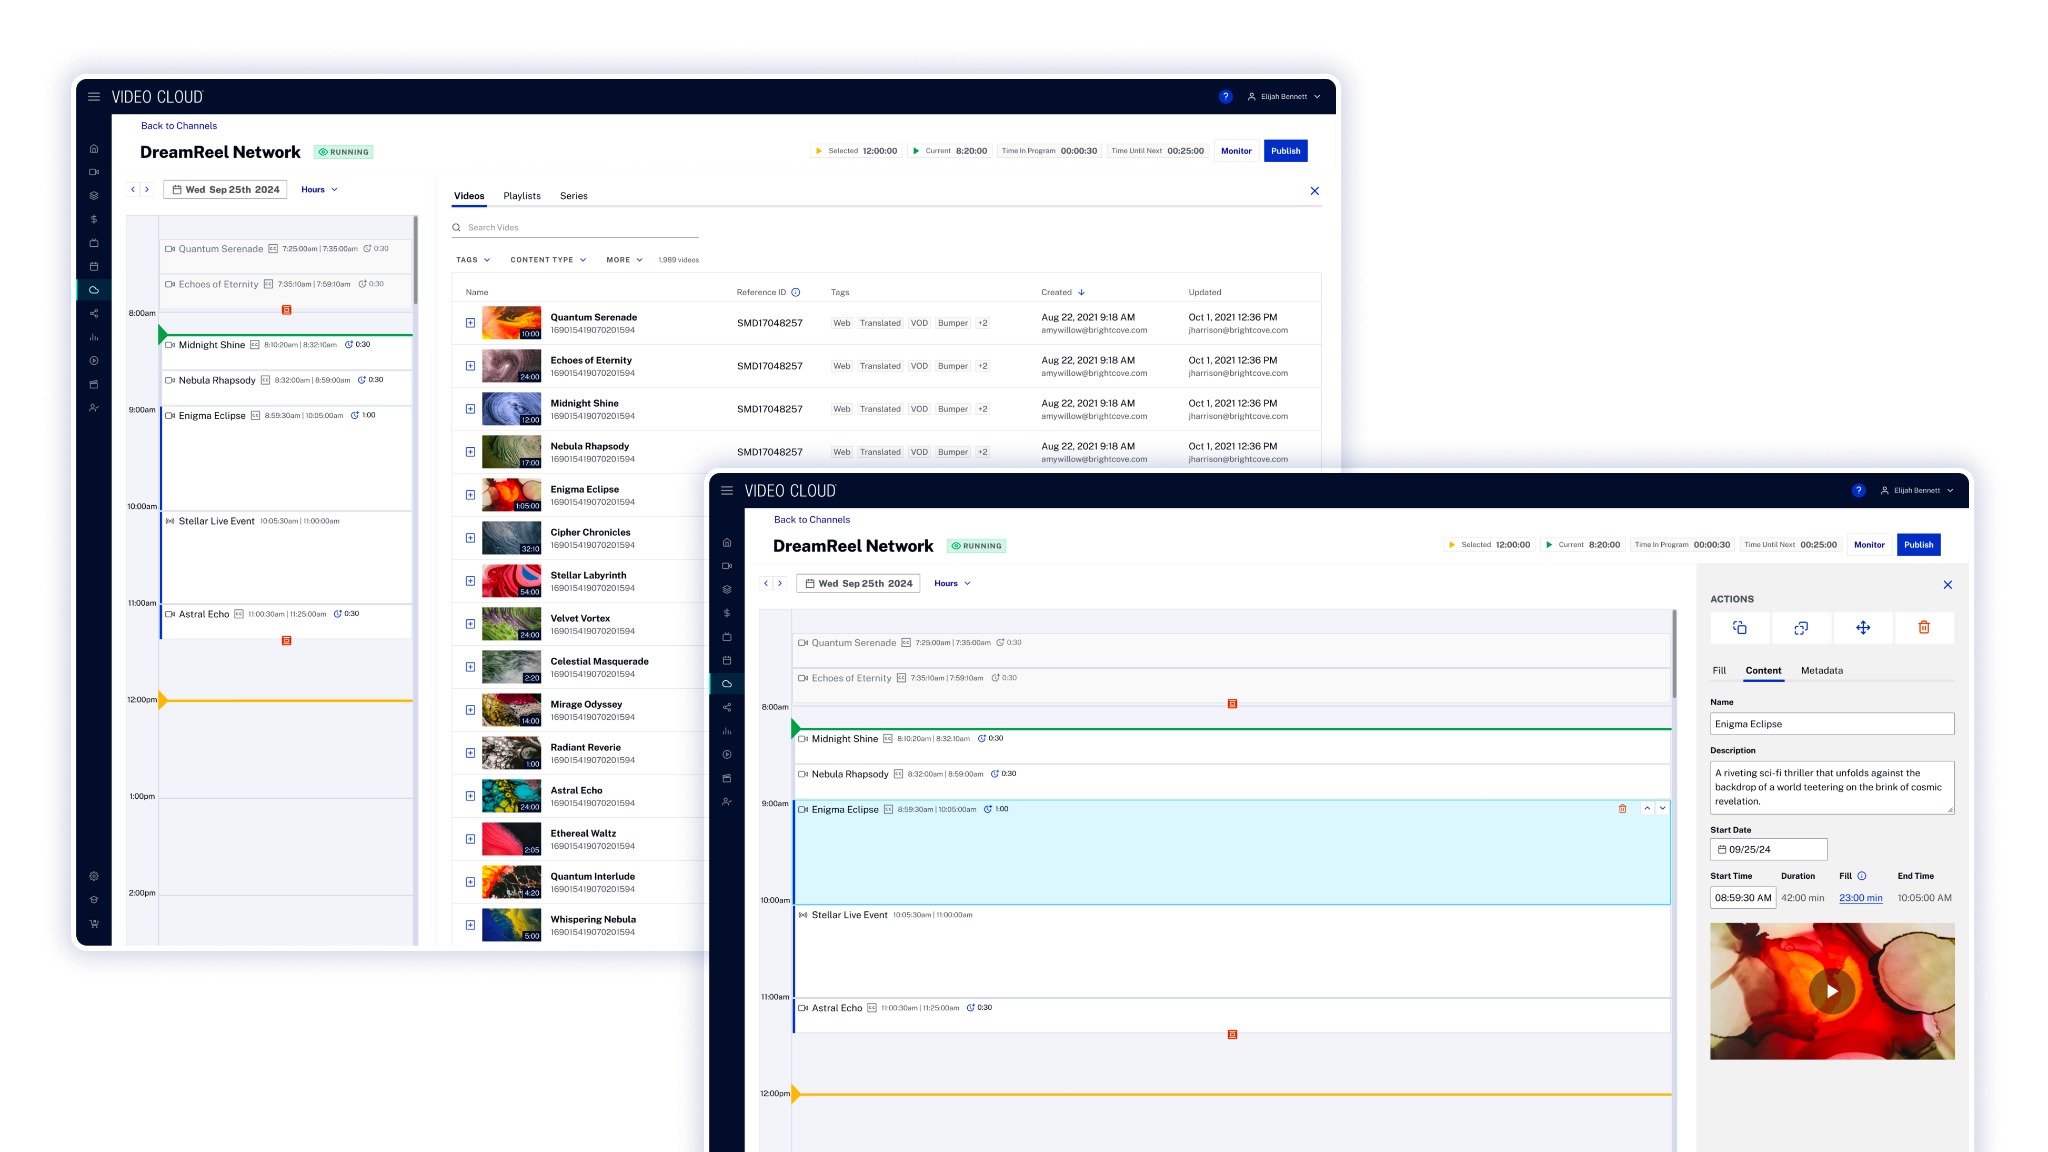
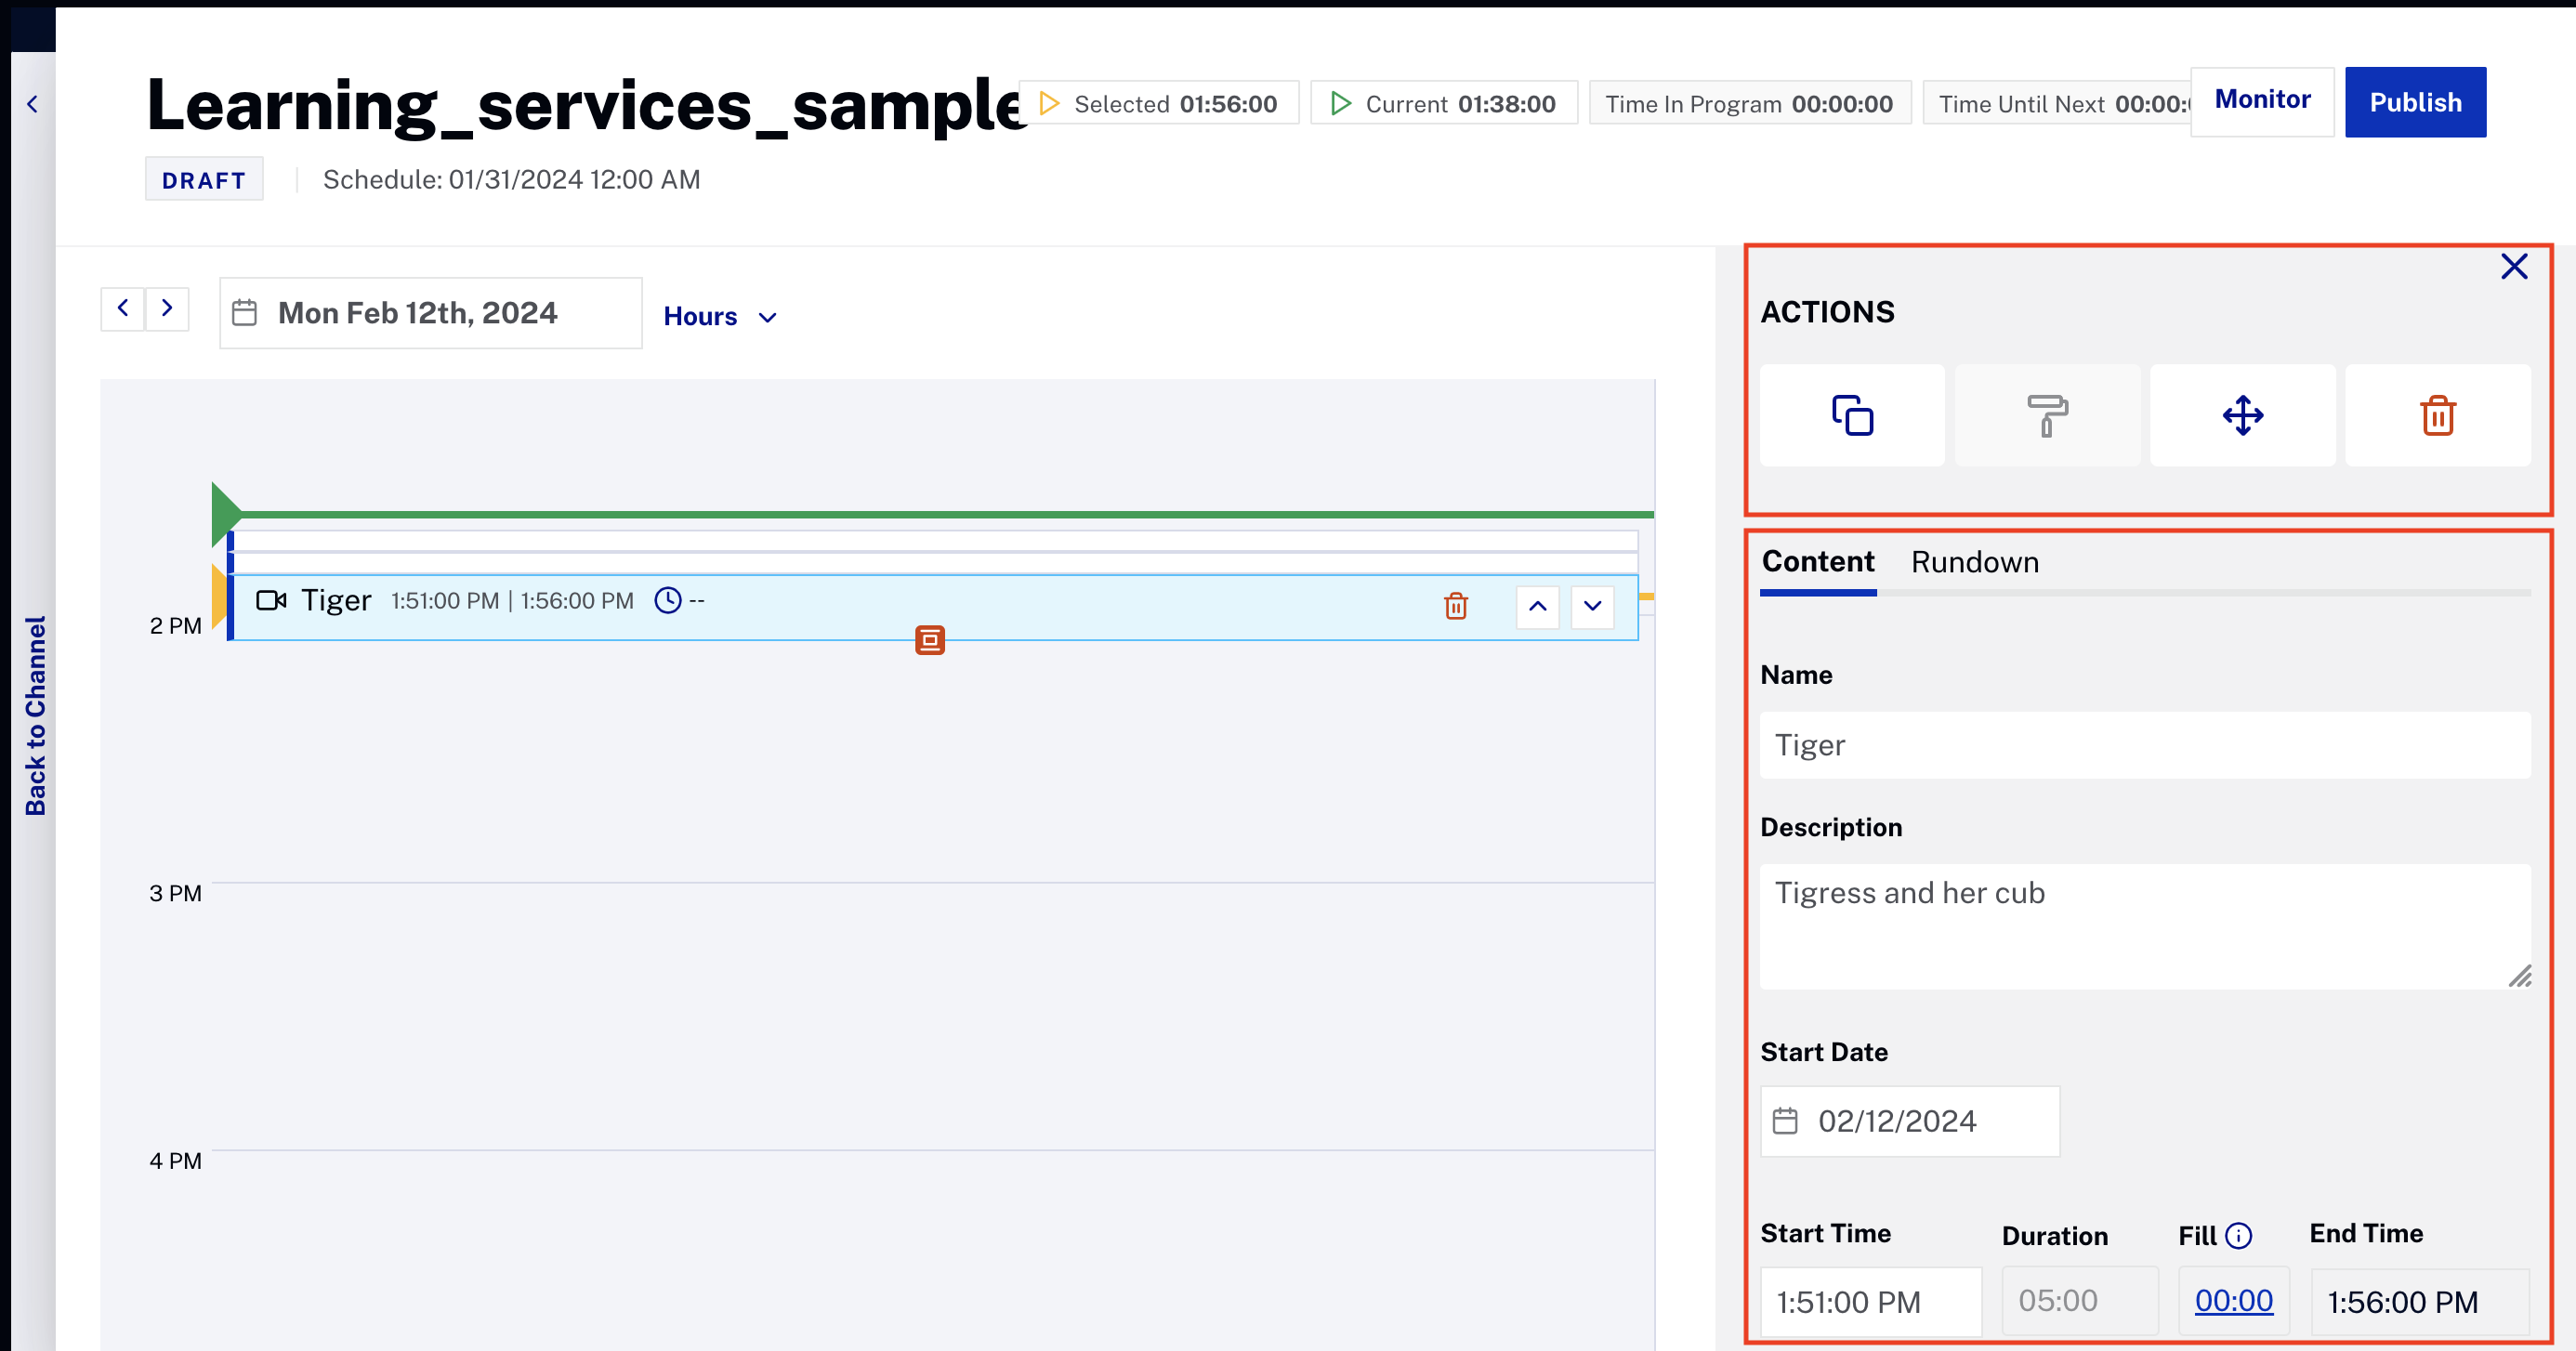
Once the video is added, it appears in the calendar at the specified time. If you click on the video slot, you can perform several actions such as copy, paste, move, or delete on the top right side. Below the content tab is the video information, such as name, description, start date, and start time.
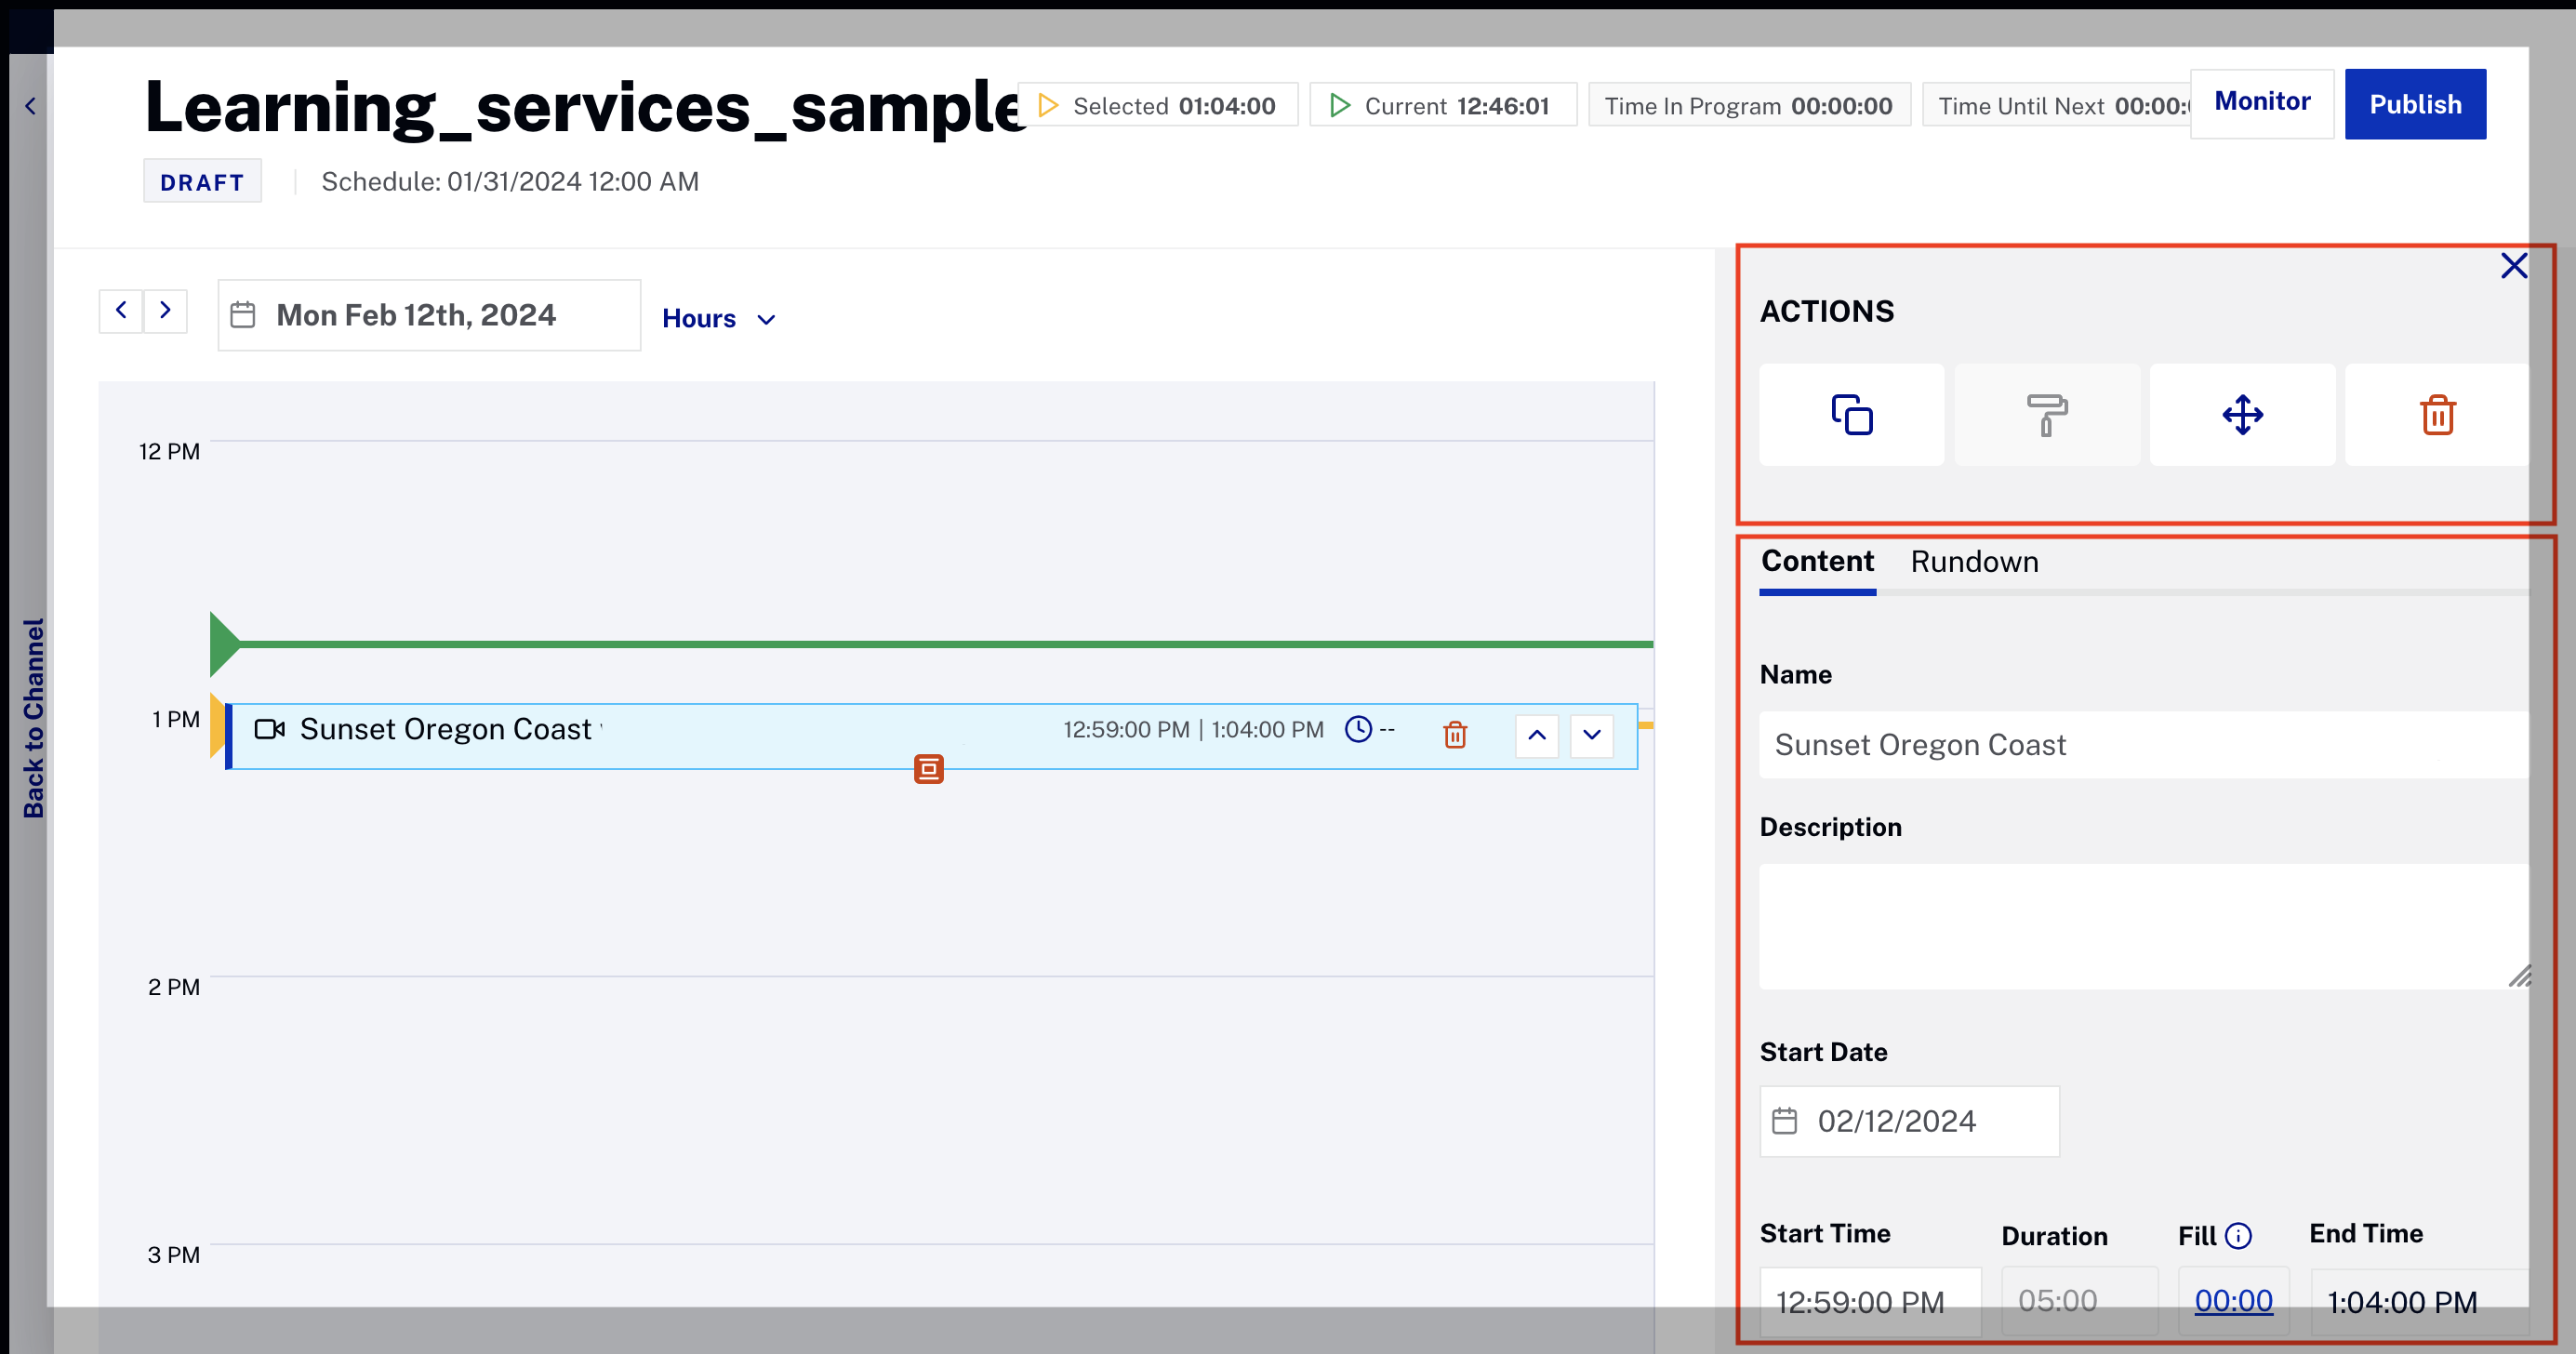
Video info and options -
If you want to add ad pods or pre/post bumpers go to the Rundown tab.
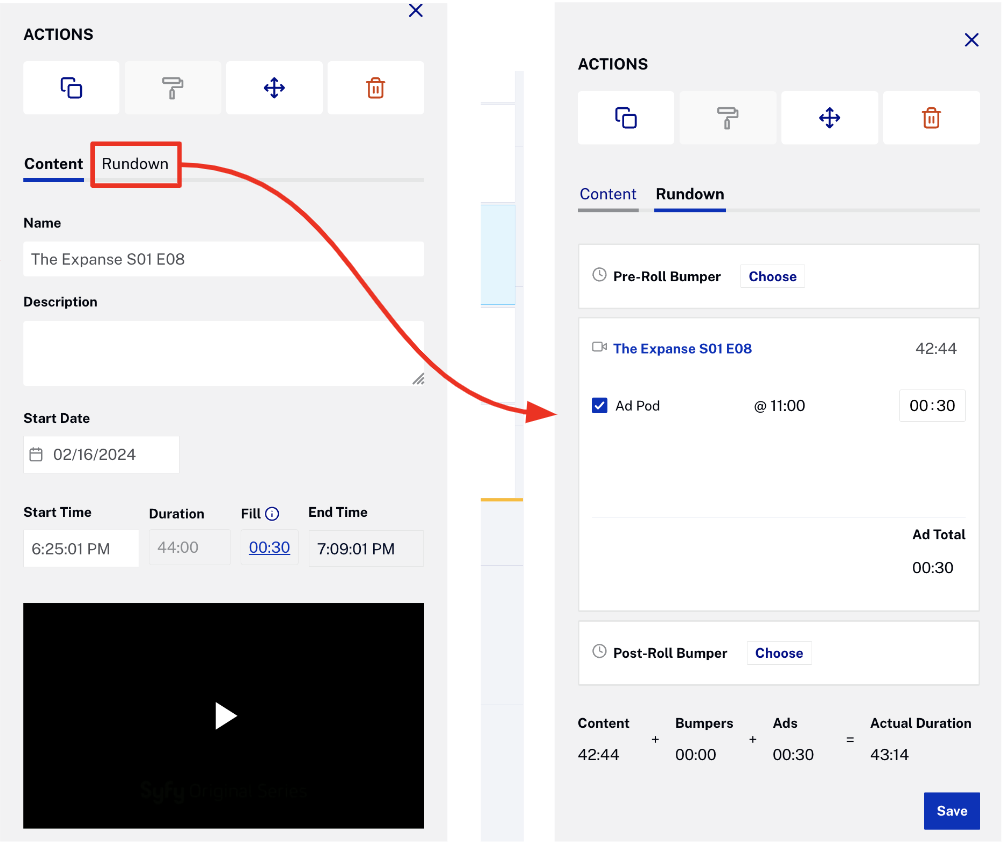
Rundown view example -
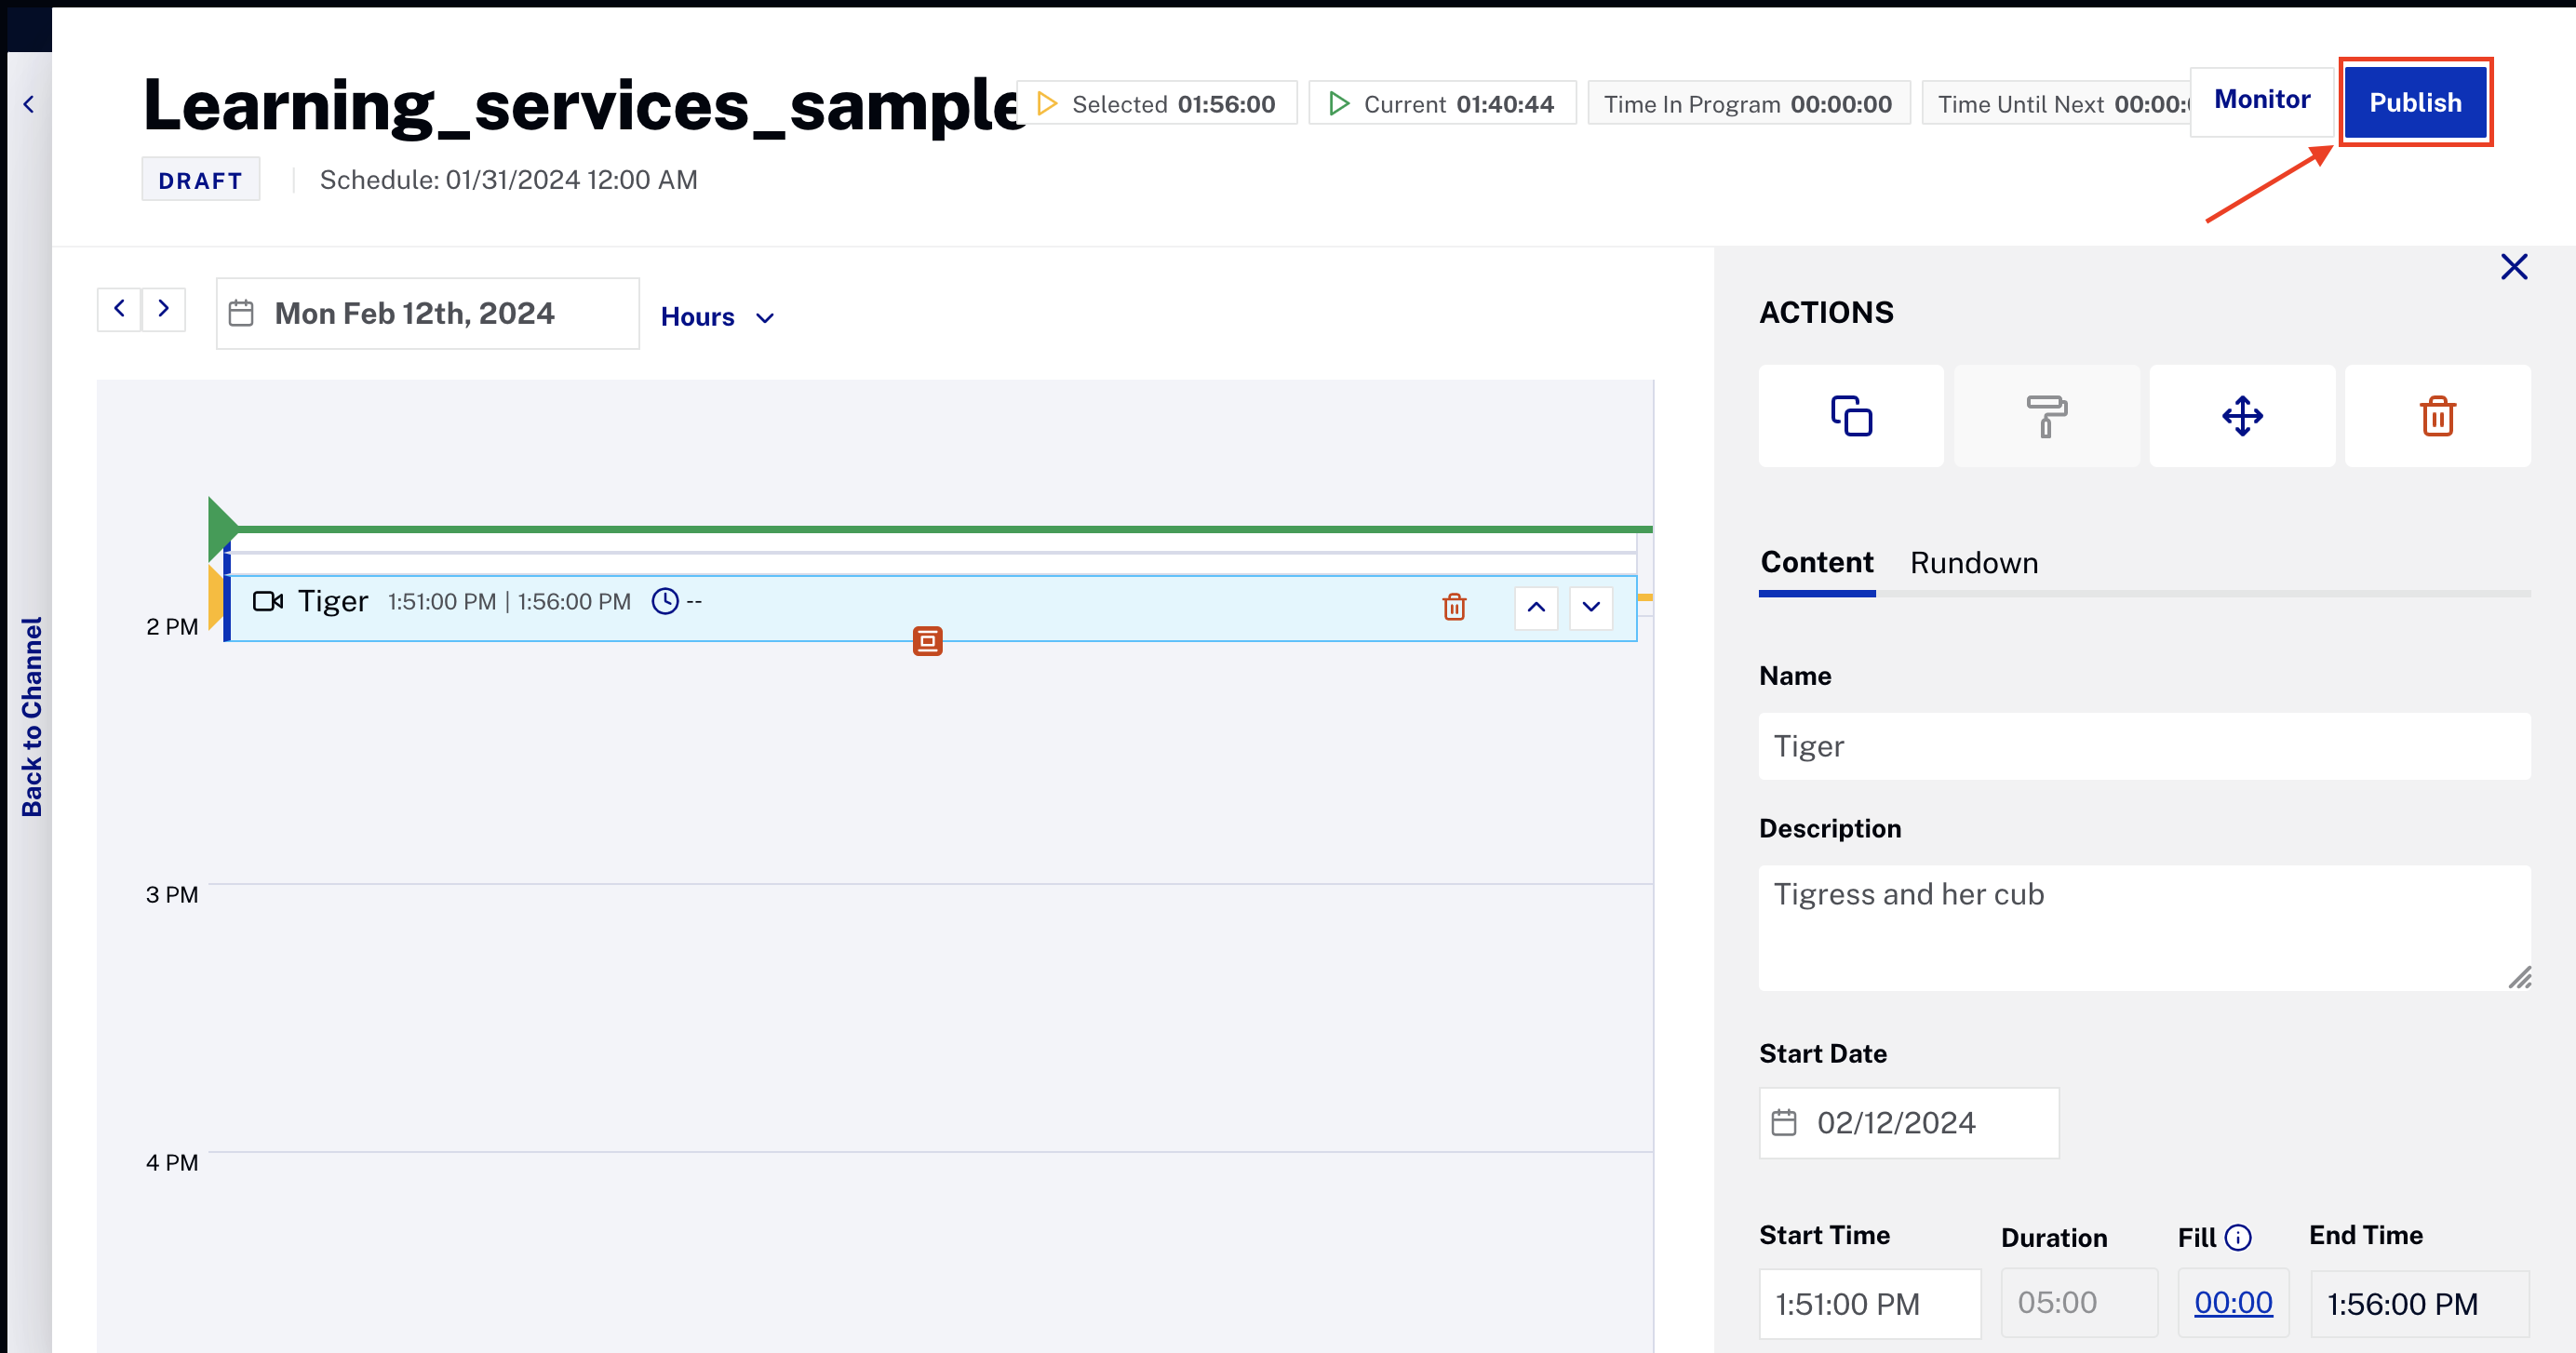
Click .
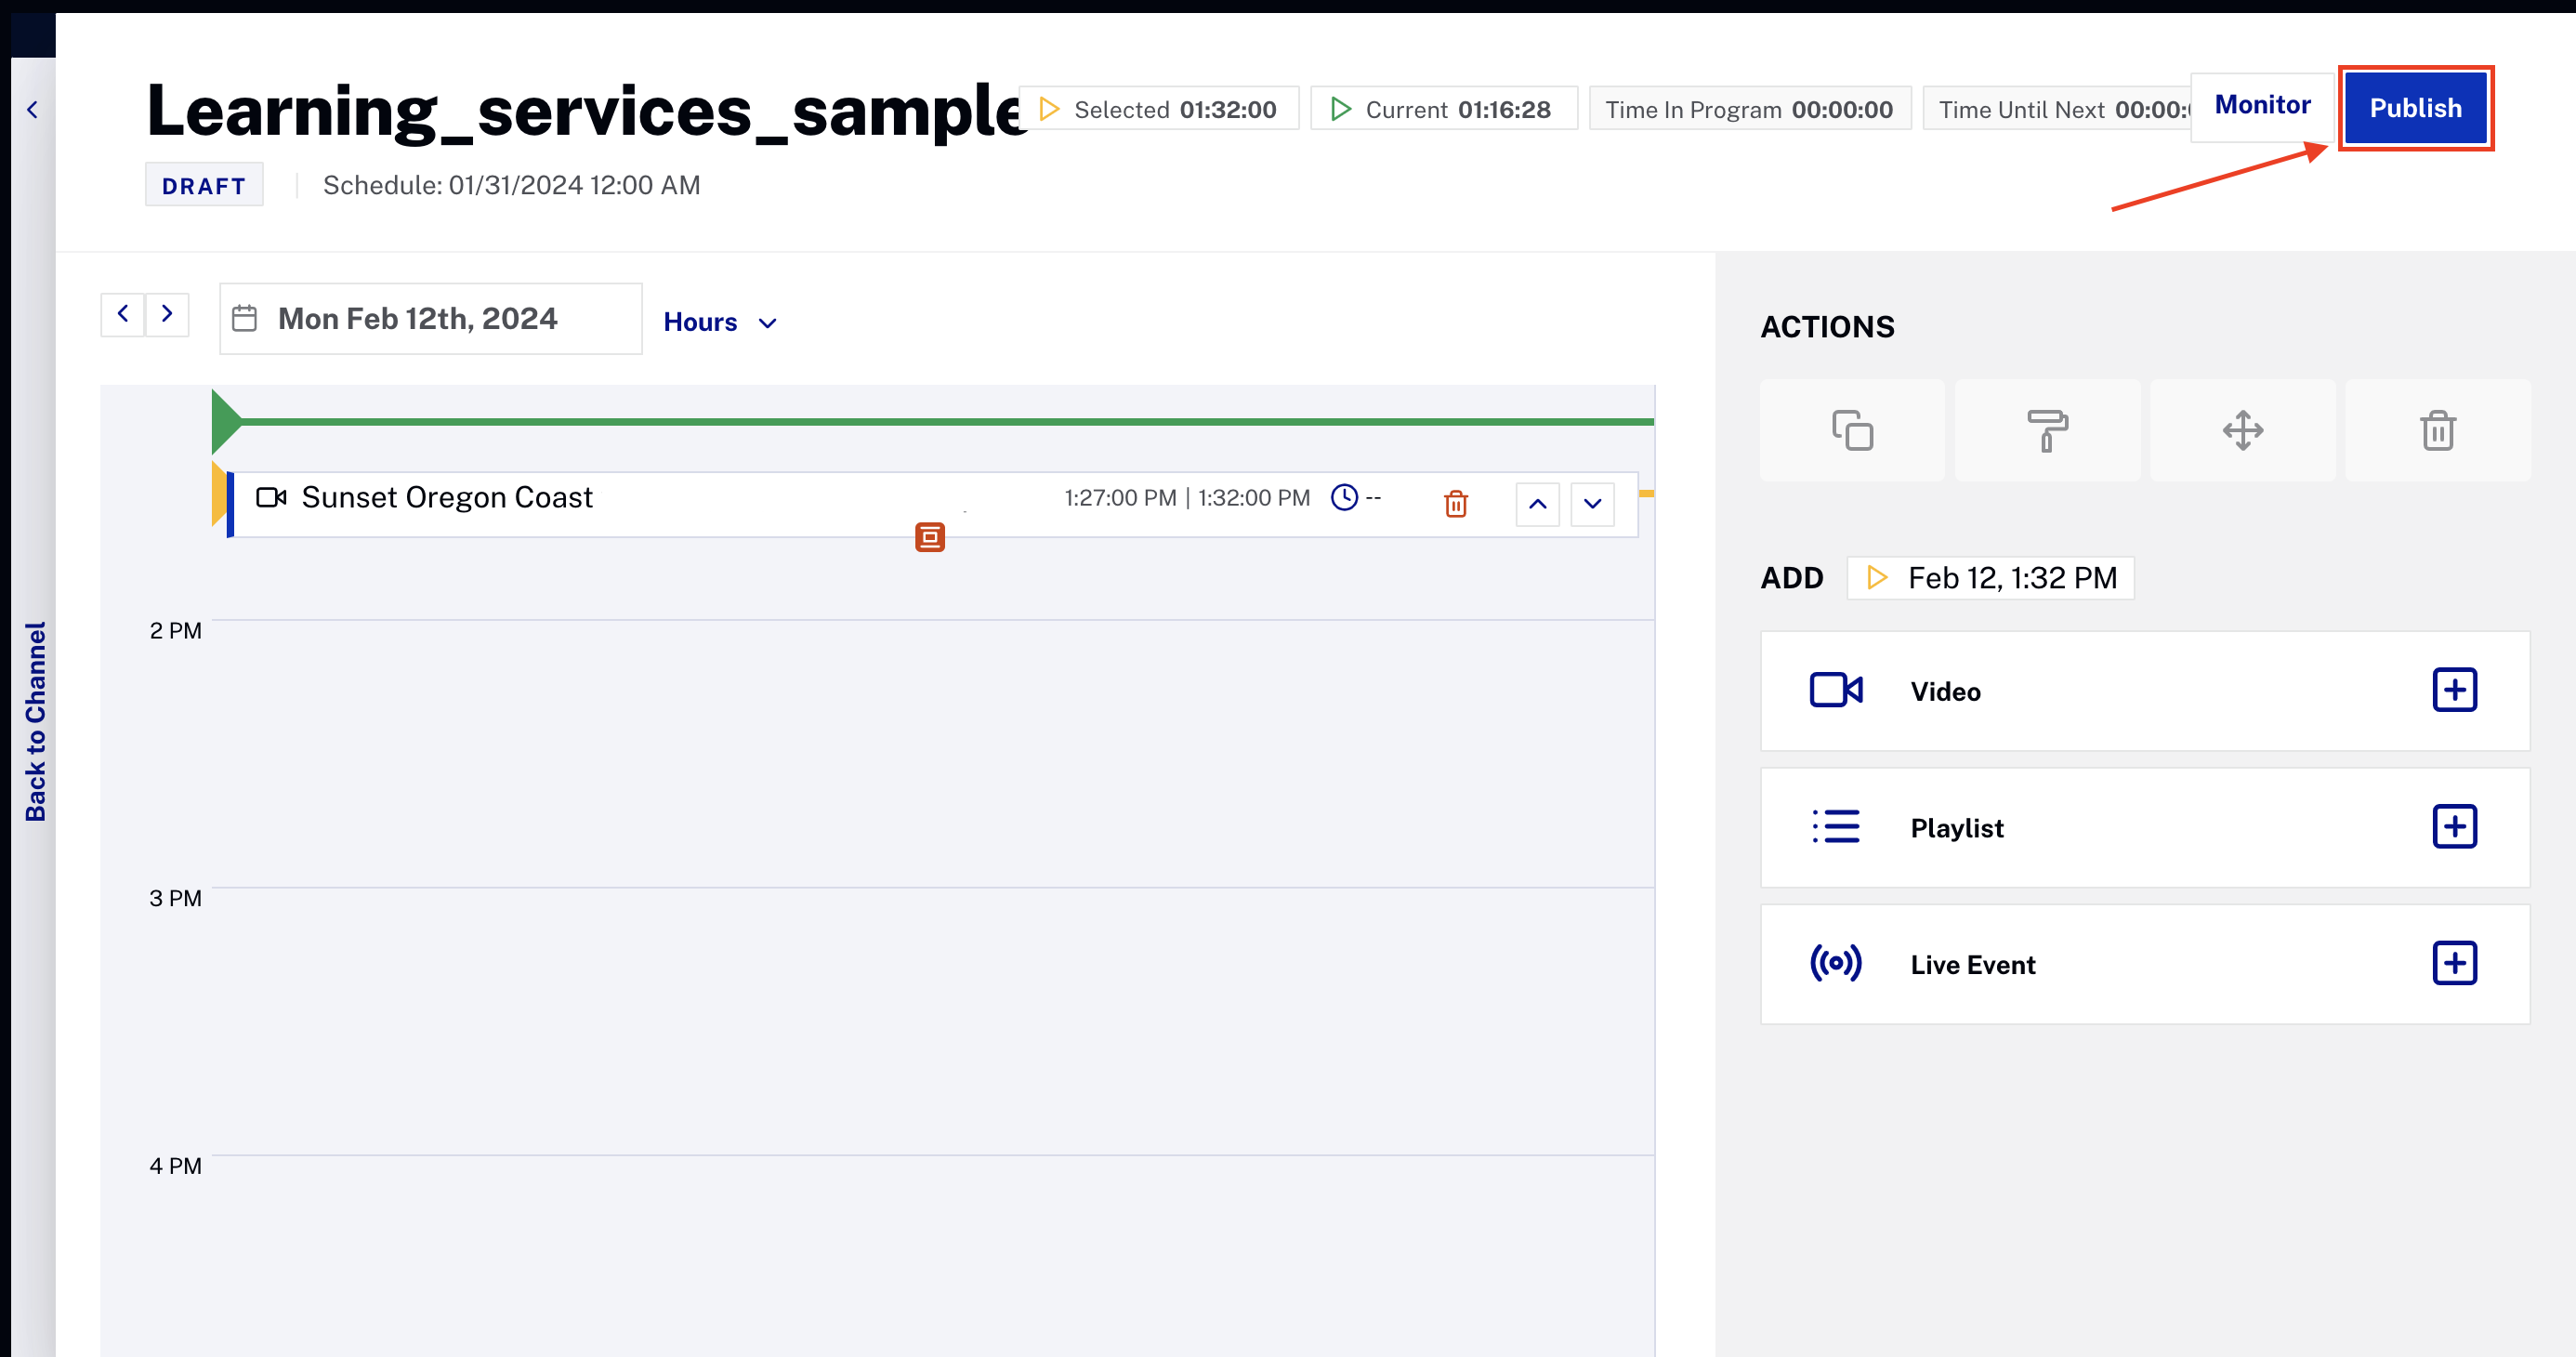
Publish video - Once you have added and published your videos, playlists, or live events, click to check a rundown view of your scheduled content.
Adding Playlists
To learn how to add Playlists, follow these steps:
- Click the playlist option on the right side to select a playlist.

Select playlist option -
Use the Search tab to find the playlists you want.
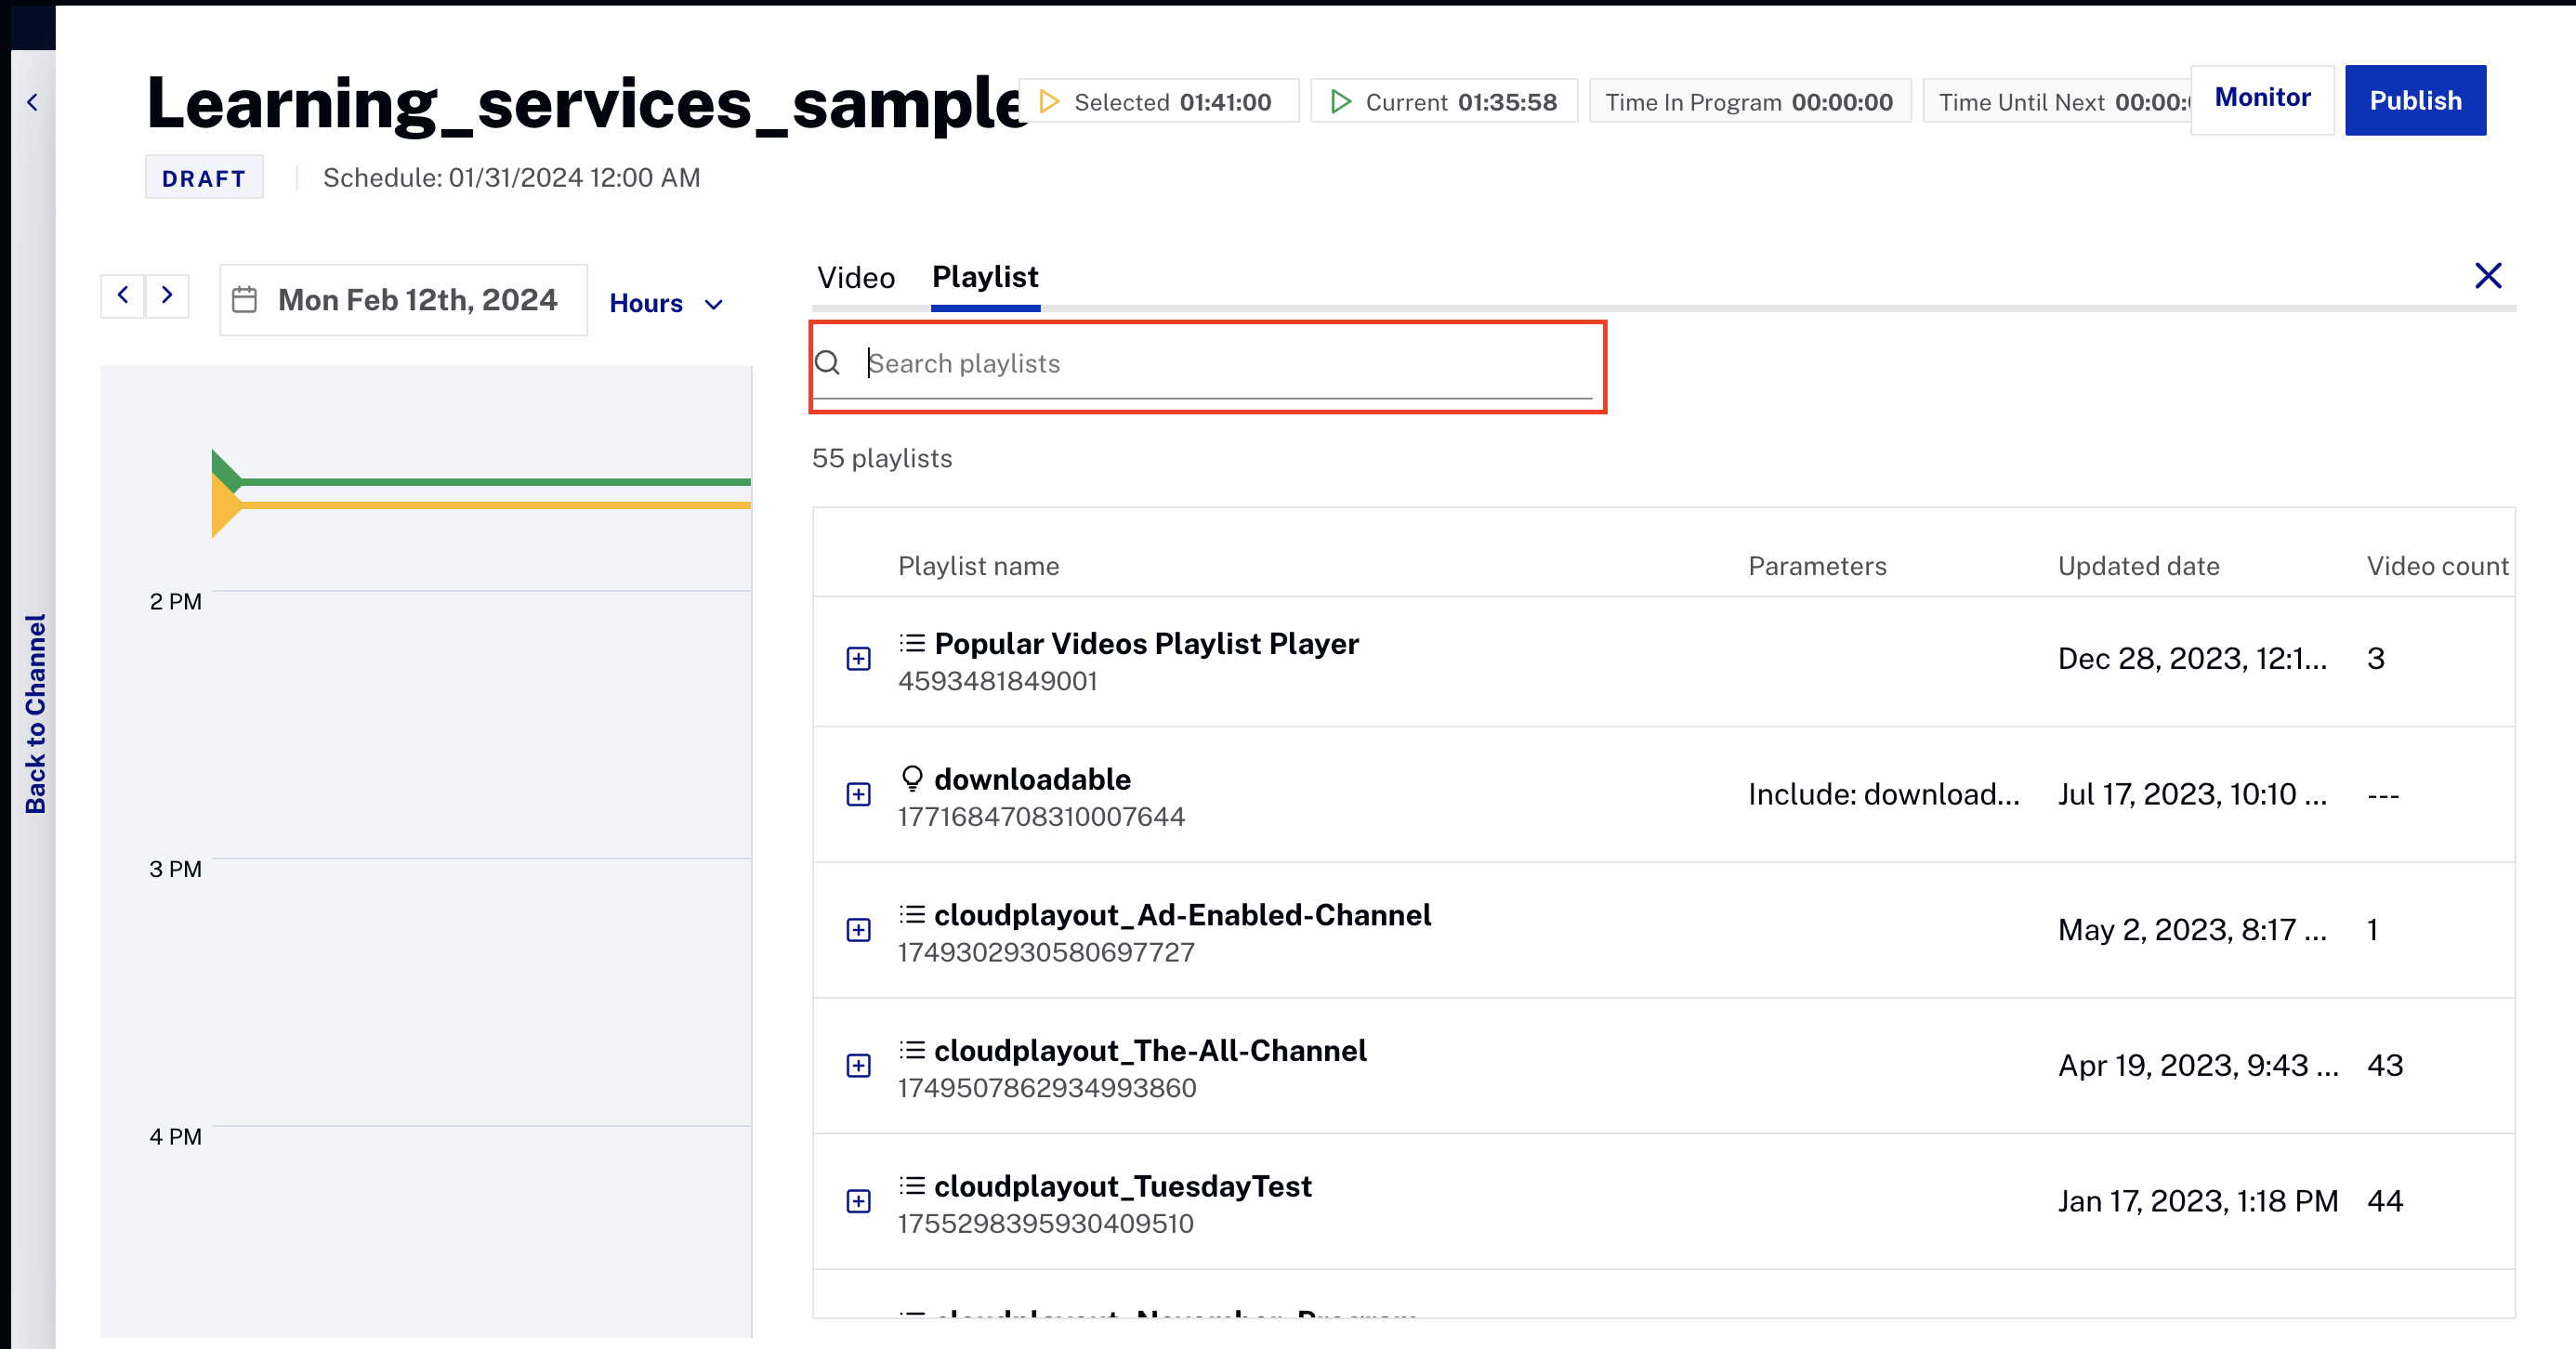
Search options -
Add your selected playlist to the schedule by clicking on the plus icon.
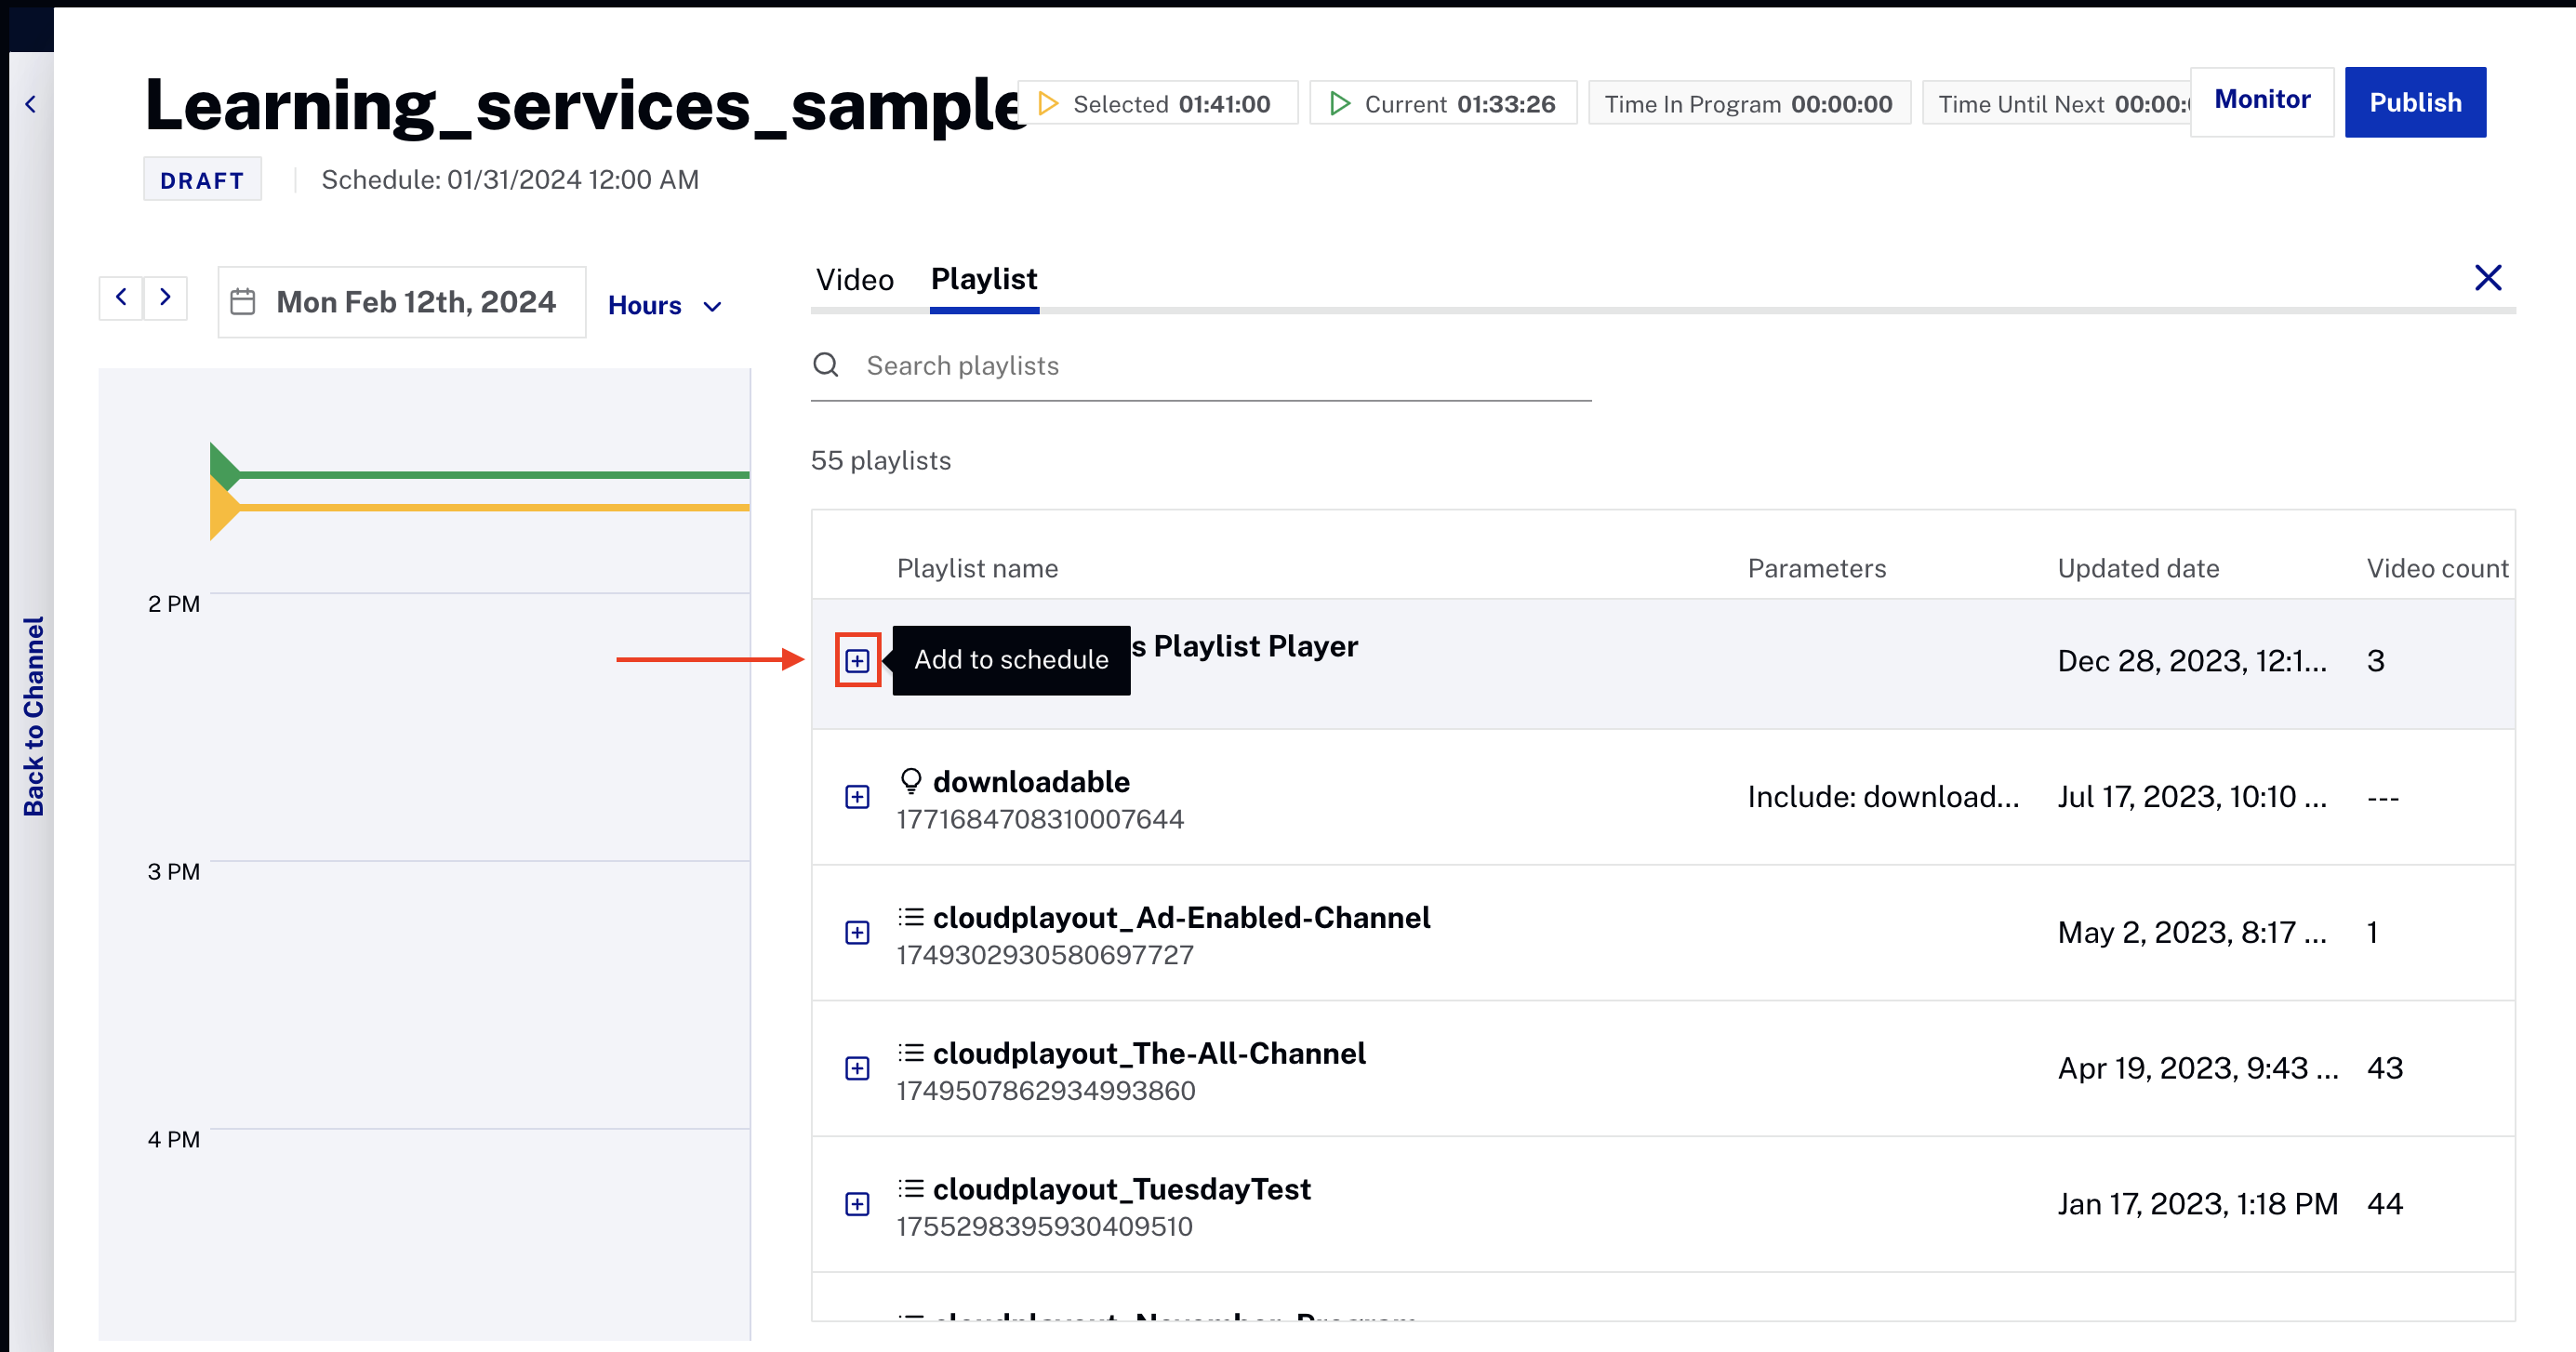
Adding a playlist -
Once the playlist is added, all the videos included in the playlist are added to the schedule at the specified time. If you click on the video slot, you can perform several actions such as copy, paste, move, or delete on the top right side. Below the content tab is the video information, such as name, description, start date, and start time.
Playlist info and options -
Click .
Publish playlist - Once you have added and published your videos, playlists, or live events, click to check a rundown view of your scheduled content.
Adding Live Event
To learn how to add Live Events, follow these steps:
- Click the Live Event option on the right side to create a live event.
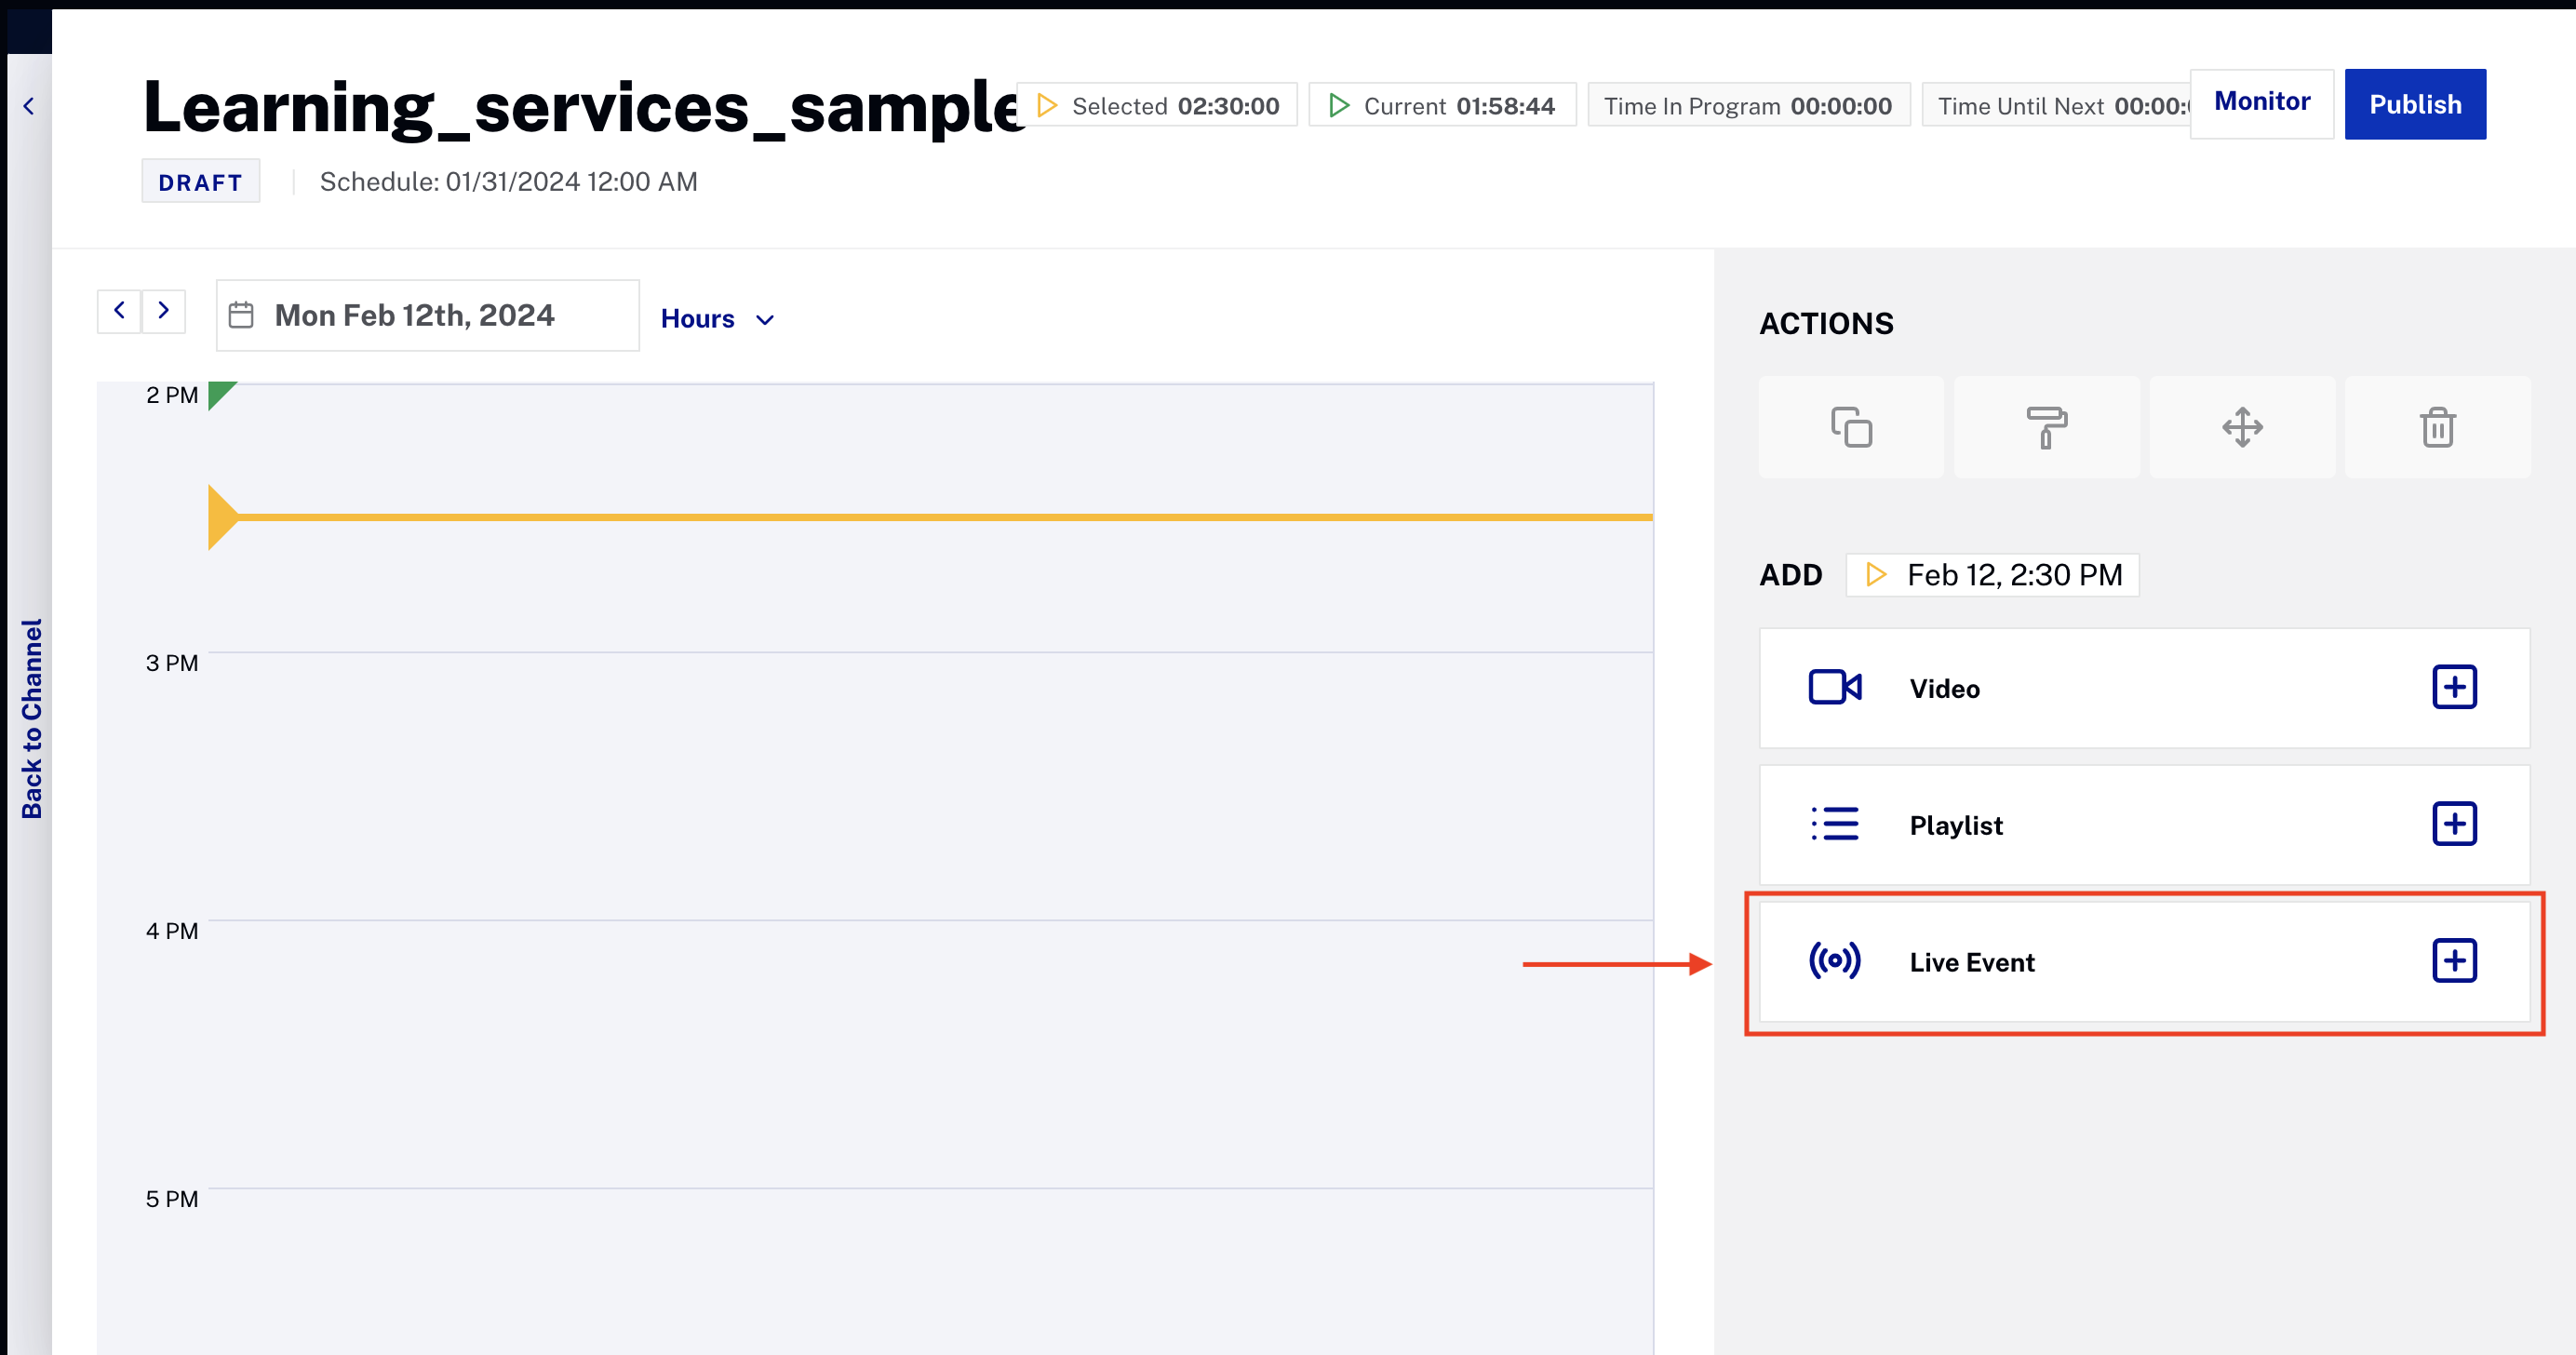
Select live event option - Enter the Live Event configuration details:
- Event Name - Name for the live event.
- Start Date/Time - Time when the live event will start playing out. This time can be updated only when the channel is not in running state.
- Duration - Add the duration of your live event.

Configure new live event - Click .
-
When the live event is added, it is shown in the schedule at the specified time. If you click on the live event slot, you can edit the content tab such as name, description, start date, and start time before the event begins. You can also change to the metadata tab to view more information.
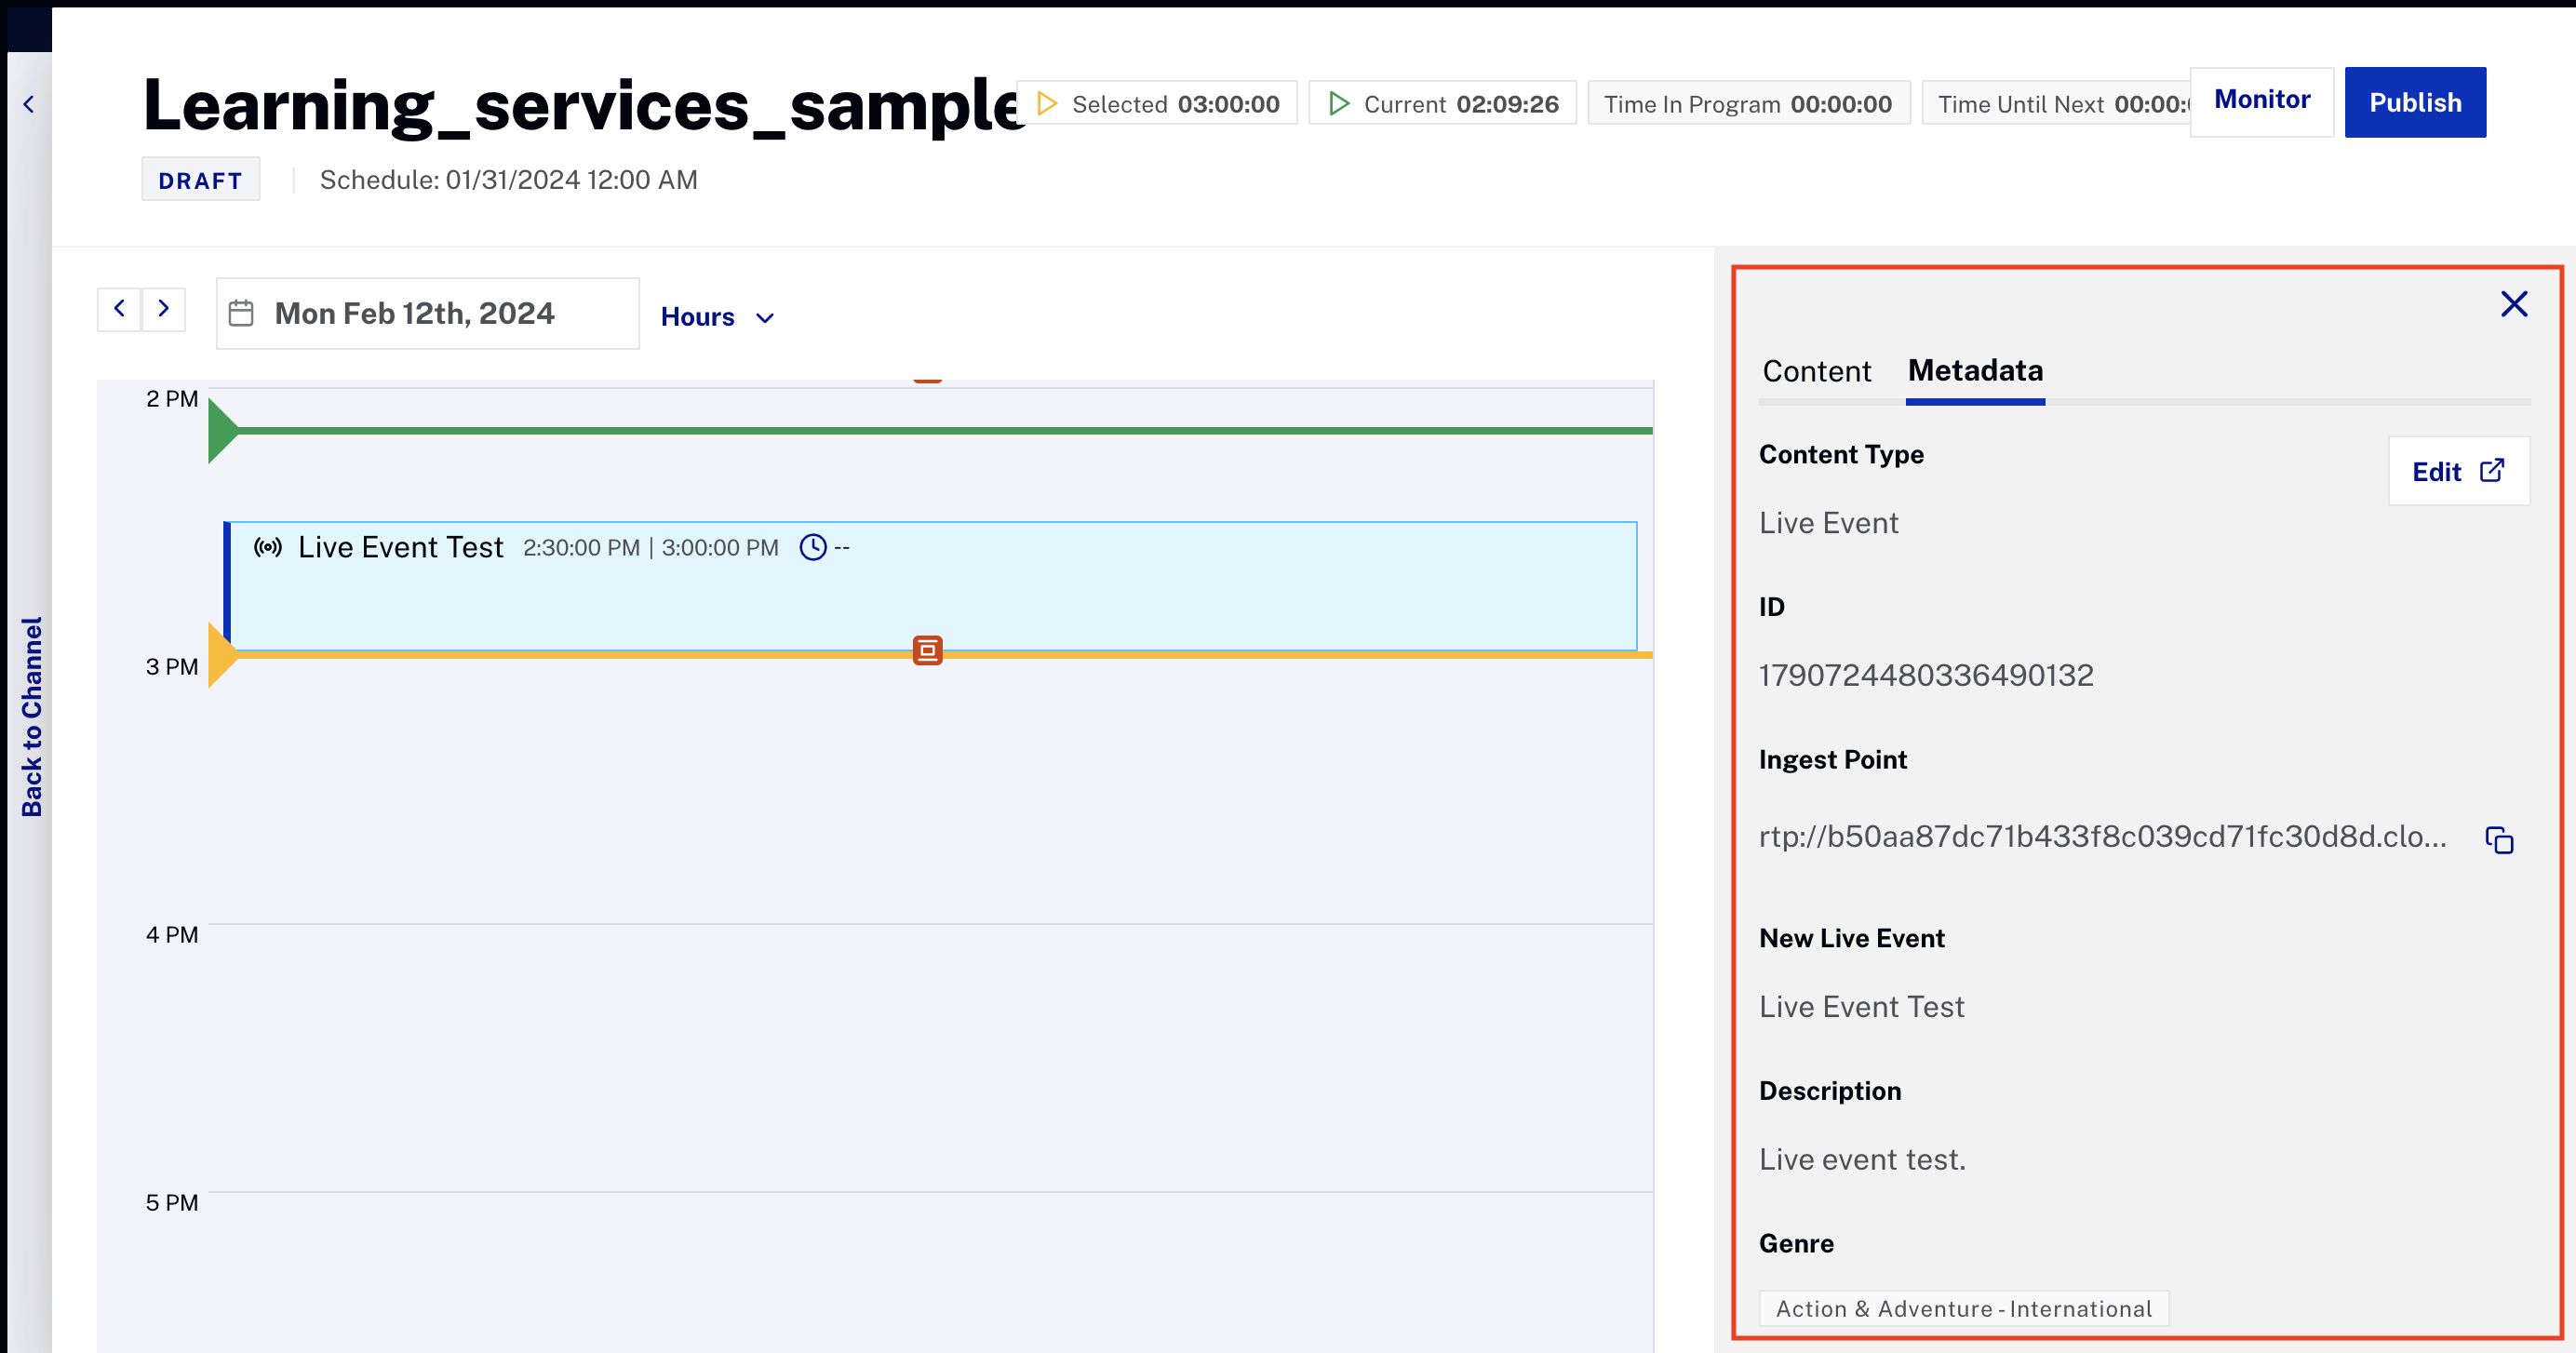
Playlist info and options -
Click .
- Once you have added and published your videos, playlists, or live events, click to check a rundown view of your scheduled content.