Creating Custom Lead Forms for Oracle Eloqua
The Campaign module provides the ability to create lead forms which allow you to capture viewer information as videos are played inside of Brightcove players. This gives you the ability to include whatever fields you need (visible or hidden) and also give you the ability to take advantage of features like progressive profiling (if available). The lead data is sent to, and processed by, Eloqua.
To create a custom lead form, the following steps must be performed.
Creating a form in Eloqua
Eloqua provides the ability to create forms to capture viewer information. These forms can be displayed inside of Brightcove Players. The data that is captured can then be used in customizing future communications. The steps below will create a simple form to capture first name, last name and email address. For complete details on Eloqua Forms, see the Eloqua documentation.
- Login to your Eloqua account.
- Navigate to Assets > Forms and then click Create a Form. The form Template Chooser opens.
- Click Blank Form and then click Choose.
- In the left navigation, expand the Field Groups panel.
- In the Field Groups panel, click Basic Contact Info and drag it to the form template.
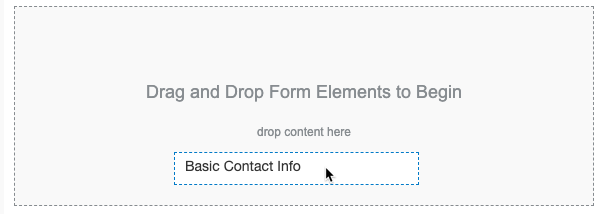
- Confirm that the fields have been added to the form.
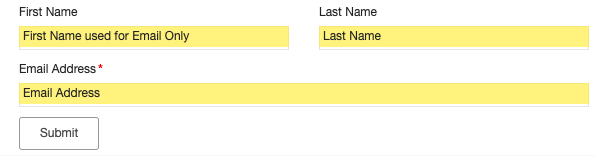
- By default, the fields are added using a field merge. This will cause strange text to appear in the fields when used in Campaign. To remove the field merge, select the First Name field by clicking on it.
- In the left navigation panel, locate the General Properties section and set the Prepopulate field data property to None.
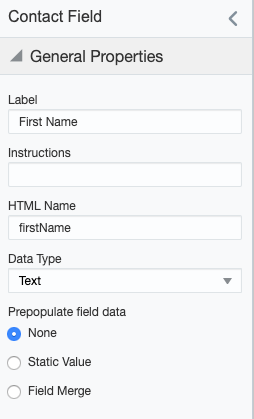
- Repeat the process for the Last Name and Email Address fields.
- Click Save.
- Give the form a name and then click Save.
Copying the form HTML
To use the form inside of the Campaign module, you will need to copy the form HTML. Follow these steps to copy the form HTML.
- Click Actions > View Form HTML... The form HTML will be displayed.

- Copy the entire HTML to the clipboard. Click Close.
- Paste the form HTML into your HTML editor of choice. You may want to use the code formatting feature of your editor to format the code so that it is easier to read.
Styling the form
By default, when the form is displayed inside of a Brightcove Player, the form will display on a transparent background over the player. You will probably want to do some basic styling to the form using CSS. The sections below provide two examples of how the form can be styled. The associated CSS is also provided. You may need to adapt the CSS to conform to your standard colors or to handle styling of additional fields.
Simple form styling example
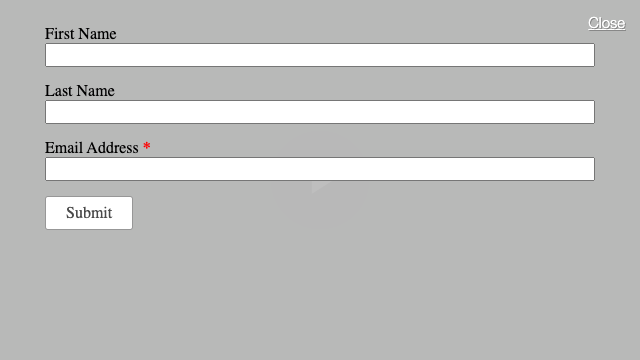
This example uses CSS to change the background color of the form to grey and the form will appear as follows:
For this styling, add the following CSS to the top of the form HTML style tag.
  body {
        background-color: rgba(204,204,204,0.9);
        margin: 0;
        padding: 20px;
        height: 100%;
  }
Creating a custom lead form in the Campaign module
Once the form HTML has been created in Eloqua and styled as needed, create a custom lead form in the Campaign module and associate the lead form with a Campaign-enabled player.
- Open the Campaign module.
- Click Lead Forms in the left navigation. If any lead forms have been created, they will be displayed.
- Click .
- Give the lead form a descriptive Name.
- Select a Form Language.
- Select the Form Timing. The form timing determines when the lead form will be displayed.
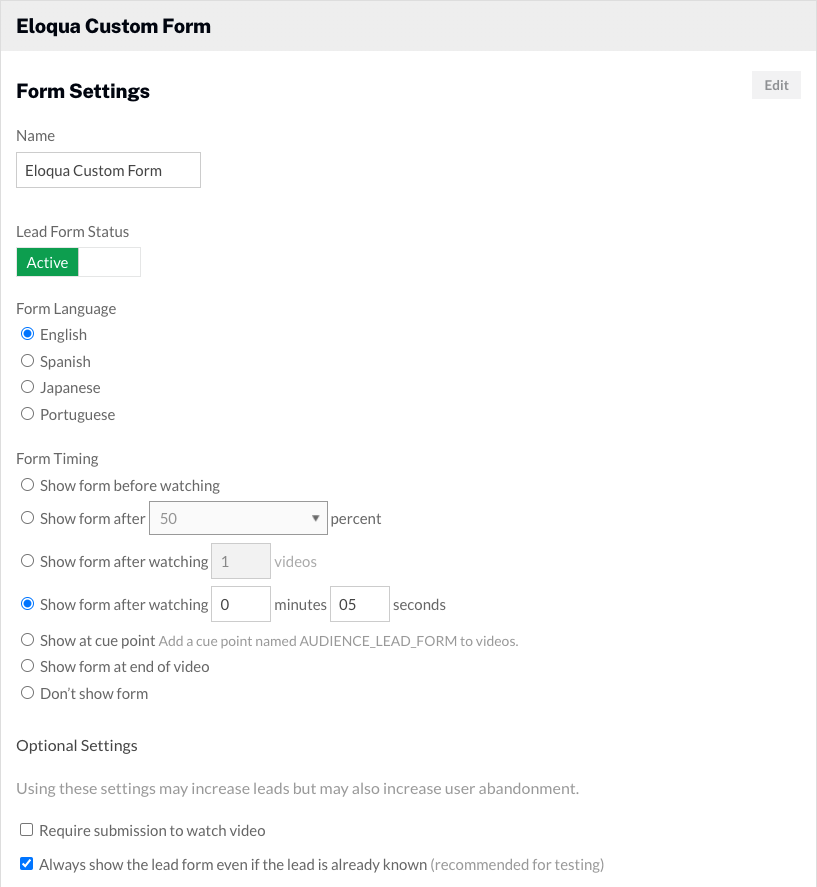
- Set the form type to Custom Lead Form.
- Paste in the Form HTML.
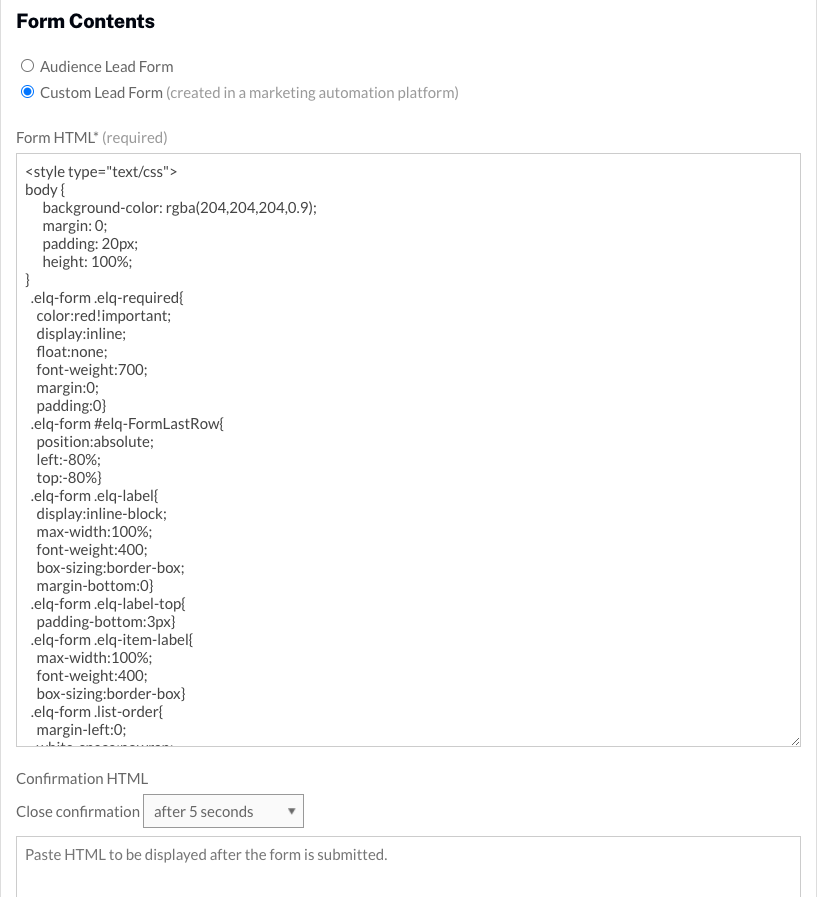
- (Optional) Paste in the Confirmation HTML. The confirmation view will be display for 5 seconds and then the video will resume playing. If no confirmation HTML is included, the video will resume playing after the form submission.
- (Optional) Click to open a preview of the form.
- Click to save the lead form.
Assigning a lead form to a player
Once the lead form has been created, it needs to be assigned to a player. Follow these steps to assign a lead form to a player.
- Click Campaign Players in the left navigation.
- Locate your player and use the Lead Form dropdown list to select the lead form.
The setup is now complete and you are ready to capture lead information. When a video is published using a Campaign-enabled player, the lead form will appear according to the form timing settings.
Validating the form data in Eloqua
There are several ways to validate that the form data has been passed to Eloqua. Follow these steps to view the form data in Eloqua.
- Login to your Eloqua account.
- Navigate to Assets > Forms.
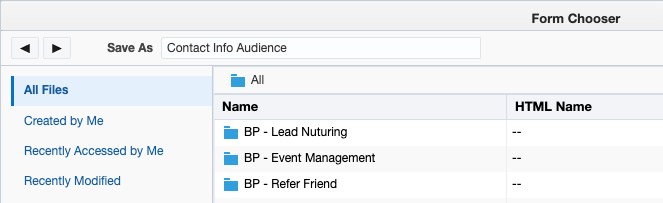
- In the left navigation, click the All Files link to display all the forms.
- Double-click the form name to open it.
- Click Actions > View Submission Data... The form data will be displayed.
