Also see Adding Static Image Overlays.
Introduction
You can use the dynamic overlays (Motion Graphics) feature to superimpose a motion image onto the video in a Cloud Playout channel. The dynamic overlay is based on an HTML5 motion graphic asset.
We have provided some sample dynamic overlays that you can use for testing.
Implementation
-
To set up for dynamic overlay, enable the option while creating a Cloud Playout channel. You can toggle this option only when a channel is in DRAFT state:
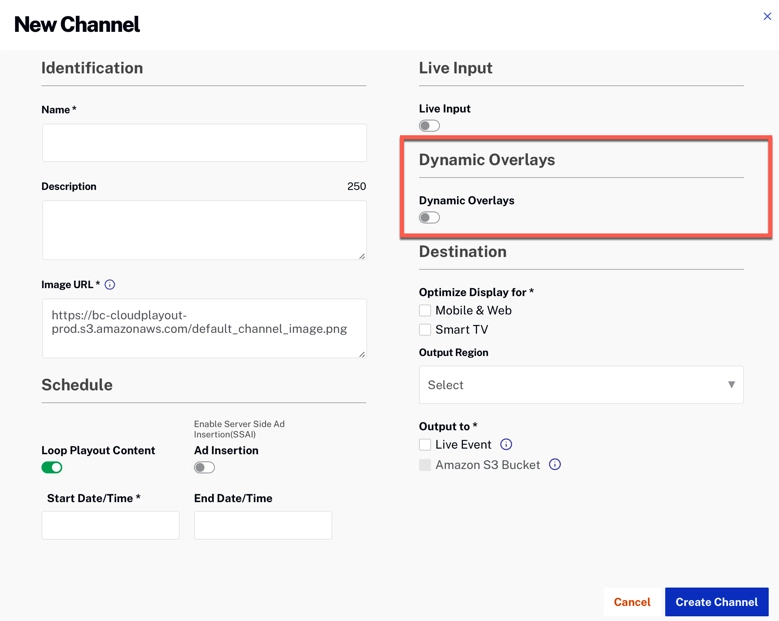
Enable Dynamic Overlays -
Then you choose an HTML5 authoring system. Use this authoring system to prepare an HTML5 asset, and you must continually publish the asset to a location outside of Cloud Playout.
- It can be any HTML5 authoring system that uses standard browser-based rendering techniques.
- It can use any HTML5 tags except video and audio.
- Publish the dynamic overlay asset to a source URL that is accessible via a public IP address. Assets protected by credentials are not accepted.
- Remember that the URL should be valid, accessible and should be returning a HTML content with content-type text/html.
-
Add the HTML5 authoring asset to your account using the Overlays page:
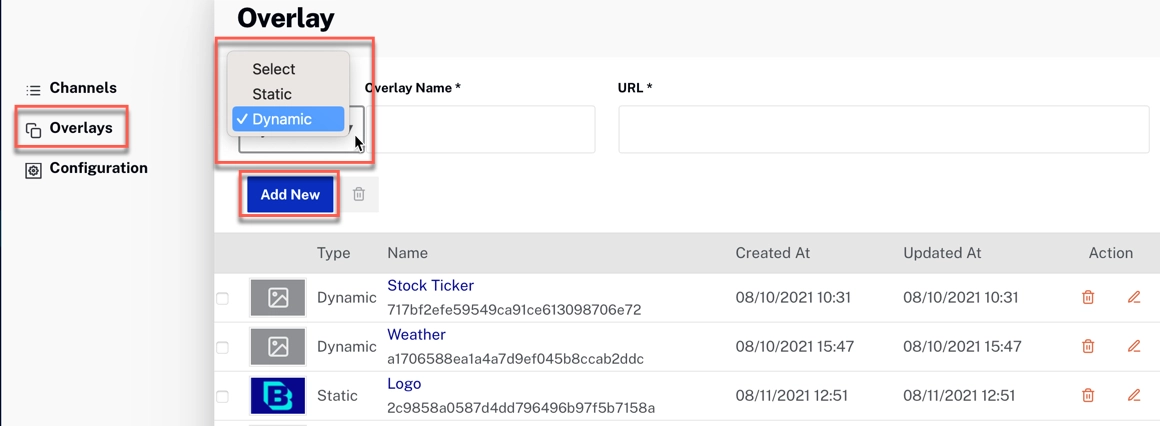
Add HTML5 Asset -
The Dynamic Overlay can then be associated with a channel:
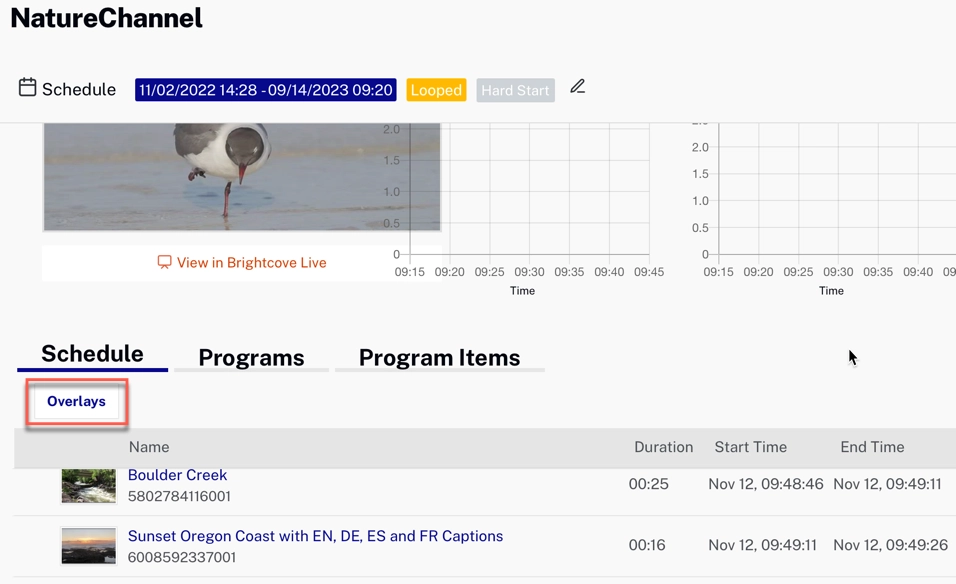
Add Channel Overlays 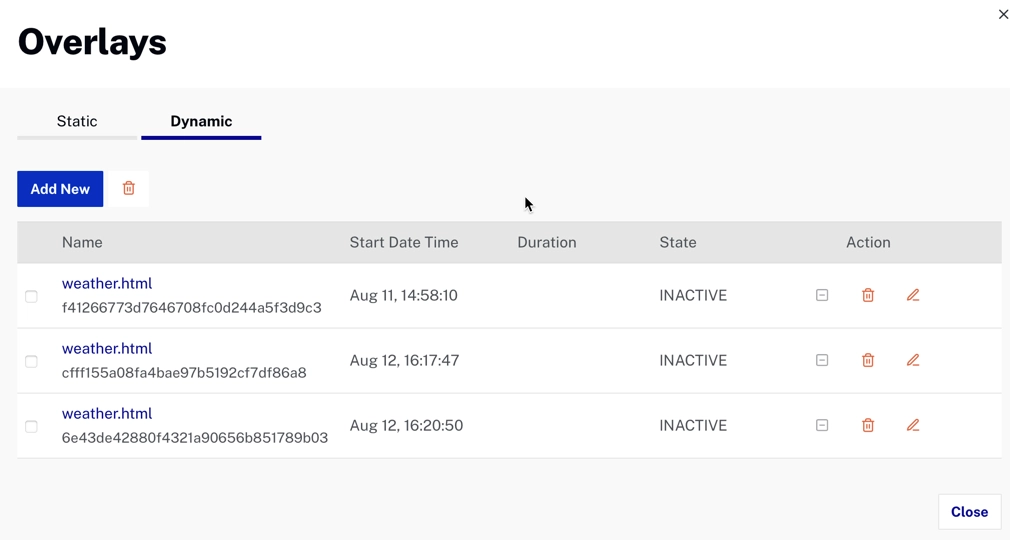
Overlays for Channel -
You can configure each dynamic overlay with a start time and duration:
- The duration when specified, should be a maximum of 24 hours. If left empty, that is considered as 24*7 and the overlay will continue to be shown until deactivated.
- The Start time must always be a future time.
- Use Current time if you want to start it immediately. Note that this option is useful only when the channel is currently running.
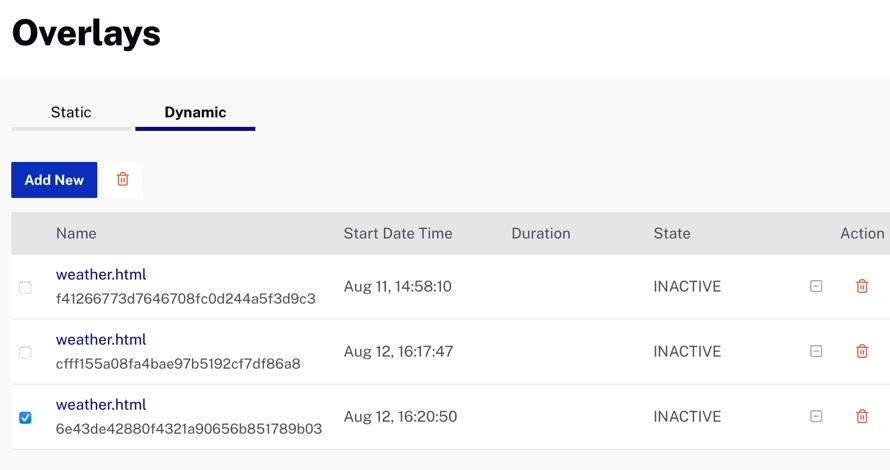
State transitions
State transitions for overlay schedules
-
INACTIVE
- A newly created schedule (or)
- A schedule that has already completed the run (or)
- A schedule that is already deactivated.
- You can change the start time to bring it back to SCHEDULED state with the same or updated overlay configuration.
- Delete - if you will no longer use this configuration.
- Modify for any configuration changes.
-
SCHEDULED
- Scheduled to start at the specified start time.
- Delete if you no longer need this schedule.
- Modify for any configuration changes.
-
ACTIVE
- A schedule that is currently in progress.
- Deactivate when you need to stop the overlay.
- Modify any configuration except layer and start_time.
- Deletion not allowed. You need to deactivate first.
Contextual Launch point
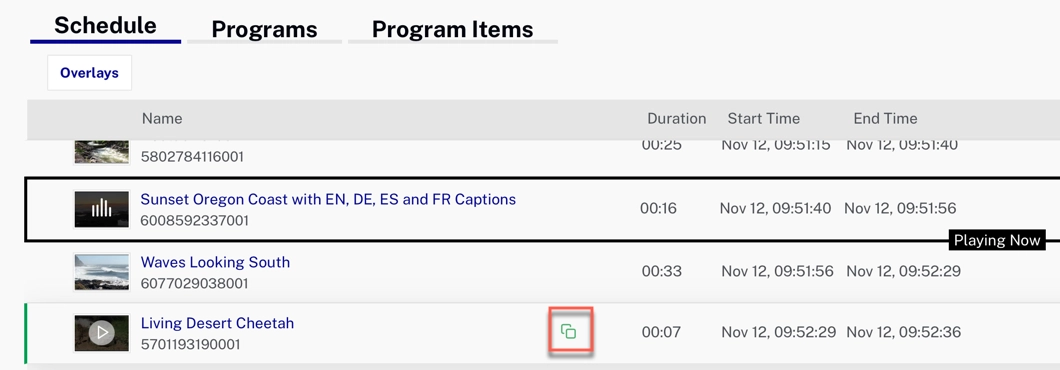
For ease of access, if you want the overlay to appear for a specific video in the playlist, you can mouse hover the video in the playlist and click on the Add Overlay icon ( ![]() ), the UI will launch the Add Overlays modal, with the start time and duration of the selected video.
), the UI will launch the Add Overlays modal, with the start time and duration of the selected video.
Notes
- This will create a schedule for the selected video’s start time and it’s not attached to the video itself. In other words, if the video is re-ordered (or) deleted (or) start time changed due to various changes to the EPG schedule, the overlay schedule will still remain on the originally scheduled start time.
- This Add Overlay in context to the video is recommended to be used on a Running channel rather than on a channel in DRAFT or SCHEDULED state - because the running channel is more time accurate (powered by EPG) than the channels in other states.
- On a running channel, this option is available on all videos following the current playing video.
- This option is not available for Ad placeholder videos on SSAI channel.
Overlay handling
- Any Javascript authored to interact with a backend system will be stripped off while streaming out of Cloud Playout.
- The overlays are applied to the source MP4 video before encoding.
- You should size the overlay content to match the width and height of the largest source video rendition (the progressive MP4 sources) in your channel.
- Cloud Playout cannot change the resolution of the overlay content to fill the frame (no upscaling), although it will resize content down to fit a smaller video rendition without cropping.