The Interactivity module provides two key features that streamline the creation and management of interactive video annotations: the Annotation Editor bar and the Timeline view. These features work together to make it easy to visualize, organize, and manage annotations across your video.
Annotation Editor bar
The Annotation Editor bar is located on the right side of the video player. This vertical toolbar provides quick access to all annotation types that can be added to your video.
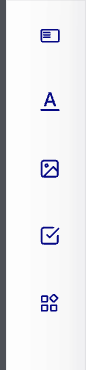
The Annotation Editor bar displays icons for the following annotation types:
- Text Overlay - Add text annotations to display on the video
- Link Overlay - Add image or transparent overlays with clickable links
- Chapters - Add chapter markers to organize video content
- Polls - Add interactive poll annotations
Expanding the Annotation Editor
When you click on one of the annotation icons in the Annotation Editor bar, the bar expands to reveal additional editing options and configuration settings for that annotation type.
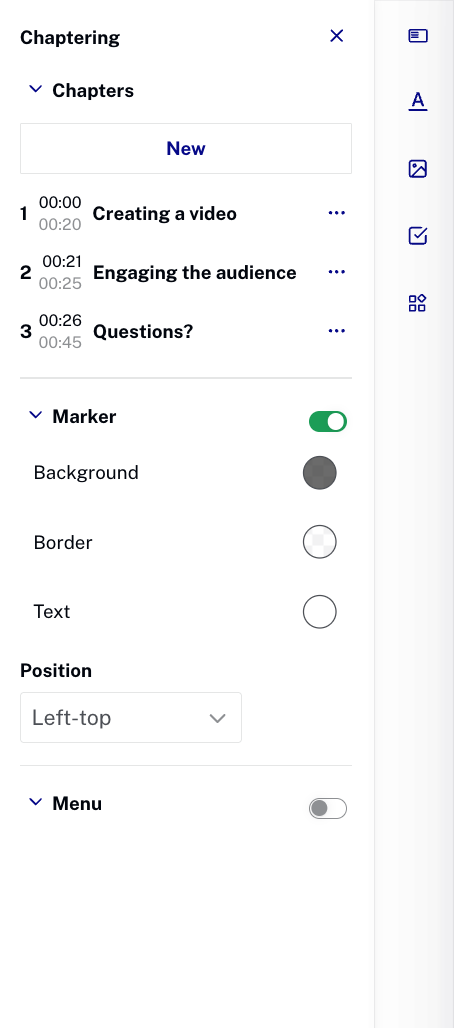
The expanded view shows a detailed panel for configuring the selected annotation type. For example, when working with chapters, you can see options for managing chapter markers, customizing the marker appearance, and configuring the chapter menu display.
In the expanded view, you can:
- Configure annotation properties and settings
- Customize the appearance and behavior of the annotation
- Set timing and duration for the annotation
- Add links and configure annotation actions
Timeline view
The Timeline view appears below the video player and provides a visual representation of all annotations in your project. This feature helps you understand where annotations are placed in your video and makes it easy to manage multiple annotations.

Understanding the Timeline
The Timeline displays the following elements:
- Time markers - Numerical markers showing time in seconds (e.g., 0:07, 0:08, 0:09) along the top of the timeline
- Playhead - A vertical line indicating the current playback position in the video
- Current time display - Shows the current timestamp (e.g., 00:26) and total video duration (e.g., 01:37)
- Annotation tracks - Horizontal rows where each annotation appears as a rectangular bar
Annotation rows
Each annotation you add to your video has its own dedicated row in the Timeline. This allows you to see all annotations at a glance and understand their placement relative to each other. Each annotation bar shows:
- The annotation label or title
- The start and end times of the annotation
- The duration of the annotation
Scrolling through annotations
When you have many annotations in your project, the Timeline may extend beyond the visible area. To view additional annotations:
- Hover over the Timeline area
- Use your mouse wheel to scroll up or down
- Alternatively, use the scroll bar that appears when there are more annotations than can be displayed
This allows you to navigate through all annotations in your project, regardless of how many you have added.
Editing annotations in the Timeline
You can directly edit annotations by interacting with them in the Timeline:
- Click on an annotation bar in the Timeline to select it
- Once selected, you can drag the left or right borders of the annotation box to adjust its start or end time
- Dragging the left border changes the start time
- Dragging the right border changes the end time
This provides a quick and intuitive way to fine-tune annotation timing without opening the annotation editor.
Zooming in the Timeline
The Timeline supports zoom functionality that allows you to view annotations at different levels of detail. Zooming affects the time markers displayed above the timeline - the more you zoom in, the more detailed the time markers become.
Zoom methods
You can zoom in or out of the Timeline using the following methods:
- Mouse wheel - Hover over the Timeline and use your mouse wheel to zoom in (scroll up) or zoom out (scroll down)
- Zoom controls - Use the zoom tool located at the bottom of the Timeline:
- Click the - (minus) button to zoom out
- Click the + (plus) button to zoom in
When zoomed in, you can see more precise time markers (e.g., individual seconds or fractions of seconds), making it easier to position annotations with greater accuracy. When zoomed out, you get a broader view of the entire video timeline.
Working with the Timeline and Editor together
The Annotation Editor bar and Timeline view work together to provide a comprehensive annotation management experience:
- Use the Annotation Editor bar to add new annotations to your video
- View all annotations in the Timeline to understand their placement and timing
- Click on annotations in the Timeline to select and edit them
- Use the Timeline's zoom and scroll features to work with precision on complex projects
- Drag annotation borders in the Timeline to quickly adjust timing
This integrated approach makes it faster and easier to create and manage interactive video experiences.