Creating Social Media Publishing Destinations
A publishing destination is a social media account/page that you wish to publish videos to. Before you can publish videos to social media accounts using Brightcove Social, you have to create at least one destination. Destinations can be created to publish videos to YouTube, Facebook, X and LinkedIn.
Creating a YouTube destination
Create a YouTube destination when you want to publish videos to a YouTube channel. Before creating a YouTube destination, you may want to verify your YouTube account. Once you've verified your account, you will be able to upload videos longer than 15 minutes.
To create a YouTube destination, follow these steps.
- Open the Social Module.
- Click Destinations in the left navigation.
- Click New Destination.
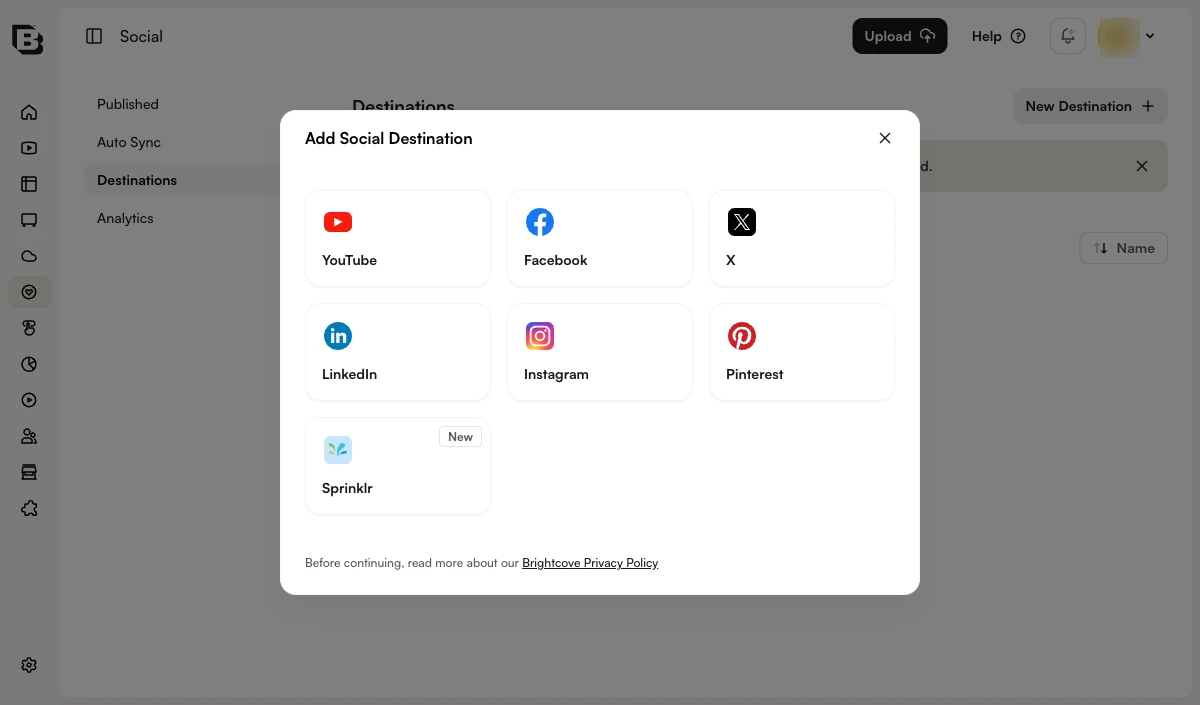
- Click Sign in with YouTube.
- You will be prompted to login to your Google account (if not already signed in). If you have multiple accounts, make sure you login to the account associated with your YouTube channel.
- A dialog will open requesting permission to manage your YouTube account. Check the upper right of the dialog to confirm you are using the correct Google account. If not, use the drop down to select the Google account you want to distribute videos to. Click Allow.

- Give the destination a unique, descriptive name. Click Next.
- Configure the default settings for the destination. See the Setting YouTube defaults section for information on configuring default values. Click Create.
- Click Destinations in the left navigation and confirm that the destination appears in the list of destinations.
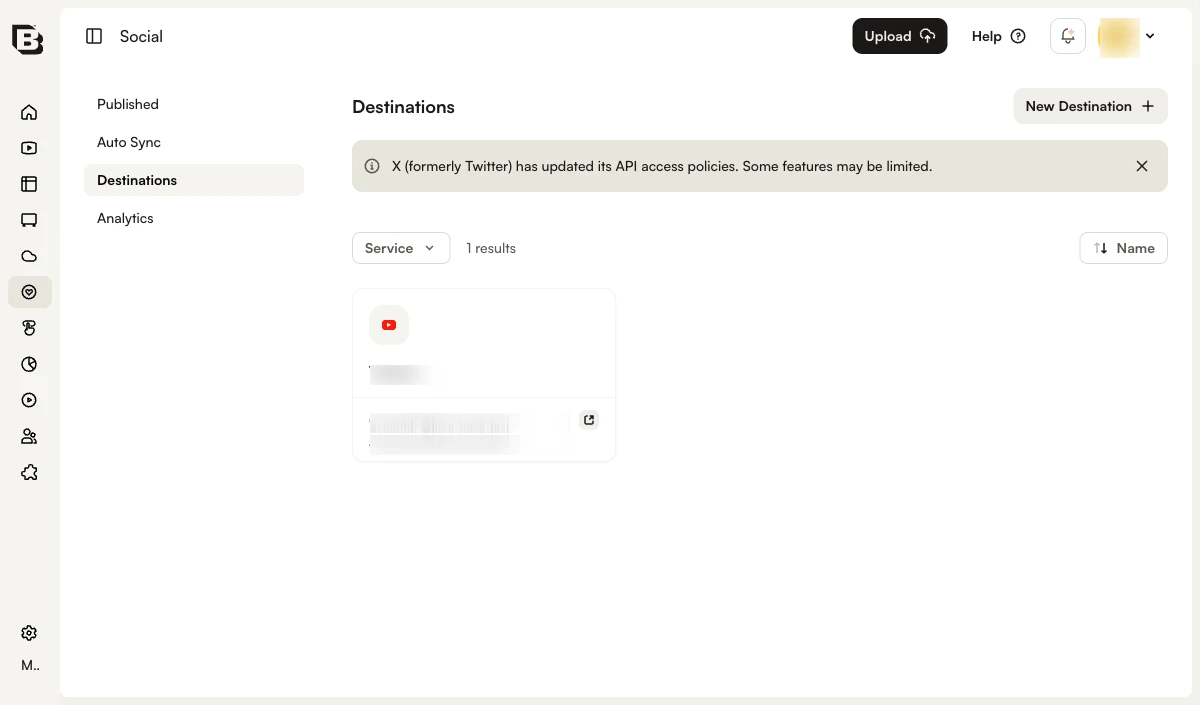
Click the destination card to edit the destination. Click the external link icon to open the YouTube channel in another browser tab.
Setting YouTube defaults
The destination default values will be used as the default video properties when publishing videos to social platforms. To configure publishing defaults for a YouTube destination, click on the destination card. The Edit Social Destination dialog has the following tabs:
- Information - Description, language, category, tags, thumbnail
- Publishing - Schedule, privacy settings
- Advanced Settings - Captions, license, live settings
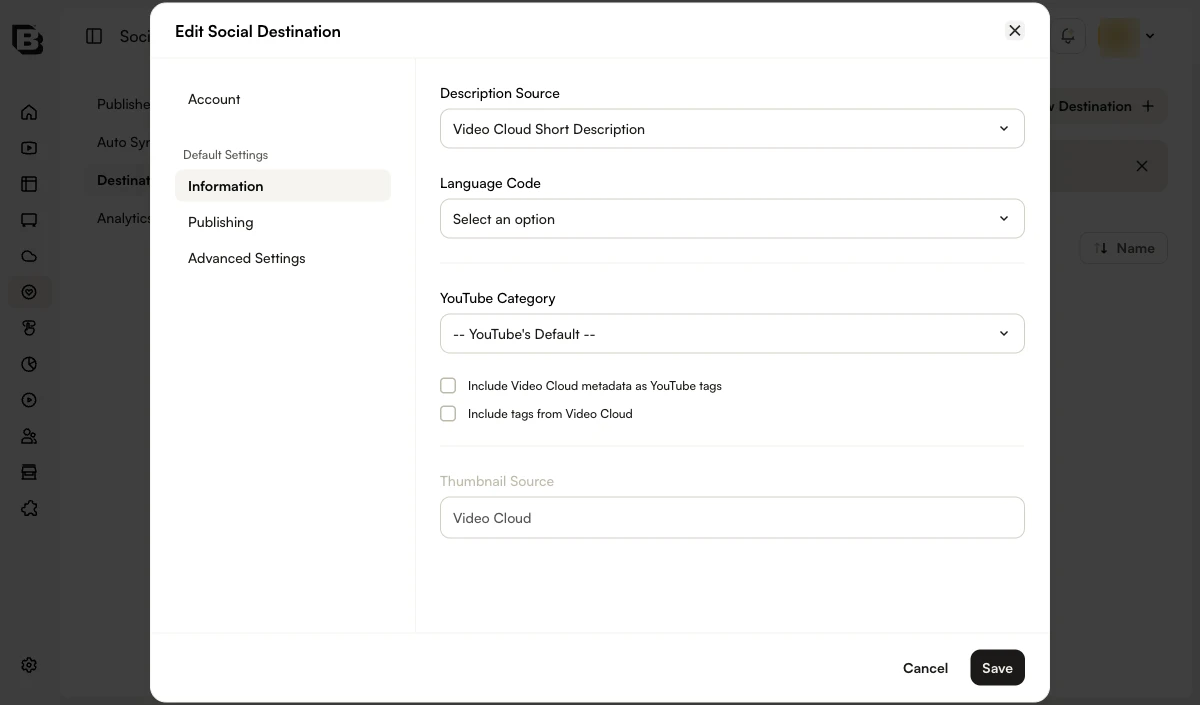
Configuring the Post Info properties
Click on the Post Info link. The following YouTube video properties can be set:
- Description - Options to use the short or long description or to enter a default description to use
- Original Language Code - Used to add translated video titles and descriptions to videos; Enter a 2 letter language code and select from the list
- YouTube Category - Content category for the video
- Tags - Option to include, or exclude, tags
- Include metadata as YouTube tags - Option to include the video ID and reference ID as YouTube tags
- Additional Tags - Option to enter additional tags for videos
- Thumbnail Source - Options to use the YouTube thumbnail, the thumbnail or to upload your own thumbnail image
Configuring the Schedule properties
Click on the Schedule link and select a schedule setting:
- Publish immediately - To publish the video immediately
- Use Video Cloud start date - To use the Video Cloud start date set for the video. In this case, we tell YouTube to make the video public as of the 'Scheduled Start Date' specified in Video Cloud. If that date is in the past, YouTube makes the video public immediately.
Configuring the Captions properties
Click on the Captions link and select an option:
- Use Video Cloud captions - The Social module will attempt to distribute the captions associated with the video to YouTube. The Social module will attempt to access captions files no matter where they are. If a remote URL is used to specify the location of the caption files and the files are accessible (e.g., not geo-restricted in such a way that we can't get to them) then Social will distribute them to YouTube.
- No captions - No captions are used
Configuring the Visibility properties
Click on the Visibility link and select a Privacy setting for the video. The following Privacy settings are available:
- Public - Anyone can view the video
- Unlisted - Anyone who has the link to the video can view it
- Private - Video can only be seen by you and the users you select
- Use YT_Privacy_Status Custom Field - Dynamically assigns the privacy setting using a custom field associated with the video. For information, see Setting the Privacy Status for a Video.
There is also a setting to Notify subscribers when video is posted to YouTube. If checked, your subscribers will see your videos in their Subscriptions feed and may receive a notification that the video was uploaded.
Configuring the License properties
Click on the License link and select a License and Rights Ownership setting for the video. The following settings are available:
- Standard YouTube License
- Creative Commons - Attribution
Configuring the Live properties
Click on the Live link and select the DVR setting for the video. The following settings are available:
- Enable
- Disable
Creating a Facebook destination
Create a Facebook destination when you want to publish videos to a Facebook page. Note that videos can only be distributed to Facebook pages, not personal profile pages. To create a Facebook destination, follow these steps.
- Open the Social Module.
- Click Destinations in the left navigation.
- Click New Destination.
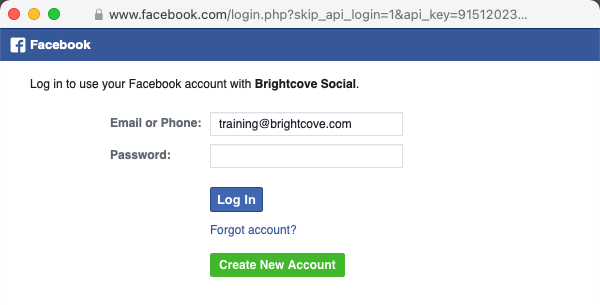
- Click Sign in with Facebook.
- A dialog will open requesting you to login to your Facebook account. Enter your credentials and click Log In.
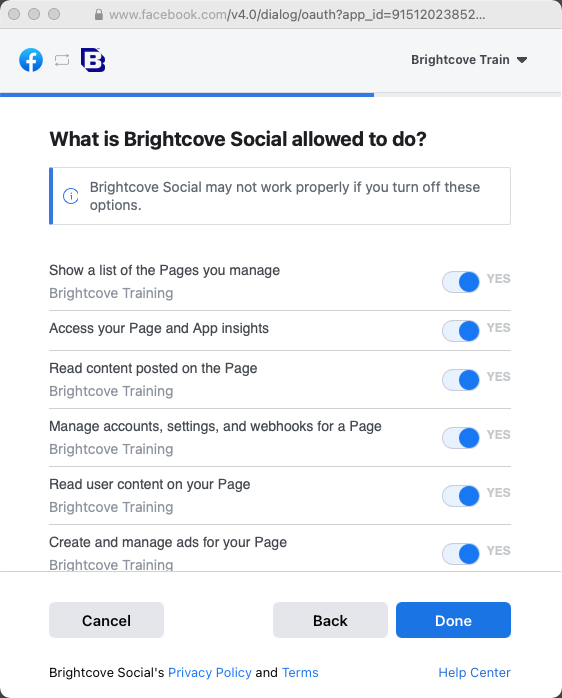
- A dialog will open confirming what Brightcove Social is allowed to do. Edit the settings as needed and then click Done.
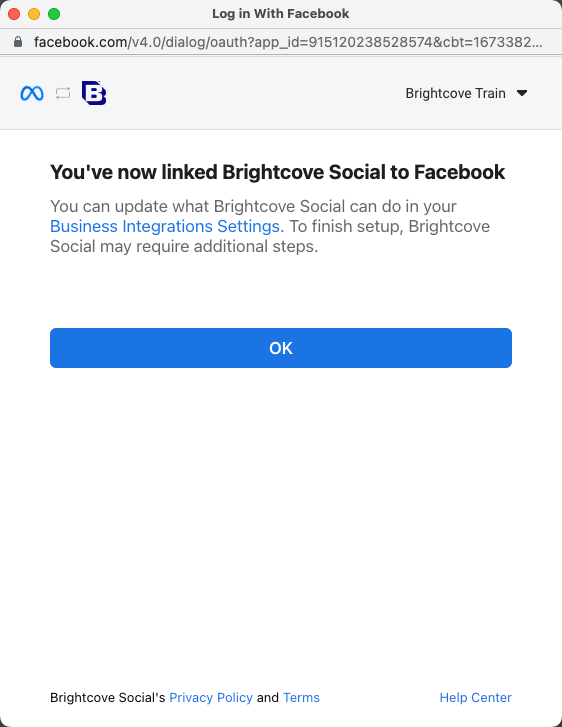
- A dialog will open confirming that Brightcove Social is linked to Facebook. Click OK.

- Give the destination a unique, descriptive name. If you have multiple Facebook pages, select the page to publish to using the dropdown list and then click Next.
- Configure the default settings for the destination. See the Setting Facebook defaults section for information on configuring default values. Click Create.
- Click Destinations in the left margin and confirm that the destination appears in the list of destinations. The value below the destination name is the destination id.
Click the destination name to edit the destination. Click the link in the Channel/Page column to open the Facebook page in another browser tab.
Setting Facebook defaults
The destination default values will be used as the default video properties when publishing videos to social platforms. To configure publishing defaults for Facebook destinations, click on the destination name and then click Edit in the Defaults for this destination section. The following Facebook video properties can be configured:
Configuring the Post Info properties
Click on the Post Info link. The following Facebook video properties can be set:
- Status Message - Options to use the Video Cloud short or long description or to enter a default description to use
- Tags - Tags to help people discover your videos
- Facebook Category - Content category for the video
- Thumbnail Source - Options to use the Facebook thumbnail, the Video Cloud thumbnail or to upload your own thumbnail image
Configuring the Schedule properties
Click on the Schedule link. Select Publish immediately to publish the video immediately or select Use Video Cloud start date to use the start date set for the video. You can also Never expire posts or have Posts expire on Video Cloud end date.
Configuring the Captions properties
Click on the Captions link. Select Use Video Cloud captions to use the captions associated with the video or No captions to not use captions.
Configuring the Target properties
Click on the Target link. The following properties can be set:
- Audience Optimization Interests - Add tags to describe the interests of people who are most likely to enjoy your post. For information, see the Facebook documentation.
- Location Restrictions - Add countries to include or exclude from seeing the post
Configuring the Monetize properties
Click on the Monetize link. The following properties can be set:
- Who is your business partner for posts to this destination? - Add a business partner for branded content posts. As you type, a list of matching businesses will appear. For information on Facebook branded content, see the Facebook documentation.
- Allow business partner to boost posts
Configuring the Rights properties
Click on the Rights link. The following properties can be set:
- Detect Matching Content - Check to enable Facebook rights management. For information, see the Facebook documentation.
- Specify Ownership - Specify copyright ownership on video, audio, or both
- Country Selection - Select Worldwide, Include Countries or Exclude Countries. If include or exclude is selected, then add the Location Restrictions.
- Apply Match Rule - Select a rule. The Match Rule determines what automatic actions happen when people upload matched videos. Match Rules are managed inside of Facebook.
- Grant Permission - Authorize certain people or Pages or Instagram accounts to have permission to post videos matching your content.
Configuring the Distribution properties
Click on the Distribution link to set where the video can be seen. The following Custom Distribution and Moderation options are available:
- Show in News Feed - Shows video in News Feed
- Allow Embedding - Allow video embeds on third-party sites
- Add as Secret Video - Videos will be accessible only via a direct URL and are not searchable for people on Facebook
- Turn off Reactions, Comments and Shares - Disallows likes and comments
Configuring the Tracking properties
Click on the Tracking link to assign a universal ID to track the video across systems. The following Universal ID options are available:
- Leave Blank
- Use Video ID from
- Use Reference ID from , if present
Configuring the Live properties
Click on the Live link to configure the Facebook Live Video Settings. Enable Allow embedding to allow the video to be embedded on third-party websites.
Click on the Live link to configure the Facebook Live Video Settings. Enable Allow embedding to allow the video to be embedded on third-party websites.
Creating an X destination
Create an X destination when you want to publish videos to an X feed. To create an X destination, follow these steps.
- Open the Social Module.
- Click Destinations in the left navigation.
- Click New Destination.
- Select Sign in with X.
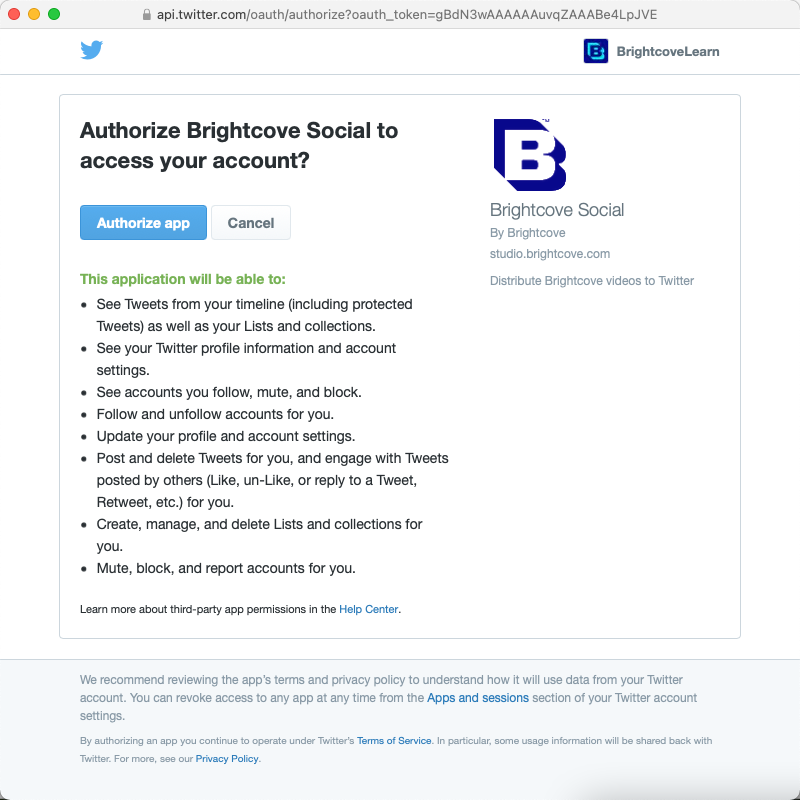
- You will be prompted to login to your X account and authorize Brightcove Social to use your account. Login to the account you want to post videos to. If you are not prompted to login, you may be logged into an X account. Make sure you are logged into the correct account before proceeding. Click Authorize App.
- Give the destination a unique, descriptive name. Click Next.
- Configure the default settings for the destination. See the Setting X defaults section for information on configuring default values. Click Create.
- Click Destinations in the left margin and confirm that the destination appears in the list of destinations. The value below the destination name is the destination id.
Click the destination name to edit the destination. Click the link in the Channel/Page column to open the X account in another browser tab.
Setting X defaults
The destination default values will be used as the default video properties when publishing videos to social platforms. To configure publishing defaults for X destinations, click on the destination name and then click Edit in the Defaults for this destination section.
Configure the default Post Content:
- Use the video's name from Video Cloud
- Use the TW_Tweet custom field from Video Cloud
- Set a custom default Post
Creating a LinkedIn destination
Create a LinkedIn destination when you want to publish videos to LinkedIn. To create a LinkedIn destination, follow these steps.
- Open the Social Module.
- Click Destinations in the left navigation.
- Click New Destination.
- Click Sign in with LinkedIn.
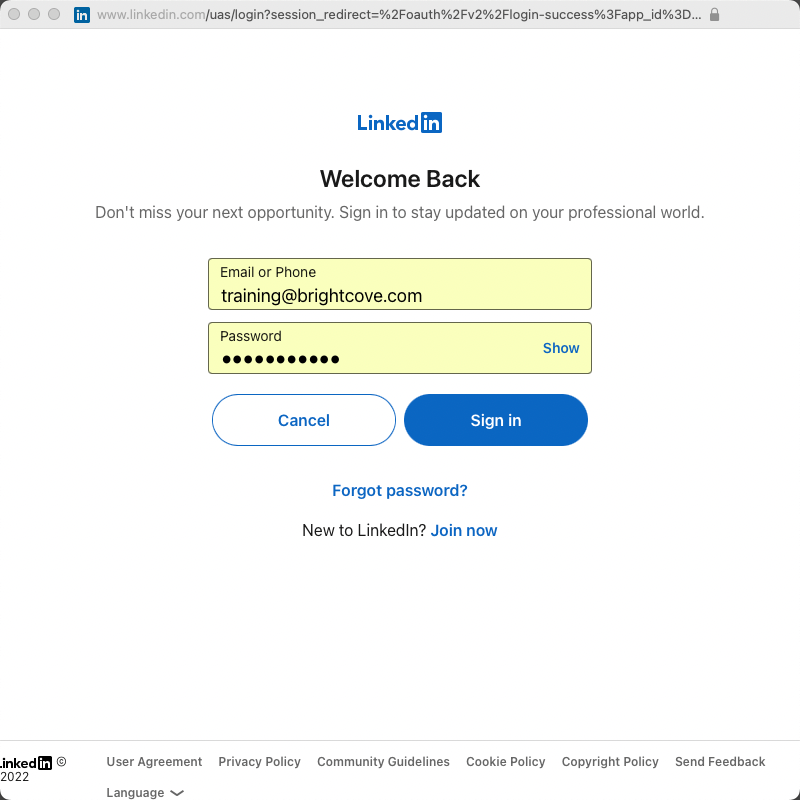
- A dialog will open requesting you to login to your LinkedIn account. Enter your credentials and click Sign In.
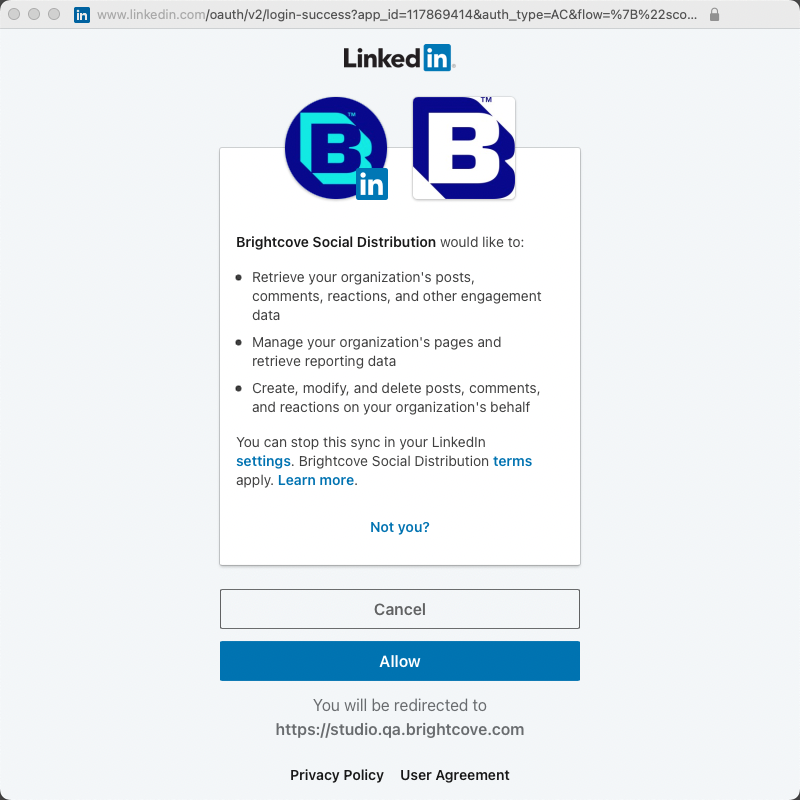
- A dialog will open confirming what Brightcove Social is allowed to do. Click Allow.
- Give the destination a unique, descriptive name. If you have multiple LinkedIn organizations, select the page to publish to using the dropdown list and then click Next.
- Configure the default settings for the destination. See the Setting LinkedIn defaults section for information on configuring default values. Click Create.
- Click Destinations in the left margin and confirm that the destination appears in the list of destinations. The value below the destination name is the destination id.
Click the destination name to edit the destination. Click the link in the Channel/Page column to open the LinkedIn page in another browser tab.
Setting LinkedIn defaults
The destination default values will be used as the default video properties when publishing videos to social platforms. To configure publishing defaults for LinkedIn destinations, click on the destination name and then click Edit in the Defaults for this destination section. The following LinkedIn video properties can be configured:
Configuring the Post Info properties
Click on the Post Info link. The following LinkedIn video properties can be set:
- Commentary - Options to use the Video Cloud short or long description or to enter a default description to use
- Thumbnail Source - Options to use the Video Cloud thumbnail or the the LinkedIn thumbnail
Configuring the Visibility properties
Click on the Visibility link and select a Visibility setting for the video. The following settings are available:
- PUBLIC - Anyone can view the video
- LOGGED IN - Anyone who is logged in can view the video
Configuring the Captions properties
Click on the Captions link. Select Use Video Cloud captions to use the captions associated with the video or No captions to not use captions.
Creating an Instagram destination
Create an Instagram destination when you want to publish videos to Instagram. To create an Instagram destination, follow these steps.
- Open the Social Module.
- Click Destinations in the left navigation.
- Click New Destination.
- Click Sign in with Instagram.
- A dialog will open with some steps that must be completed before you can create an Instagram destination. These steps should be completed before continuing.
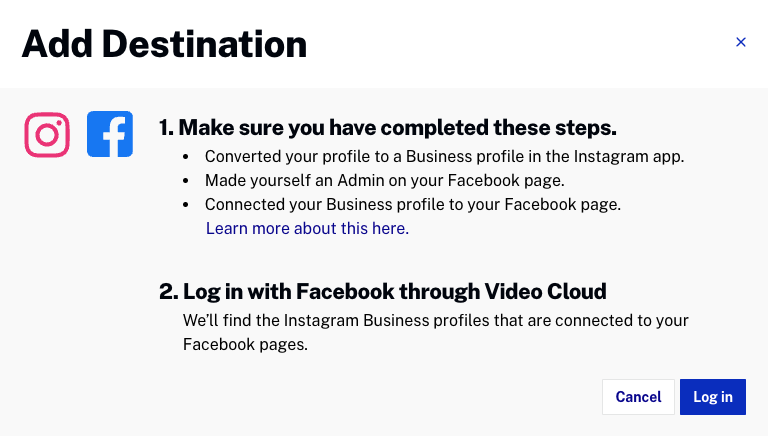
- Click Log In.
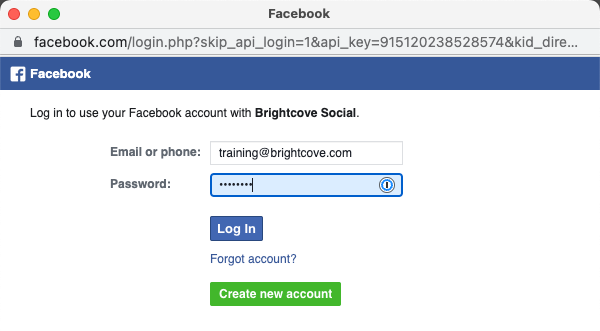
- You may be prompted to login to your Facebook account. Enter your credentials and click Log In.
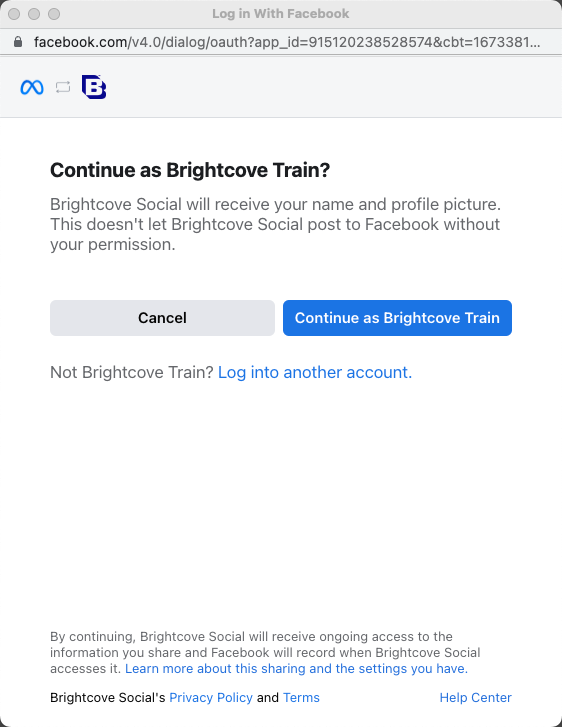
- A dialog will open confirming that you wish to continue. Click Continue.
- A dialog will open asking which Instagram Business Accounts you want to use with Brightcove Social. Click Next.
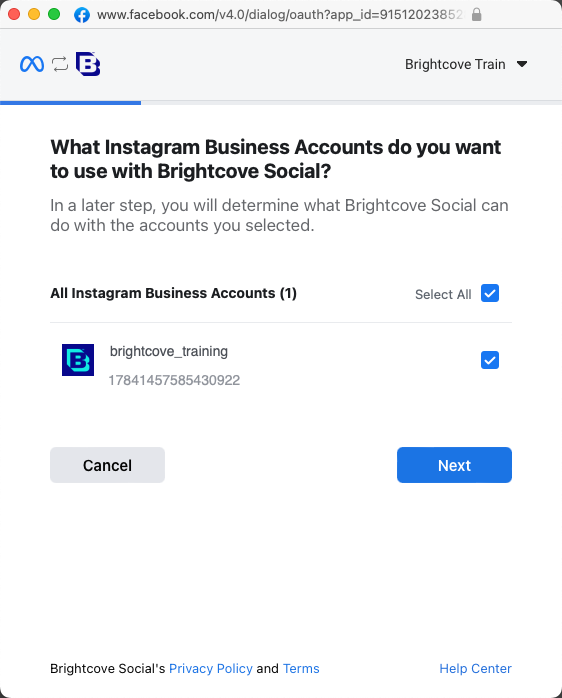
- Select the account(s) to use with Brightcove Social.
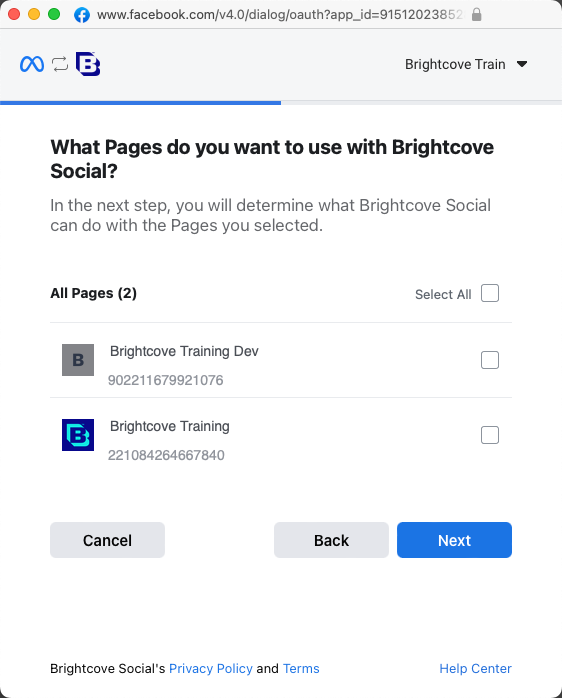
- Click Next.
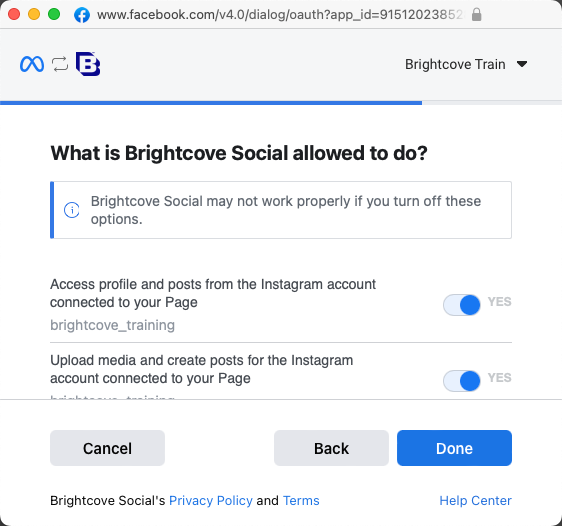
- Review the permissions for Brightcove Social and then click Done.
- A dialog will open confirming that Brightcove Social is linked to Facebook. Click OK.
- Give the destination a unique, descriptive name. If you have multiple Facebook pages, select the page to publish to using the dropdown list and then click Next.
- Configure the default settings for the destination. See the Setting Instagram defaults section for information on configuring default values. Click Create.
- Click Destinations in the left margin and confirm that the destination appears in the list of destinations. The value below the destination name is the destination id.
Click the destination name to edit the destination. Click the link in the Channel/Page column to open the Instagram page in another browser tab.
Setting Instagram defaults
The destination default values will be used as the default video properties when publishing videos to social platforms. To configure publishing defaults for Instagram destinations, click on the destination name and then click Edit in the Defaults for this destination section. The following Instagram video properties can be configured:
Configuring the Post Info properties
Click on the Post Info link. The following Instagram video properties can be set:
- Caption - Select Use Video Cloud short description to use the short description associated with the video as the caption. Select None for no caption.
Configuring the Visibility properties
Click on the Visibility link. The following Instagram video properties can be set:
- Share to feed - Choose whether the post will Appear in both Feed and Reels tabs or Only appear in the Reels tab
- Comment - Choose whether comments will be Enabled or Disabled
Creating a Sprinklr destination
Creating a Sprinklr destination when you want to send videos to Sprinklr so that you can find them in your assets library inside Sprinklr and publish them to their final destinations from Sprinklr directly. To create a Sprinklr destination, you first need to create a Sprinklr app.
- Open the Social Module.
- Click Destinations in the left navigation.
- Click New Destination.
- Click Sign in with Sprinklr.
- Fill the fields with the information you obtained when you created your Sprinklr app.
- A dialog will open requesting permission to manage your Sprinklr account. Click Submit.
- LOGIN to your Sprinklr account.
- Accept the terms of use and the privacy policy.
- Configure the default settings for the destination. See the Setting Sprinklr defaults section for information on configuring default values. Click Create.
- Click Destinations in the left margin and confirm that the destination appears in the list of destinations. The value below the destination name is the destination ID.
Click the Destination Name to edit the destination. Click the link in the Channel/Page column to open the Sprinklr details page in another browser tab.
Setting Sprinklr defaults
The destination default values will be used as the default video properties when sending videos to Sprinklr. To configure publishing defaults for Sprinklr destination, click on the destination name and then click Edit in the Defaults for this destination section. The following video properties can be configured:
Configuring the Post Info properties
Click on the Post Info link. The following Sprinklr video properties can be set:
- Name - Options to use the name or to enter a default name to use.
- Description - Options to use the short or long description or to enter a default description to use.
- Tags - Option to include, or exclude, tags.
- Include metadata as Sprinklr tags - Option to include the video ID and reference ID as Sprinklr tags
- Additional Tags - Option to enter additional tags for the videos sent to Sprinklr.
Configuring the Schedule properties
Click on the Schedule link and select a schedule setting:
- Publish immediately - To publish the video immediately
- Use Video Cloud start date - To use the Video Cloud start date set for the video. In this case, we tell Sprinklr to make the video public as of the 'Scheduled Start Date' specified in Video Cloud. If that date is in the past, Sprinklr makes the video public immediately.
- Never expire posts - Published videos on Sprinklr don't expire if they are expired on .
- Posts expire on end date - We tell Sprinklr to expire the videos when 'Scheduled End Date' specified in Video Cloud. If that date is in the past, Sprinklr expires the video immediately.
Configuring the Distribution properties
Click on the Distribution link and select an option:
- Status - Status for when the videos land on Sprinklr (Draft, Approved, Expired).
- Restricted - Select if the videos are restricted or not by default.
Deleting a destination
To delete a destination, follow these steps:
- Open the Social Module.
- Click Destinations in the left navigation. A list of destinations will appear.
- Click the destination name to delete.
- The destination details will be displayed. Click Delete and then click Delete to confirm the deletion.
Reconnecting to a destination
Brightcove Social will display an error message if any destinations have issues.
An error icon will be displayed next to the destination name. This can happen if the Brightcove permissions are removed from the social media account or when the credentials used when creating the destination are no longer valid. To resolve the issue:
- Click the destination name.
- Click the Reconnect link at the top of the page.
- You may be prompted to re-authenticate with the social media account.