Scheduling Live Events
The Live module provides the ability to schedule when recurring events start and end. When the scheduled start time is reached, the recurring event will become activated. Note that only events that were created as recurring events can be scheduled.

Notes on scheduled events
- Six pending activations can be scheduled at a time; if more are needed, please contact Brightcove Support
- Once the event is activated, the default Reconnect Time is still valid (see Live API: Static Entry Points for more information)
- All of the limitations associated with static entry points are still valid
Adding a schedule to an event
If your account is enabled for Auto Start/Stop, a Scheduling section will be available when you edit the event (on the Control Room page).
To use Auto Start/Stop, follow the instructions below:
- Open the Live module.
- Create a new recurring live event or click the Standby tab and click on an existing event.
- On the Control Room page, locate the Scheduling section.
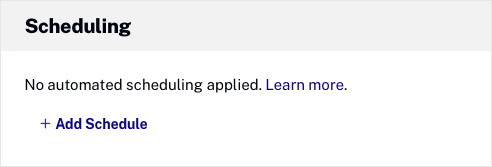
- Click + Add Schedule and enter the event Start Date and End Date.
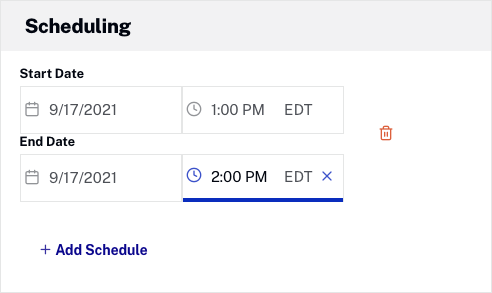
- To create another schedule, click + Add Schedule. The + Add Schedule button will become disabled when the maximum number of pending activations is reached.
-
To delete a schedule, click the delete (
 ) icon next to the schedule.
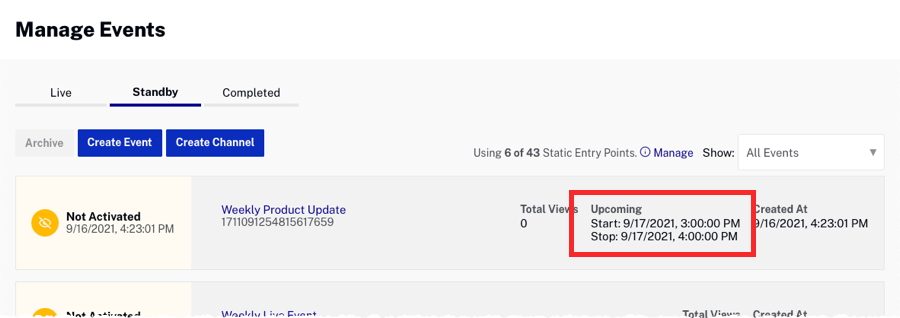
Viewing upcoming activations
To view all scheduled events, click the Standby tab. The next upcoming Start and Stop dates are shown under the Upcoming title.
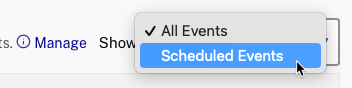
The Show dropdown at the top of the page can be used to display only scheduled events.
Once an event starts, it will be displayed on the Live tab, and the start time will be disabled.