Creating and Managing Live Events using the Live Module
Introduction
The Live module can be used to help you broadcast a live event to both desktop and mobile devices. After entering your event information into the Live module, you will be provided with a set of encoder settings that you plug into your on-site encoder. All transcoding is done in the cloud so you don't need a hardware based transcoder.
Depending on your Live subscription, you may have the ability to create events, channels or both. Typically, events are created to stream shorter length, one time or recurring events. Channels are typically used when delivering 24/7 live events. Channels and events are billed differently - check with your Customer Success manager for details.
Prerequisites
Before you can broadcast a live event, the following items are required:
- A Brightcove account with access to the Live module
- A camera to broadcast the event
- You must have your own encoding software, for example Telestream's Wirecast or Open Broadcaster Software
Limitations
- Live streams with SSAI must be published via the Live module, not the Media Module.
- Live broadcasts will experience a 20-30 second delay.
- Streaming must begin within 30 minutes of the event start (default-level account setting).
- Live DVR is not supported on Chromecast. Non-DVR streams will play on these devices instead.
- Output settings cannot be modified after the event has been created.
- Brightcove scales live streaming capacity up or down to match demand, and generally this is transparent. When an account attempts to create several live jobs in a region in a short time, however, there may be a short delay while additional capacity is prepared. If you try the request again in a few minutes, it should succeed.
Billable states
Billing for live jobs applies to Active states:
Active states (billing applies)
waitingprocessingdisconnected
Inactive states (billing does not apply)
standbycancellingfinishingcancelledfinishedfailed
Managing live events
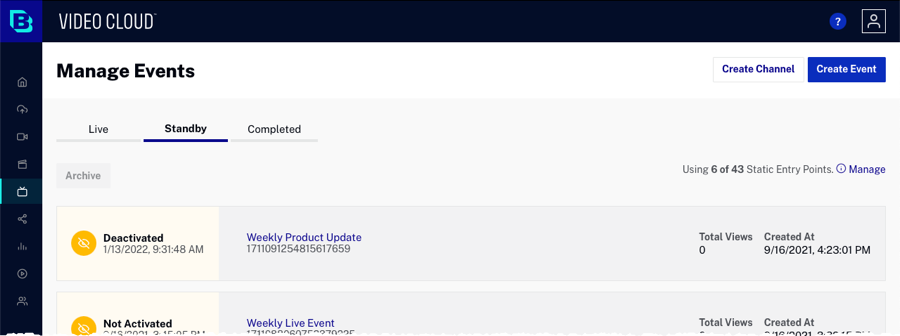
To access the Live module, login to Studio and click Live in the primary navigation. After logging in, your Brightcove account name will appear in the upper right corner of the page. If you have multiple accounts, use the account switcher dropdown to select the account you would like to work with. If the account you select hasn't been enabled for Live, an introductory "Brightcove Live" video page will appear. The Manage Events page displays three main tabs:
- Live - Lists live events that are in progress
- Standby - Lists recurring events that are in standby mode
- Completed - Lists completed events
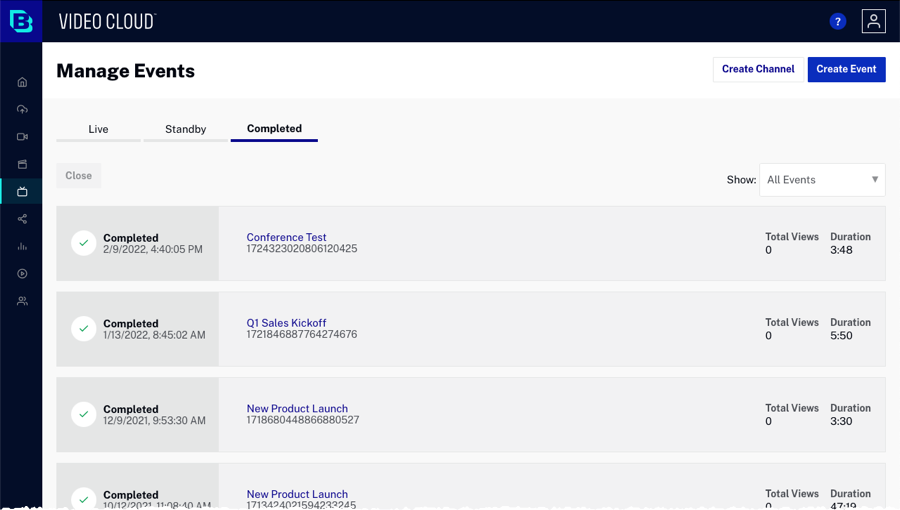
The Show dropdown can be used to filter the events that appear on the Completed tab.
The body of the page will display a list of live events with related information:
- Job Status - Status of the live stream
- Processing - Stream is live
- Processing Error - The Live stream has encountered an error
- Standby - Stream ready to be activated (static entry points only)
- Stopping - The live stream is stopping and creating any associated VOD outputs
- Completed - Live stream has completed
- Cancelling - The live stream is stopping and will NOT process any pending VOD outputs
- Cancelled - The live stream has been cancelled
- Disconnected - The encoder has been disconnected
- Deactivated - Recurring event is in a deactivated state
- Not Activated - Recurring event has been activated but a stream start has not occurred
- Waiting - Waiting for the RTMP stream (encoder to start)
- Failed - The job has stopped as a result of a system error
- Abandoned - The event finished without an encoder being connected
- Completed date and time
- Event name and ID
- Total views
- Duration
- Created date and time (for recurring events only)
To view the live event video properties, click on the event name to open the Control Room.
Creating a new event
For a complete step-by-step guide to creating and streaming a live event using the Live module, see one of the following topics:
- Step-by-Step: Using the Live Module with Telestream Wirecast
- Step-by-Step: Using the Live Module with Open Broadcaster Software (OBS)
To create a new event, follow these steps.
- From the Manage Events page click . The Create Live Event or Create Live Channel page will open. The properties when creating events and channels are the same. The screen shots in this document cover creating an event.
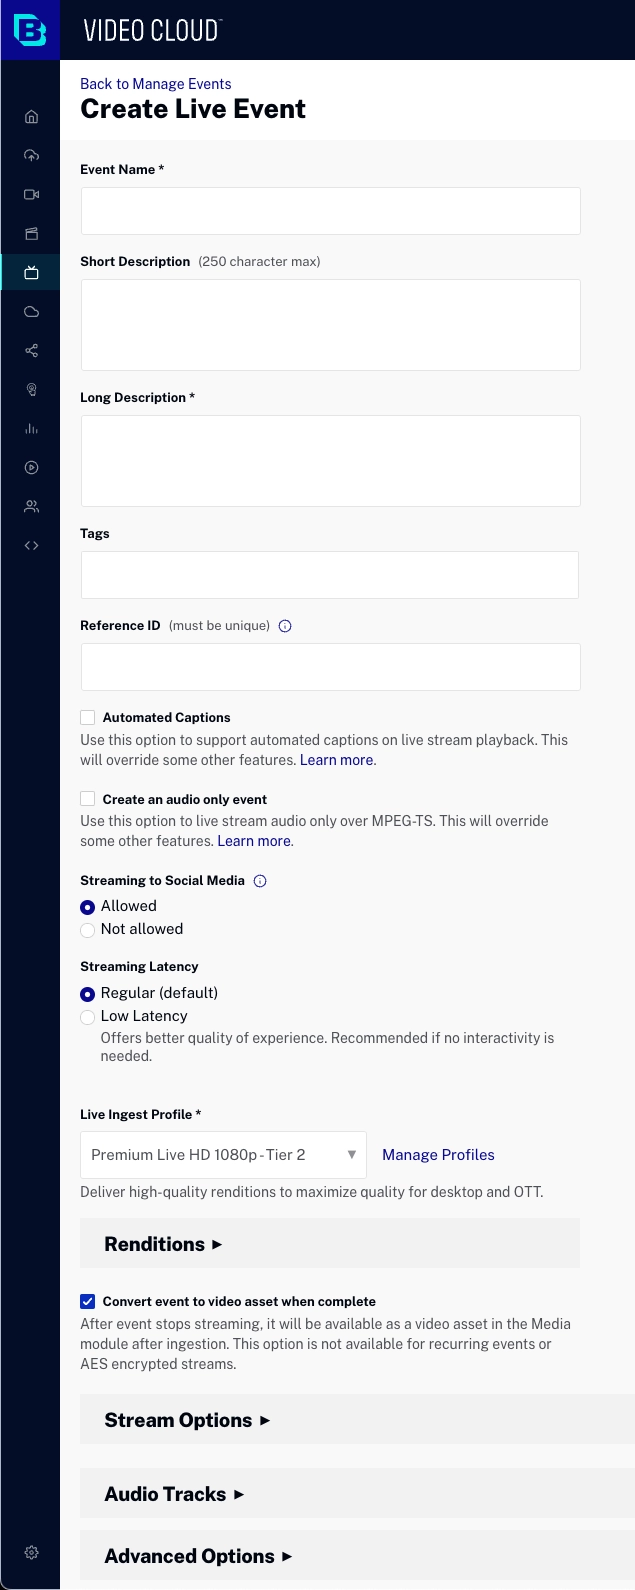
- Enter the event details:
- Event Name - Name for the event; this name will also appear in the Media module if the video is saved as a video asset (max 255 characters)
- Short Description - Description of the event (max 250 characters)
- Tags - Tags to associate with the event; tags will be assigned to the video if the video is saved as a video asset (max 128 characters and 1200 tags)
- Reference ID - Reference ID for the event; must be unique (max 150 characters)
- Any required custom fields for the account will be displayed. Assign values to the custom fields.
- Setting Streaming to Social Media to Allowed will make the event available for streaming to social media platforms. This can be done once the event has started streaming or by using the Social module.
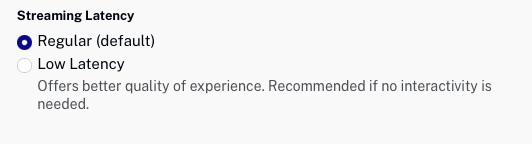
- Select a Streaming Latency option.
- Regular - Live delay can be approximately 30-45 seconds
- Low Latency - Live delay reduced to approximately 5-10 seconds (see the Using Low Latency streaming section below)
- Select a Live Ingest Profile. The dropdown list will list all Live ingest profiles. The ingest profile will control the quality and number of live renditions that are created. Clicking the Manage Profiles link will open the ingest profile editor in another browser tab. Note that you must be an account administrator to access the ingest profile editor. Click the Renditions link to view the renditions that will be created using the selected ingest profile.
- Select Convert event to video asset when complete to save a VOD version of the live video to your Brightcove account. When this option is selected, the highest quality rendition from the selected Live Ingest Profile is used as the source for the VOD video. The default ingest profile for the account is used when creating renditions. Note that the VOD version is not available as soon as the live event ends, the video will be available once the ingestion process is complete.
- Click Integrations to add an integration with a Zoom meeting. For information, please refer to the Integrating a Zoom meeting documentation.
- Click Stream Options and select a Region. The Region is the Amazon Web Services (AWS) region to use. To reduce latency, you should select the region that is closest to where your encoder is located. By default, the region is set to Oregon (US West) which will produce bad results if you are streaming from another continent. The following regions are supported:
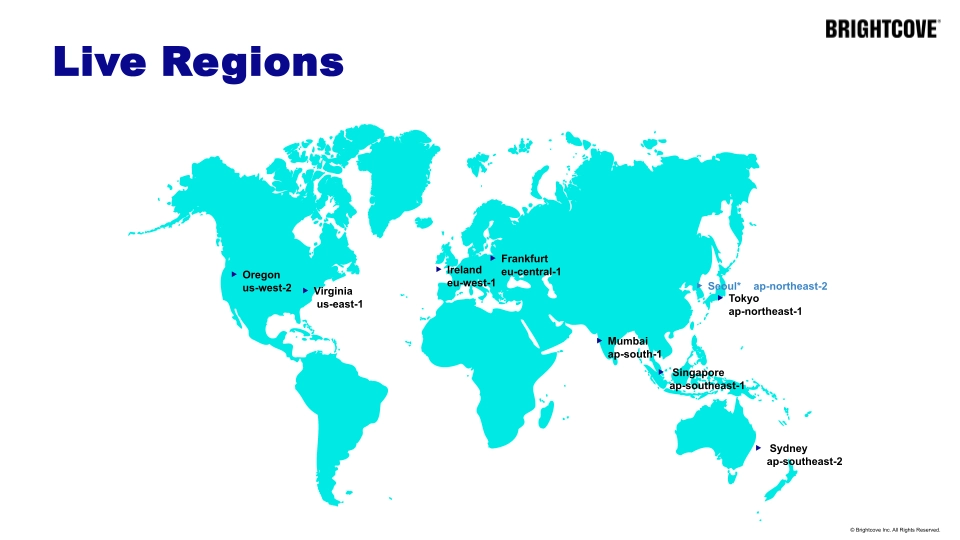
regions - Oregon (US West) (default)
- Virginia (US East)
- Tokyo (Asia Pacific)
- Seoul (Asia Pacific)
- Singapore (Asia Pacific)
- Sydney (Asia Pacific)
- Mumbai (Asia Pacific)
- Frankfurt (EU)
- Ireland (EU)
- Click Advanced Options and configure the advanced options.
- Click to start the live event. The Control Room page will open with details about the live event including the Streaming Endpoint (RTMP URL) and Stream Name which will be used by your encoder.
By default, the encoder must be started within 30 minutes from when a new event is created.
Click to end the event.
Configuring advanced options
When creating a new event, advanced options can be configured. To configure the advanced options, click the Advanced Options link when creating the event.
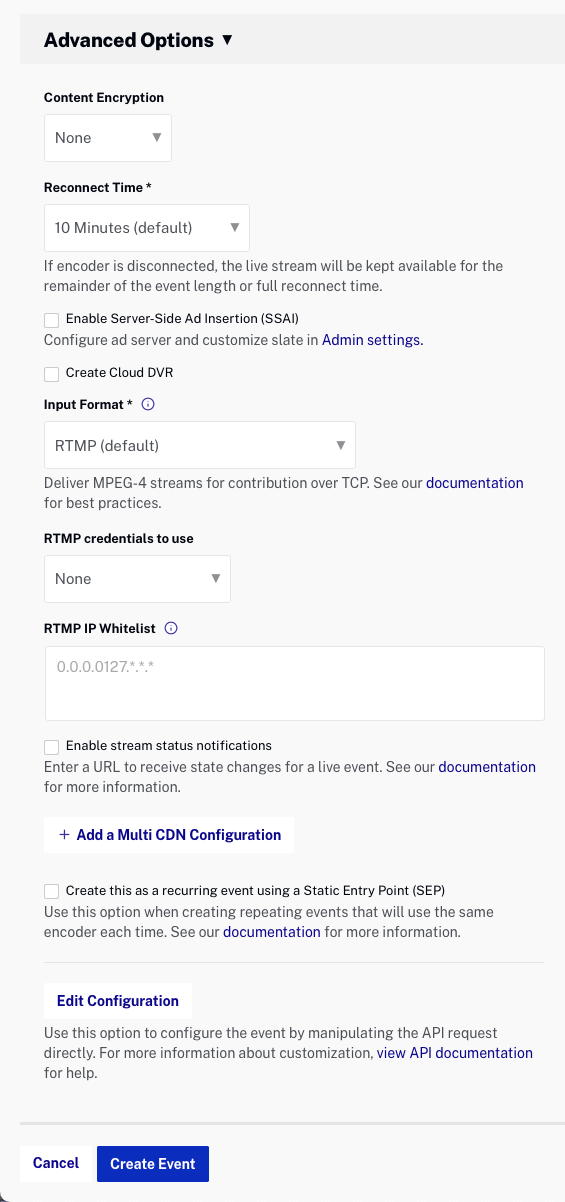
The following options can be configured:
- Content Encryption - Select the type of encryption to apply to the live output stream:
- None - No encryption is applied
- AES-128 - Secures the live HLS outputs using AES-128 encryption. If this option is selected, you must enter your Encryption Key. The key must be 32 hexadecimal characters. For best results, use a key generator, choosing the
128-bitandHexoptions. The encryption key value is only entered in the Live module, it is not used as part of your encoder settings. - Digital Rights Management (DRM) - Secure Premium content stream with Digital Rights Management technologies. For details, see the
Live DRM document.
- HLS + FairPlay
- HLS (fMP4) + Widevine Modular
- Reconnect Time - If the encoder is disconnected, this is the amount of time that the live stream will be kept available. This setting has no effect on how soon the encoder must be started when a new event is created.
- Enable Server Side Ad Insertion (SSAI) - Enables server side ad insertion. Ads are configured as part of the server-side ad settings. For information on working with server-side ads in the Live module, see Implementing Server-Side Ads in the Live Module.
- Fill Slate - Select a fill slate. The fill slate will be displayed when there are gaps in a live stream ad break that cannot be filled with a dynamically-served ad. Create fill slates as part of the Live settings.
- Ad Audio - When checked, normalizes the audio levels on ads based on the adjustment that is set. This can be used as a way to help make sure ads aren’t significantly louder than the content.
- Create Cloud DVR - Enables DVR capability. If the event is published using a Brightcove Player version earlier than 6.33.0, the Live DVRUX Plugin is required. Content is available for 7 days after the event finishes.
- DVR Window - The amount of time, in seconds, to keep in the live DVR manifest. The maximum value allowed for this field is 86400 seconds, which is 24 hours in seconds.
- Input Format - The input format from the encoder that will be sent to the Live module. This feature enables additional metadata in a live stream like now, now-next, more flexibility in subtitles and captioning, audio tracks and enables streamlined digital experiences with standard broadcast level data. The following input formats are supported:
- RTMP (default)
- Real-Time Transport Protocol (RTP)
- Secure Reliable Transport (SRT)
- RTMP credentials to use - Select the RTMP credential used to secure the Streaming Endpoint. Note this option will only appear if the Input Format is RTMP and at least one RTMP credential was created as part of the Live settings.
- RTMP IP whitelist - Enter a set of IP addresses allowed to connect to the RTMP endpoint. This controls who can connect to the RTMP endpoint. Please leave the option empty if you want to keep it open to all IPs. Note that this option will only appear if the Input Format is RTMP.
- Enable stream status notifications - When checked, enter a Notification URL. An http request will be made to the Notification URL when there is a change in the job status. This can be used to update a server in response to changes in the job status. For more information on using API notifications, see the Live API Notifications topic.
- CIDR Whitelist - Enter a set of IP addresses that are allowed to connect to the RTP or SRT endpoint. This controls who can connect to the RTP or SRT endpoints. Note this option will only appear if the Input Format is RTP or SRT.
You can specify
0.0.0.0/0to allow all networks.To allow specific IP addresses, use
{IP address}/32(example: 255.160.10.1/32).See Classless Inter-Domain Routing for more information.
- + Add Multi CDN configuration - Enter a label and URL for additional CDNs. This is a whitelist of CDNs that are allowed to ask our primary CDN for the video segments. You are responsible for configuring the secondary CDN correctly.
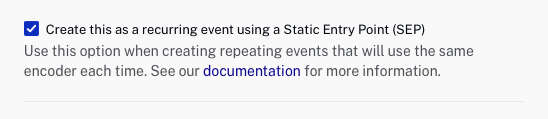
- Create this as a recurring event using a Static Entry Point (SEP) - Allows a single live stream to be created and then activated/deactivated when needed. For information, see the Introduction to recurring events section of this document.
Click Edit Configuration to view/edit the API request that will be made to create the live stream. Caution should be used when editing the API call directly.
Using low latency streaming
Latency refers to the delay between when a video is captured and when it’s displayed on a viewer’s device. When creating a new live event, there is an option to use Low Latency.
Low latency provides near real-time streaming with streaming delays reduced to approximately 5-10 seconds. Low latency is recommended when faster interactions are needed but may provide an inferior quality of experience. There are factors outside of Brightcove's control that may determine whether a low latency feed can be delivered (encoder, viewer bandwidth, etc.).
For low latency source encoder setup, the following is required.
- 30 frames per second, drop framerate is not supported (29.97)
- Codec: H264
- Profile:Baseline
- Video Codec: H264
- H264 Profile:Baseline
- Audio Codec: AAC
The following options are not supported when using low latency:
- DRM
- SSAI
- Redundancy
- Audio-only
- Multi-Language Audio
- B-frames on the input
- Add a Multi CDN Configuration
Note: Low latency requires Brightcove Player version 6.62.0 and above.
Introduction to recurring events
Selecting the Create this as a recurring event using a Static Entry Point (SEP) option allows for a long-running live stream that can be activated and deactivated while keeping the same entry point URL and playback URL. When using recurring events, the streaming endpoint URL and video ID will not change.
Limitations
The following limitations apply when working with recurring events:
- The Convert event to video asset when complete option is not available. An alternative is to use clipping to archive the full live event as a VOD. Clips can be created up until the next activation of the stream, or for 7 days, whichever is shorter. When the stream is re-activated, previous recording sessions are removed from the server and can no longer be clipped.
- Job settings can not be modified, they are currently tied to the settings that initially created the recurring event.
- Activating the stream can take up to 60 seconds for the event to become available. Some encoders have built-in retry (Wirecast, Elemental, etc.) so the encoders will reconnect as soon as the entry point is available.
- Reconnect Time is still applicable for recurring events on encoder disconnects. If the Reconnect Time is reached, the recurring event will be set to a deactivated state. Brightcove recommends deactivating a stream when a job completes and setting the Reconnect Time to an acceptable window of time to wait in the event of a disconnect (input hour costs are accrued during this wait period).
- You should always stop the encoder before deactivating a recurring event. Accounts are allocated a finite number of recurring events. If the limit is reached, you will need to stop one of your recurring events before you can create a new one. If you have reached the maximum number of recurring events and attempt to create another one, an error will be returned.
- When you deactivate a recurring event, the last few seconds of the stream remain playable for some time, related to clipping purposes. .
- Accounts are limited to a total of 34 SEP events (3 per region, except for us-west-2, where 10 allowed). If you reach the limit, you must end one SEP event in the region where you want to create a new one before you can proceed.
- If you attempt to activate more than 5 SEP jobs at once, you will receive an error like the following:
{
  “message”:“Allocating additional streaming capacity to the region. Please retry your request.: no_streaming_capacity_in_region”,
  “statusCode”:500,
  “name”:“ApiError”,
  “isApiError”:true
}
You will need to wait until some jobs have finished activating before retrying the request.
Working with recurring events
To create a recurring event, select the Create this as a recurring event using a Static Entry Point (SEP) option when creating a live event and then click Create Event.
When the recurring event is created, it will appear in the Standby tab on the Manage Events page.
The recurring event status can be one of:
- Not Activated - Recurring event has been created and streaming has never started
- Waiting - Recurring event is activated and waiting for stream
- Streaming - Recurring event in progress
- Disconnected - Recurring event is in the process of being stopped
- Deactivated - Recurring event is deactivated
- Archived - Recurring event has been archived
Activating a recurring event
Activating a recurring event makes the job available for streaming. The recurring event should be activated before the encoder is started. To activate a recurring event:
- Click on the Standby tab.
- Click on the event name to open the event in the Control Room.
- Click .
- Start your encoder.
When the recurring event is activated, it will move from the Standby tab to the Live tab.
Deactivating a recurring event
Deactivating a recurring event disables the job for streaming. When the event is over, the recurring event should be deactivated. To deactivate a recurring event:
- Click on the Live tab.
- Click on the event name to open the event in the Control Room.
- Click Deactivate.
- Stop your encoder.
Archiving a recurring event
Archiving a recurring event permanently deactivates the job so it can't be enabled for streaming. Eventually the event will be deleted. Only events where streaming was started can be archived. If a recurring event was created and streaming never started, a Cancel button will appear vs. an Archive button.
To archive a recurring event:
- Click on the Standby tab.
- Click on the row for the event to select it.
- button becomes red
- Click
Viewing live event info using the Control Room
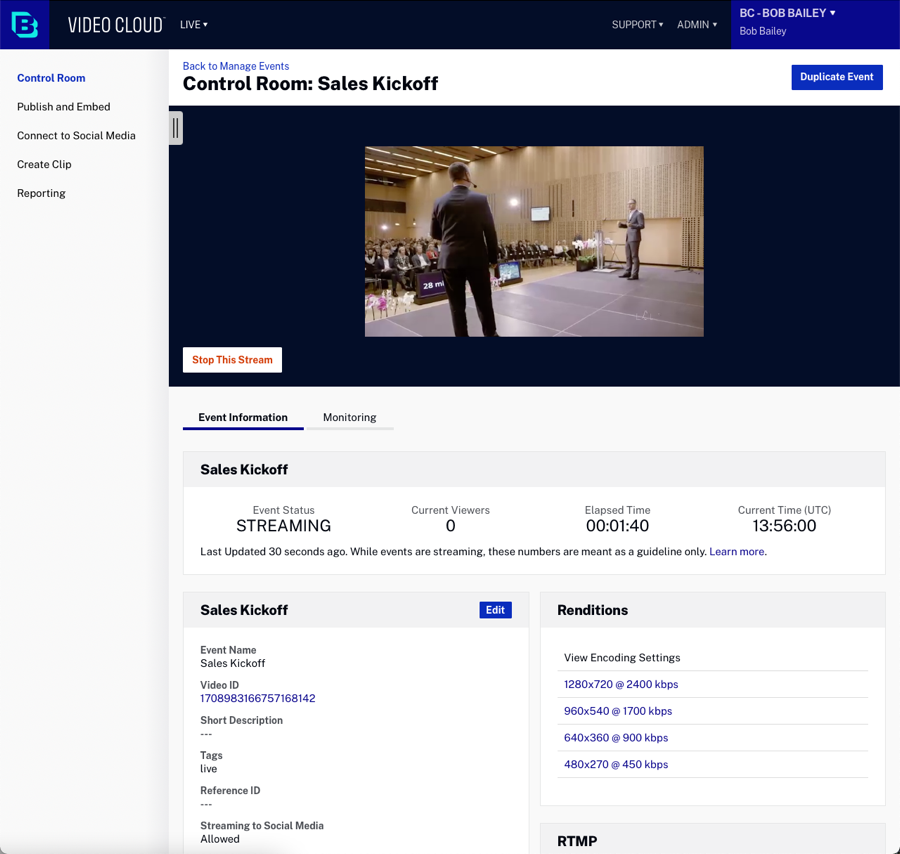
The Control Room page is used to view information about a live event. When you create a new live event and streaming begins, the Control Room page will open displaying the event information. A preview of the event will appear in the preview player. The Control Room page is also displayed when you click on an event on the Manage Live Events page. Click the Monitoring tab below the preview player to view monitoring information while the stream is in progress.
The Control Room page Event Information tab is organized into the following sections:
Click the Monitoring tab below the preview player to view monitoring information while the stream is in progress.
Event Status
The Event Status section is displayed only while an event is in progress. The following information is displayed:
- Job Status - Current job status
- Streaming - Stream is live
- Processing Error - The Live stream has encountered an error
- Standby - Stream ready to be activated (static entry points only)
- Stopping - The live stream is stopping and creating any associated VOD outputs
- Completed - Live stream has completed
- Cancelling - The live stream is stopping and will NOT process any pending VOD outputs
- Cancelled - The live stream has been cancelled
- Disconnected - The encoder has been disconnected
- Waiting - Waiting for the RTMP stream (encoder to start)
- Failed - The job has stopped as a result of a system error
- Current Viewers - Number of current viewers. Please note this is just an estimation and the figure may not be accurate for events with a low number of viewers or spikes in the audience.
- Elapsed Time - Stream elapsed time since it was started (not when it was created)
- Current Time - Current UTC time
Event Information
The Event Information section displays the following information:
- Name - Name of the event
- Job ID - Internal job ID
- Video ID
- Short Description
- Tags
- Reference ID
- Streaming to Social Media - If Allowed, the live event can be assigned to a scheduled social event
- Streaming Endpoint (RTMP URL) - Streaming endpoint used by the encoder
- Stream Name - Stream name used by the encoder
- Region - Streaming region
- Playback URL - URL that can be used to view the live stream in a non-Brightcove Player
Clips
The Clips section displays all of the clips that were created from the live stream. Clicking the clip name will open the clip in the Media module. For information on creating a clip, see Creating a Video Clip Using the Live Module.
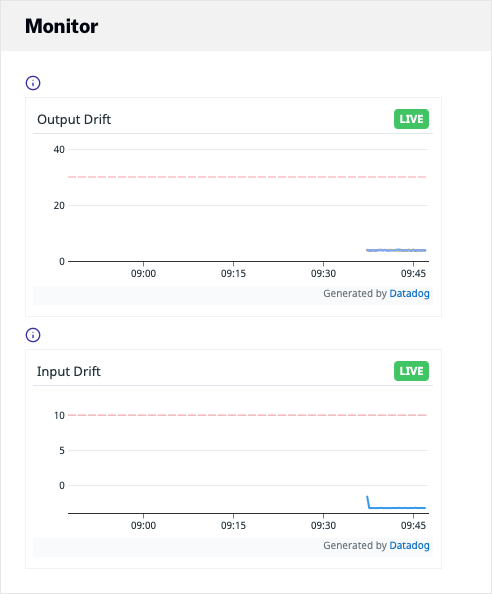
Monitor
The Monitor section displays the Input and Output Drift for the stream. Click Retrieve updated data and graphs to view updated graphs. If the account is enabled for extended monitoring, the Monitor section will be replaced with a Monitoring tab below the preview player. See the extended monitoring section for details.
Renditions
The Renditions section displays details about the renditions that were created. Clicking on a rendition link will show the encoding settings for the rendition.
RTMP
The RTMP section can be used to add RTMP Outputs. This allows the live stream to be sent to other RTMP entry points. This can be used to send the live to stream to Facebook or YouTube for example.
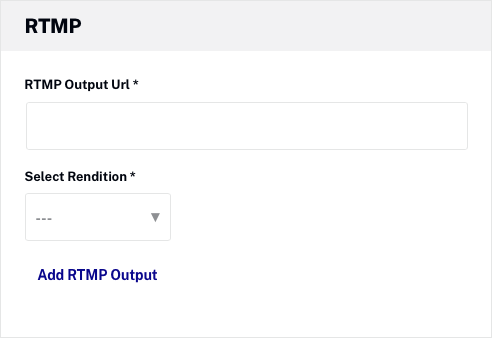
Enter the RTMP Output URL and the Rendition to send. Note that the format of the output URL may change depending on where the RTMP stream is being used. For more information, see Using Live RTMP Outputs to Stream to Facebook and YouTube.
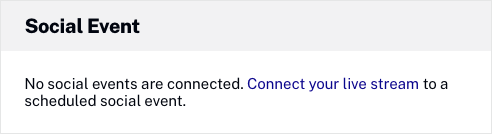
Social Event
The Social Event section will display information about the scheduled social event the live stream is assigned to, if any.
Viewing extended monitoring
By default, the Live module will display a Monitor section with Output and Input Drift graphs. If you would like to enable the extended monitoring, please contact your Brightcove account representative. Extended monitoring will display a Monitoring tab below the preview player. The monitoring information is available while an event is in progress and for up to 1 hour after the event ends.
Click Select Graphs to select which graphs appear and for a description of what each graph contains.
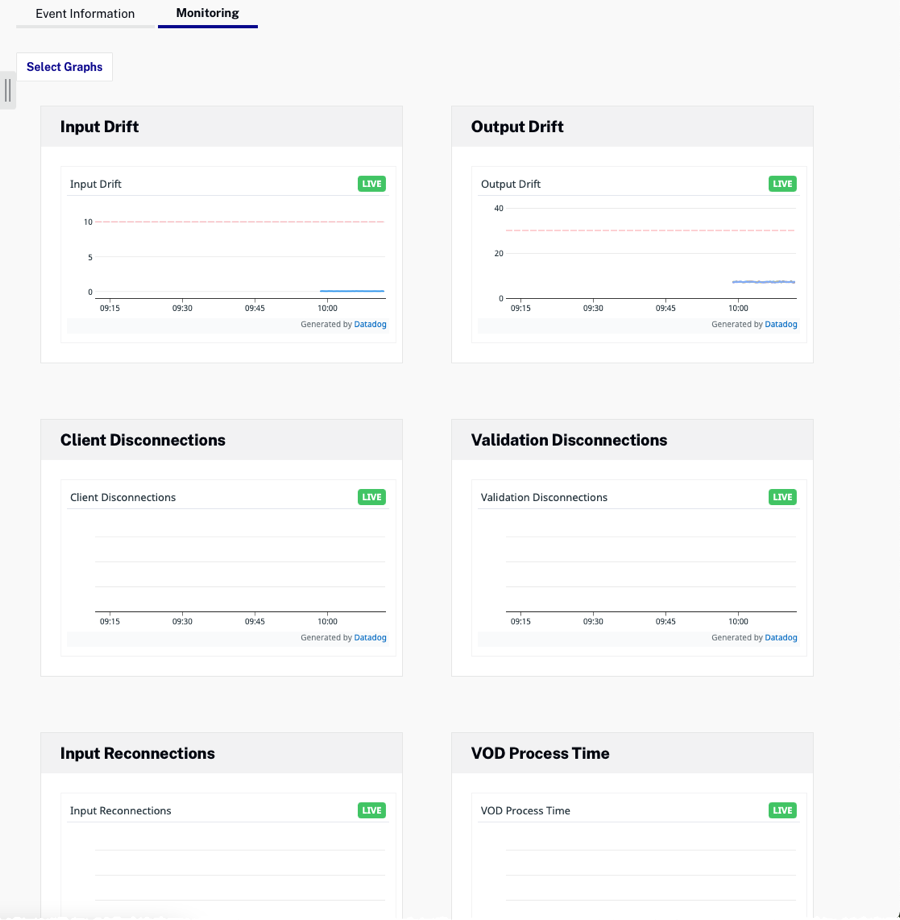
The following graphs are available:
- Input Drift - Input drift can be an indicator of stream health, and represents the stream currently being sent from the encoder to the Brightcove entry point.
- Output Drift - Output drift is the processing of each rendition in the stream. Higher values could increase the latency of the stream and/or cause viewing problems for end users.
- Client Disconnections - Disconnections from the encoder connected to the entry point. This is an indication of connectivity issues or incorrect output settings in your encoder.
- Validation Disconnections - Forced stream disconnections due to unexpected input settings from your encoder.
- Input Reconnections - Reconnections from the encoder to the entry point. This indicates a reestablished connection from your encoder to the entry point.
- VOD Process Time - Live to VOD processing time. This is the time before syndicating the clip to a content management system, including Brightcove Video Cloud.
- Cuepoint Detected - Detected ad triggers sent in the input stream via inband SCTE-35 or Live API triggers.
- Cuepoint Missed - Detected Ad triggers that could not be executed. This may be a result of incorrect formatting. See documentation for formatting.
- SSAI Tracking Event Counts - Server-side tracking pixel response time by HTTP status code and host.
- Variant Response Time - HLS master manifest response time for session-based streams.
- Chunklist Response Time - HLS variant (rendition) manifest response time for session-based streams.
- Inserted Ad Counts - Total number of inserted ads.
- RTMP Output Drift - Output drift is the processing of each RTMP rendition in the stream. Higher values could increase the latency of the stream and/or cause viewing problems for end users.
- RTMP Output Disconnection - Disconnections encountered for the RTMP output. This is an indicator of connection problems between the RTMP server and the destination server.
- RTMP Output Connection - Reconnections for the RTMP output stream. This occurs typically after being disconnected from the destination server.
Monitoring the stream
The Monitor section displays the Output and Input Drift graphs. Click the Retrieve updated data and graphs link to view the information. Output Drift measures the healthiness of the stream. Output Drift is defined as the difference between the wall clock vs. stream timestamps (TS). In live streaming, ideally, the wall clock should run at the same pace as stream TS, if the stream TS arrives slower than real time this means that there is a problem (bottleneck) in the system.
Input Drift measures the health of the input stream and is defined as the difference from the input timestamp and the real time clock.

Duplicating an event
Duplicating an event makes it easy to create another event with the same settings that were used to create a prior live event. To duplicate an event, follow these steps:
- Click on an event to open the Control Room page.
- Click at the top of the page. A new live event will be created using the settings from the prior live event. Make changes to the event properties as needed.
- Click Create Event.
Generating the embed code for a live event
To generate the embed code for an event, click Publish and Embed in the left navigation. Two types of embed code are available:
- Standard - iframe embed code. Recommended for most cases. This type places the player inside an <iframe> tag.
- Advanced - In-page embed code. Allows the player to exist in the HTML page directly, not in an iframe. This offers developers the benefits of ease of accessing the player and associated properties and events.
You also have the ability to get the URL to the published player. This is useful for viewing the event in a browser.
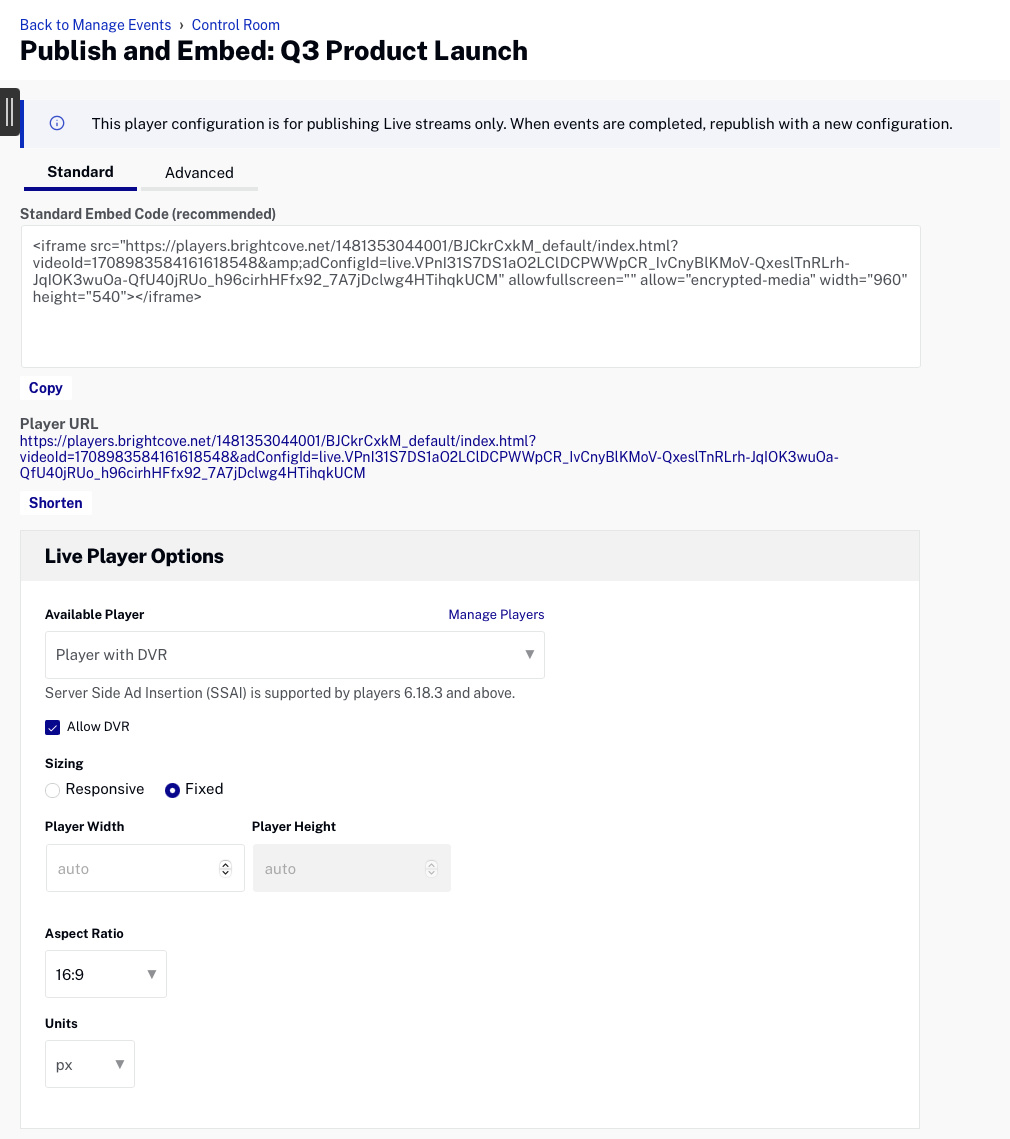
To generate the embed code for a live event, follow these steps:
- Click on an event to open the Control Room page.
- Click Publish and Embed in the left navigation.
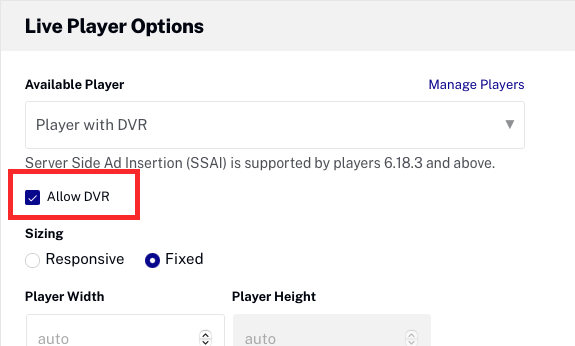
- Select a Player.
- When Allow DVR is checked, the player will request the DVR manifest instead of the live manifest. This option is only available if the event was created with the Create Cloud DVR option selected. If the event is published using a Brightcove Player version earlier than 6.33.0, the Live DVRUX Plugin is required.
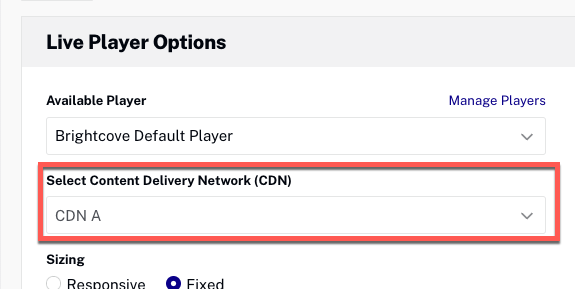
- Select Content Delivery Network (CDN). This option is used to select a specific CDN in case the Live Job was configured for Multi-CDN. It should look similar to this:
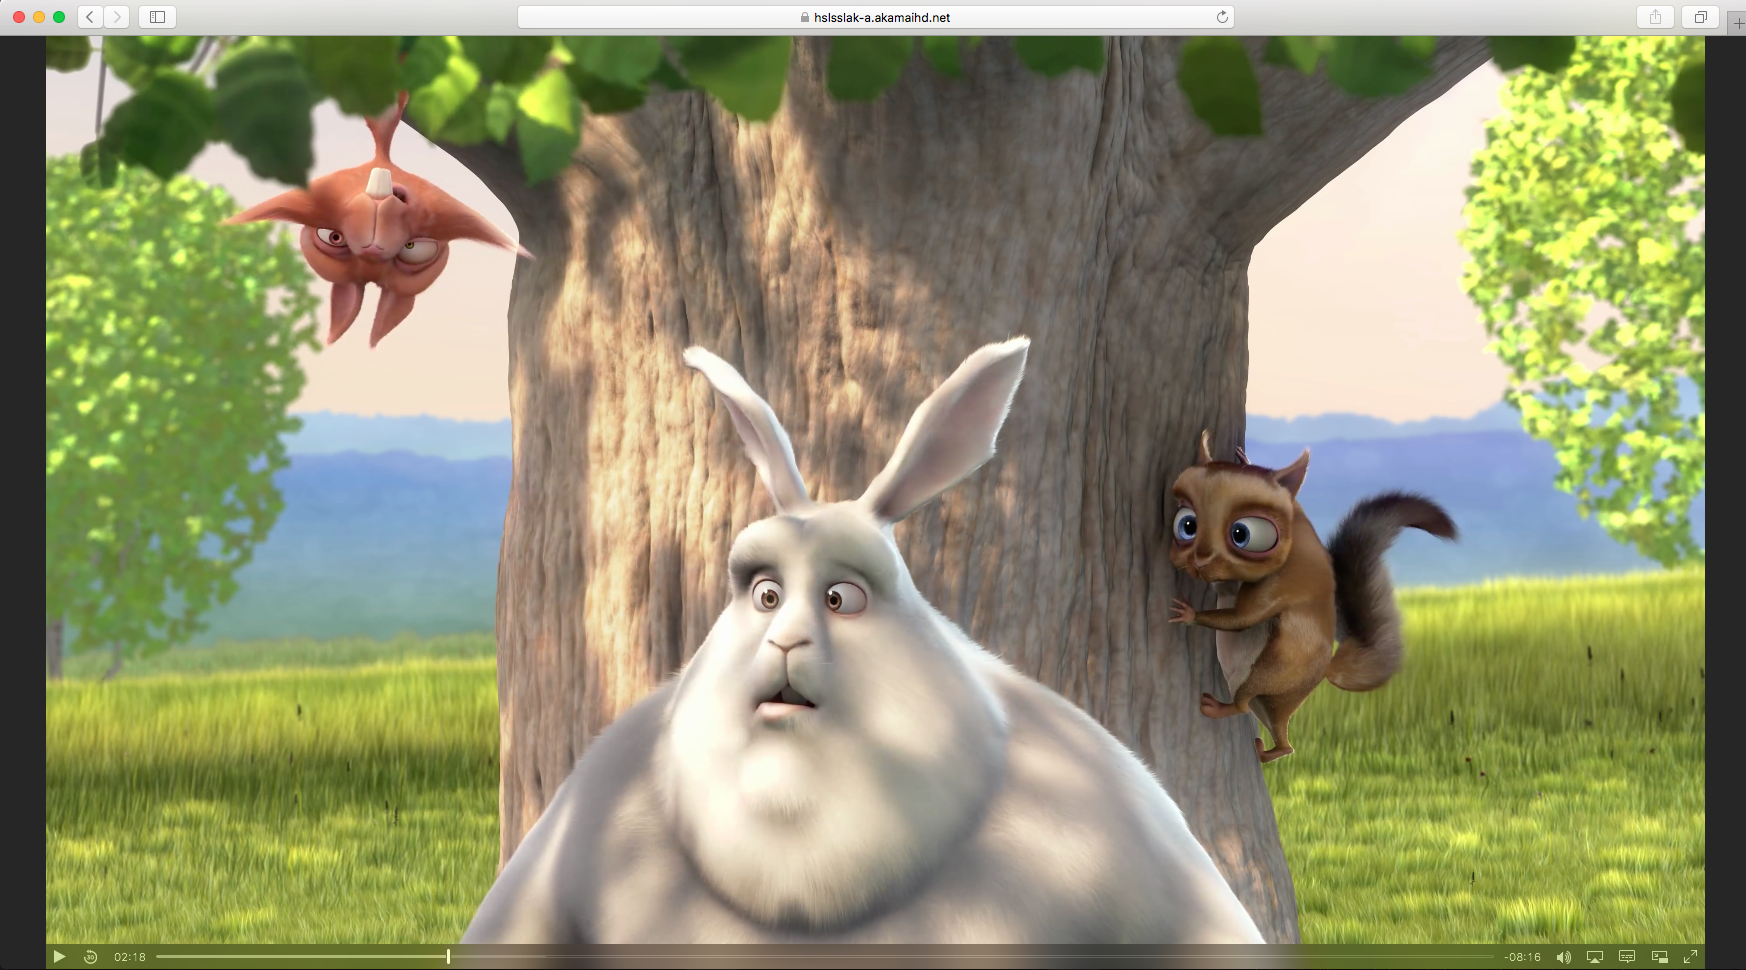
- Click the Player URL to preview the event in a browser or copy the appropriate embed code to use.
Another option to preview your Live Streaming is doing it through the API.
Copy the playback_url value returned from creating a Live job using the Live API, and paste it into the Safari browser. Since this browser supports native HLS playback, you should see your live stream.
Also, you can copy your URL and paste it into the Brightcove Player Reference App here:
https://players.brightcove.net/3303963094001/player-reference-app/index.html
Connecting to social media
It's possible to connect a live event to a social event that was scheduled in the Social module. Before you can connect a live event to a social event, you should create a live event in the Social module. Only events that were created with the Streaming to Social Media setting set to Allowed can be assigned to a scheduled event.
To connect a live event to a social event, follow these steps:
- Create a live event in the Social module.
- Click on an event to open the Control Room page.
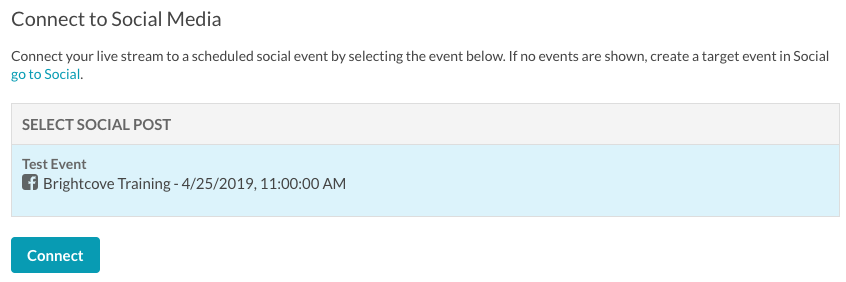
- Click Connect to Social Media in the left navigation. A list of scheduled social events will display. If no events display, no scheduled events exist.
- Click on a scheduled event and then click Connect.
Once the event is assigned using the Live module, return to the Social module to preview the event and start the streaming process to the social platform.
Creating a clip
Clips can be created while the event is in progress or after the event has ended. If clips can't be created, a message will appear when hovering over Create Clip in the left navigation. For information on creating a clip, see Creating a Video Clip Using the Live Module.
Live event reporting
Click Reporting in the left navigation to view Live analytics.
Requesting an ad
If the Enable Server Side Ad Insertion (SSAI) option was selected when the event was created, the Control Room page will display a Goto Ad button. When clicked, the length of the ad break can be selected.
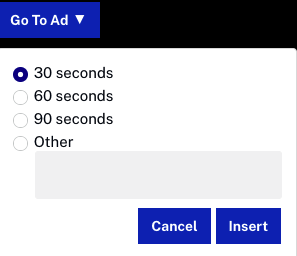
Click to insert an ad break into the live stream. If the ad doesn't fill the entire ad break time, the fill slate will be displayed. For information on working with server-side ads in the Live module, see Implementing Server-Side Ads in the Live Module.
Troubleshooting live stream issues
If you need further help getting your live event to work, you can contact us. To make sure you get the fastest response possible, below is a list of what support will need to solve the problem.
- The specific symptoms the stream is having. For example, does it not play at all or does it stutter or freeze?
- Whether this stream worked correctly in the past
- The entry point URL you are using in your encoder
- The encoding software and hardware are you using
- The URL to the player to which you have published the live event
- The video ID of your live asset
- The results of a trace-route from your encoder to the publishing point host
Limitations
- Currently, Brightcove only supports a limit of 20,000 VODs per job.