Also see Adding Dynamic Overlays.
Introduction
You can use the static image overlay feature to superimpose a static image onto a video in a Cloud Playout channel. A static image is a still image that doesn't have motion. You prepare the image and store it outside of Cloud Playout and provide to us as a publicly accessible , unauthenticated http/https URL.
Examples
- You want to insert a static image overlay at a specific time during the channel’s runtime and run it for 10 seconds. You want the image overlay to appear in the lower-right corner of the video frame. You want the image overlay to have 50% opacity.
- You want to insert two static image overlays so that they both appear in the video frame either at the same time or with some overlap. You want the display of the image overlays to slightly overlap so that one image overlay appears in a location and, while that image overlay is still showing, another image overlay appears in another location.
Implementation
- The image that you overlay on a video should be a .tga or a .png file.
-
Create and manage static overlay images for an account using the side menu item:
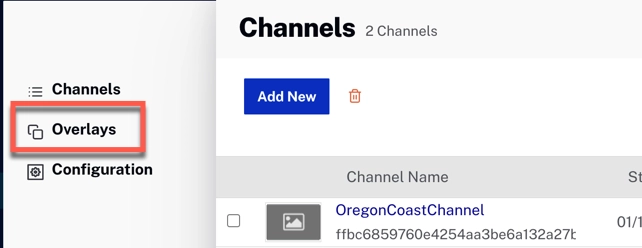
Overlays -
The overlay images then can be associated with a channel:
Associate Overlay with Channel
Overlays in Draft Channel
Overlays in Running Channel -
You can insert up to two layers at one time. Each image should be a separate layer. If different images are scheduled on same layer for the same time or if they overlap during any time window, then the image that is provisioned later will remove the existing image on the same layer.
- The layers are in Z order, which means that overlays with higher values of layer are inserted on top of overlays with lower values of layer.
- You can set up the overlays to all appear on the underlying video at the same time (or not), and you can set them up to physically overlap each other (or not).
-
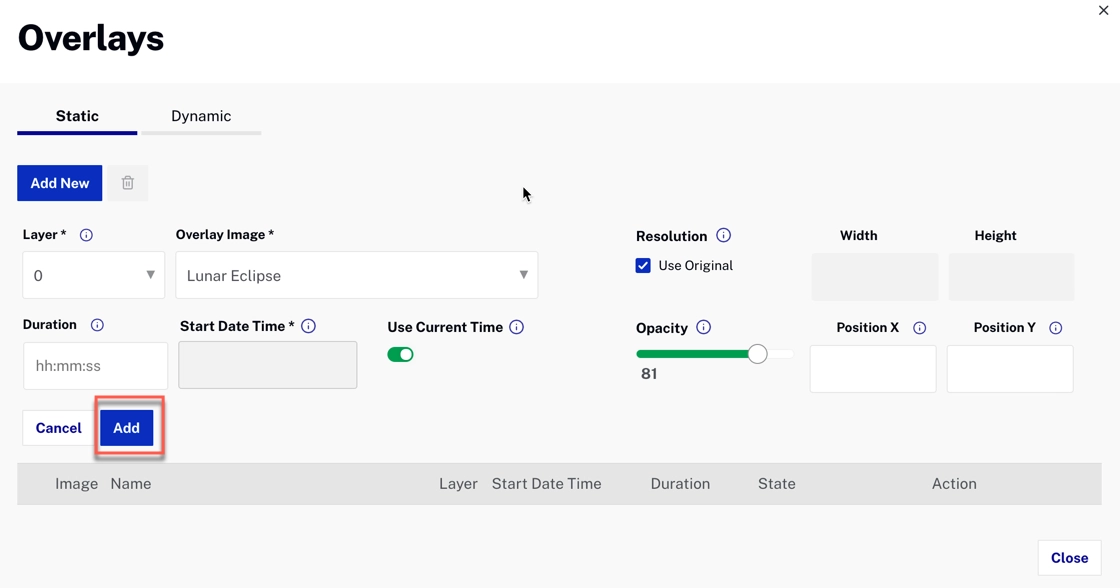
You can configure each image overlay with a start time and duration:
- If the duration is set, the maximum duration is 24 hours
- If the duration is not set, the overlay will continue to be shown until deactivated
- Start time must be a future time
- You can configure with an opacity of 0 - 100. 0 is transparent and 100 is fully opaque.
-
You can position the image overlay on the video frame, as specified by x/y coordinates. By default the X, Y coordinates are considered as 0, 0 (the top left corner of a video frame):
- Position X: the position of the left edge of the overlay relative to the left edge of the video frame, in pixels. If the placement causes the overlay to extend beyond the right edge of the underlying video, then the overlay will be cropped on the right.
- Position Y: the position of the top edge of the overlay relative to the top edge of the video frame, in pixels. If the placement causes the overlay to extend beyond the bottom edge of the underlying video, then the overlay will be cropped on the bottom.
-
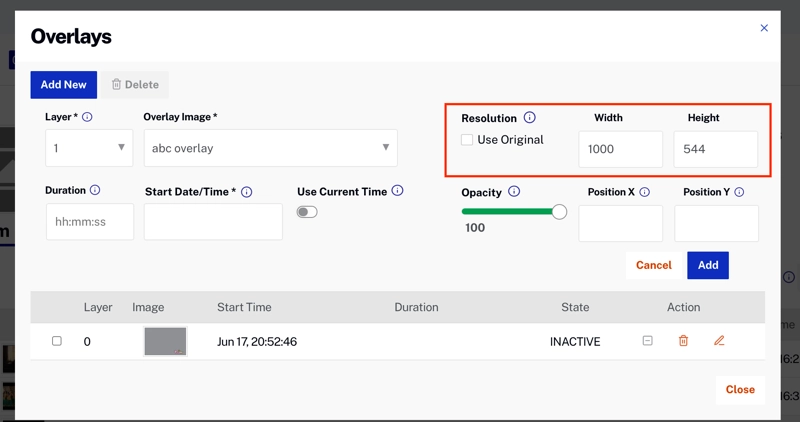
Sizing: the Use Original option can be used for Resolution to use the original resolution of the supplied image:
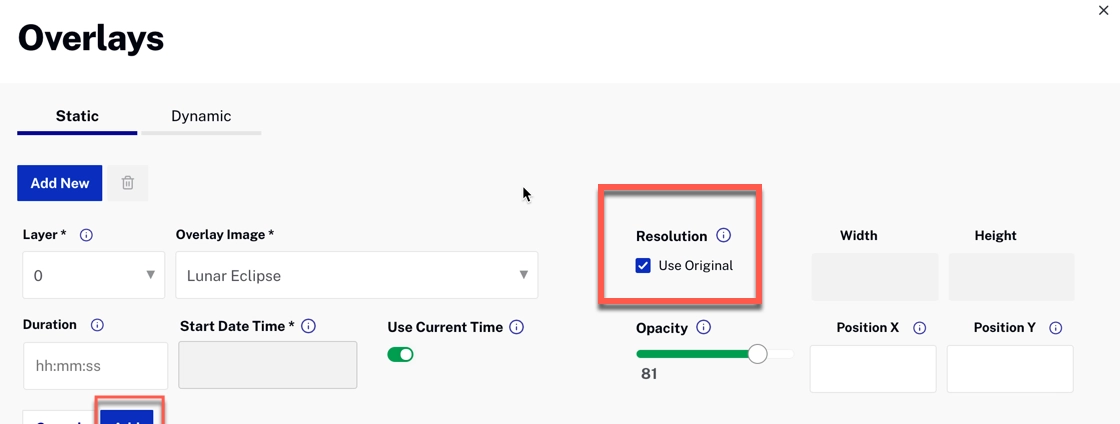
Use Original Image Size -
You can provide a custom width and height for the resolution to let the system scale the image before applying it on the source video:
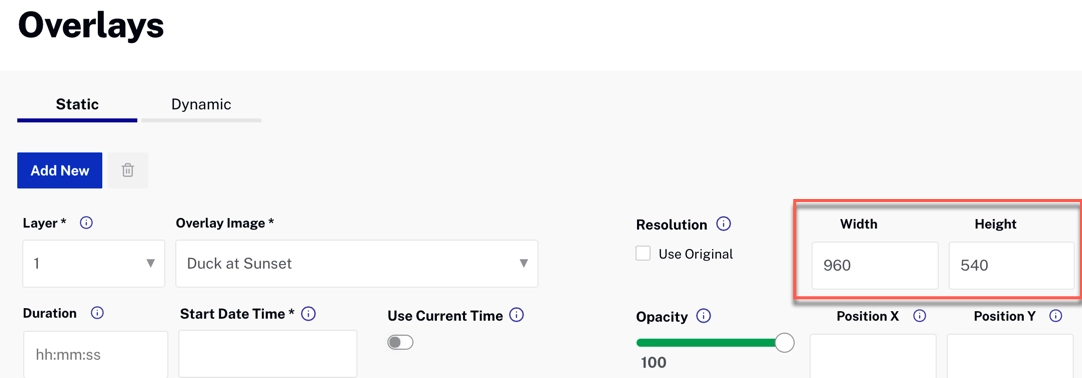
Set Width and Height - Leaving the width and height empty and Use Original unchecked will cause the system use the channel’s output resolution. For example: Mobile and Web output will set the overlay resolution as 720p and a Smart TV profile will set the overlay resolution as 1080p. Using this option is not recommended since it might not always be aligned with the MP4 source resolution.
-
You can provide a custom width and height for the resolution to let the system scale the image before applying it on the source video:
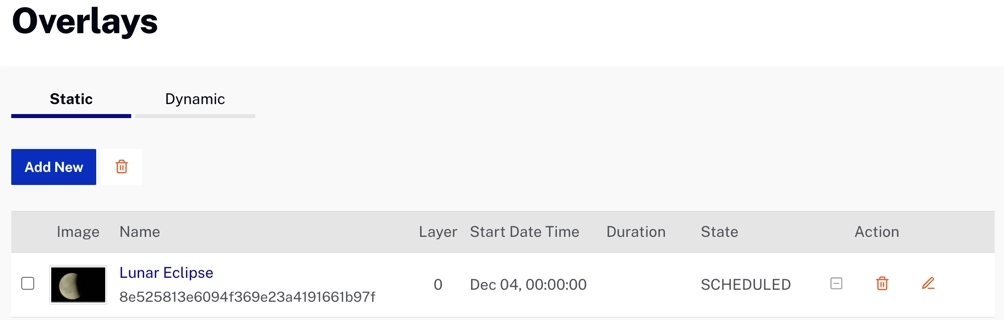
State transitions
State transitions for overlay schedules
-
INACTIVE
- A newly created schedule (or)
- A schedule that has already completed the run (or)
- A schedule that is already deactivated.
- You can change the start time to bring it back to SCHEDULED state with the same or updated overlay configuration.
- Delete - if you will no longer use this configuration.
- Modify for any configuration changes.
-
SCHEDULED
- Scheduled to start at the specified start time.
- Delete if you no longer need this schedule.
- Modify for any configuration changes.
-
ACTIVE
- A schedule that is currently in progress.
- Deactivate when you need to stop the overlay.
- Modify any configuration except layer and start_time.
- Deletion not allowed. You need to deactivate first.
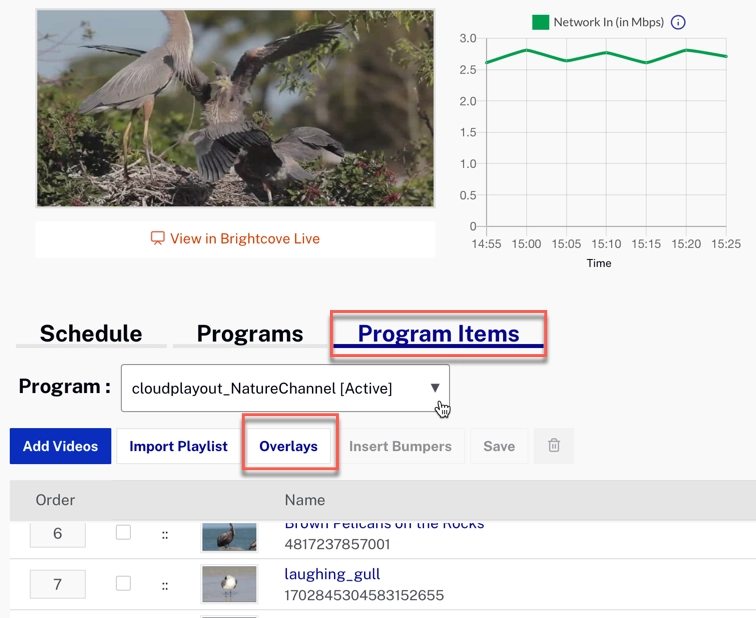
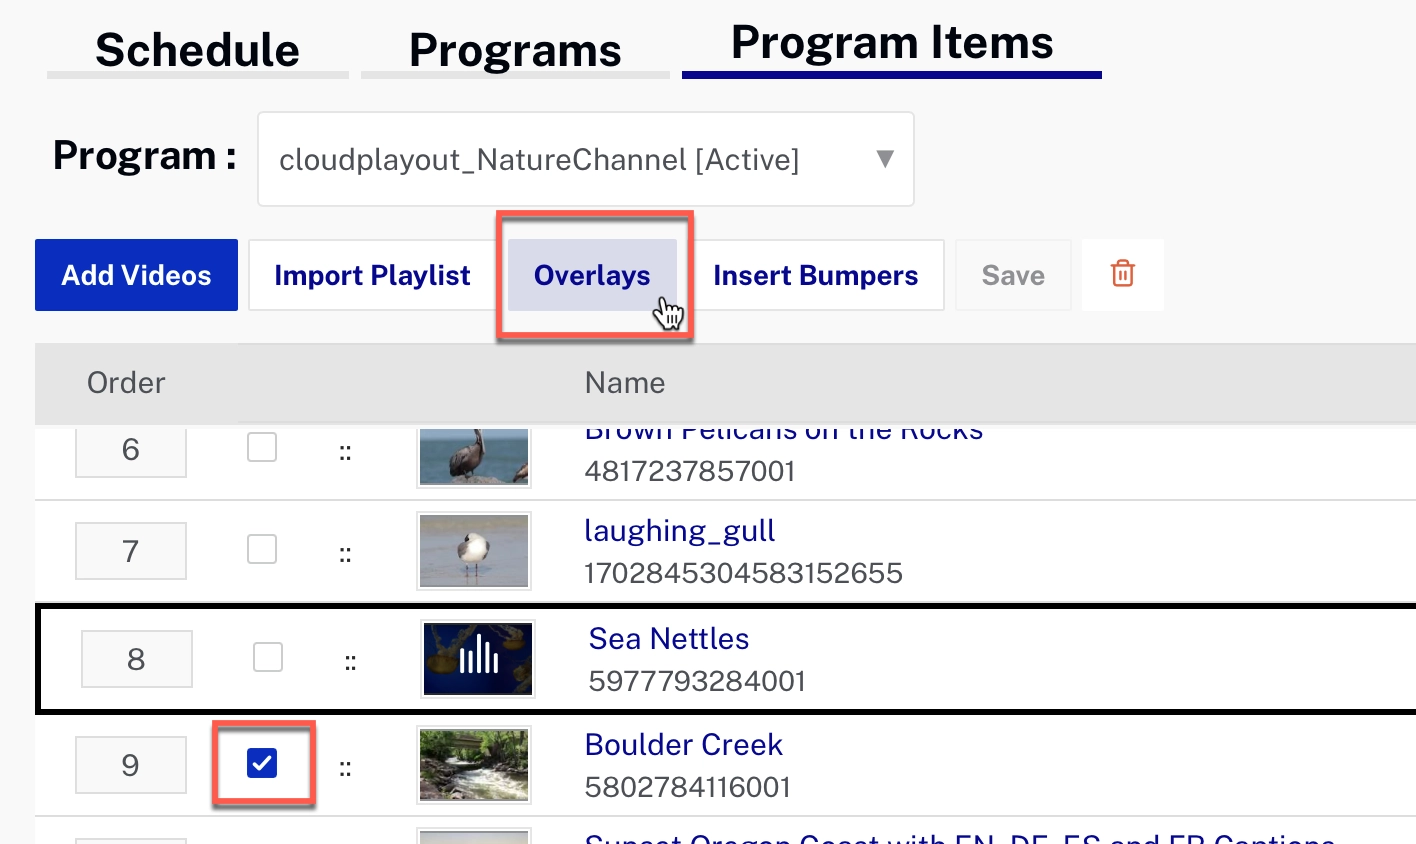
Contextual Overlay Launch
For ease of access, if you want the overlay to appear for a specific video in the playlist, you can mouse hover the video in the playlist and click on the Add Overlay icon ( ![]() ), the UI will launch the Add Overlays modal, with the start time and duration of the selected video.
), the UI will launch the Add Overlays modal, with the start time and duration of the selected video.
Notes
- This will create a schedule for the selected video’s start time and it’s not attached to the video itself. In other words, if the video is re-ordered (or) deleted (or) start time changed due to various changes to the EPG schedule, the overlay schedule will still remain on the originally scheduled start time.
- This Add Overlay in context to the video is recommended to be used on a Running channel rather than on a channel in DRAFT or SCHEDULED state - because the running channel is more time accurate (powered by EPG) than the channels in other states.
- On a running channel, this option is available on all videos following the current playing video.
- This option is not available for Ad placeholder videos on SSAI channel.
Image handling
The image is overlaid on the underlying source video pixel for pixel.
Below are some some possible fixes/workarounds for a case where the overlay is larger than the video.
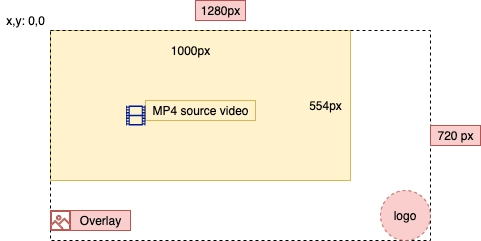
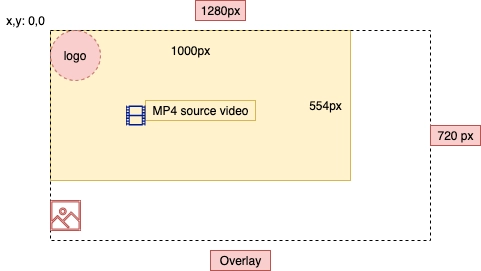
Problem case
The diagram below shows a too-large overlay, with a company logo in the lower-right corner and therefore hidden:
Solution 1
You could use the width and height fields to resize the image to fit the size of the video screen. The disadvantage of this is that resizing an image degrades the image quality, and will make the logo itself smaller:
Solution 2
If you move the logo to the upper-left corner, at least that will be assured visibility, but may not have a desirable placement:
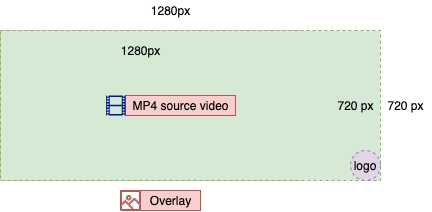
Solution 3
The ideal solution is to size your overlay to exactly match the resolution of the video (and check Use Original for the sizing):
Notes
- The image is overlaid before creation of individual output encodes (with their different resolutions and video quality). This means that if the underlying video is scaled for a particular output encode, then the image is similarly scaled.
- The overlay image is inserted in all outputs, i.e, the overlays will also be visible on preview images seen on Cloud Playout UI.