Publishing Videos and Playlists with the Media Module
This topic contains information on publishing videos and playlists to the web. For information on the other publishing options, see:
- Publishing a Video to Email
- Publishing Videos to Social Media Platforms
- Publishing Videos to an In-Page Experience
If you are looking to dynamically assign video content to a player, get the embed code for the player and then use one of the techniques available to dynamically assign videos to a player.
Publishing videos and playlists
To publish a video or playlist, follow these steps.
- Open the Media module.
- To publish a single video, open the video details page by clicking the video title, then click Embed to Web in the top-right of the page. You can also select the checkbox next to the video in the list and open the More actions menu on the bulk-action bar, then choose Publish to Website.
- To publish a playlist, switch to the Playlists tab in the Media module, open the playlist, and click Embed to Web.
- Confirm that the Embed on Web dialog opens. A preview of the video or playlist being published will appear in the dialog.
Known Issue: Since the preview player is being loaded over HTTPS within the Studio, if your content is being served over HTTP, the preview player will not playback the content and your browser will display an insecure scripts message. This is not a Studio bug but a browser security limitation.
- Select a player to use. When publishing playlists, there are some playlist-related player properties that can be set to control appearance and behavior of the playlist. See the Setting playlist properties section below for details.
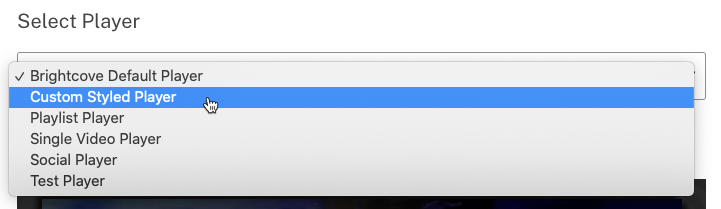
Note that the preview will update to display the player that was selected.
- (Optional) Click Preview to preview the player in another browser tab, or click Copy URL to copy the player URL.
- Choose an option for the player sizing:
- Responsive - The player size will adjust automatically based upon the browser size
- Fixed - The player size is based upon the width and height parameters
- Select an aspect ratio for the player.
- Choose from the default values Square (1:1), Tablet (4:3), Desktop (16:9), and Mobile (9:16), or select Custom and enter a custom player width and height.
- The Player width and Player height are specified in pixels (px).
- Select the type of publishing code to copy by clicking the Iframe or JavaScript tab.
- Iframe embed code - Recommended for most cases. This type places the player inside an
<iframe>tag. If player dimensions are specified, the iframe will be sized to the player dimensions. If no player dimensions are specified, the iframe can be placed inside of a<div>tag and the responsive nature of the player will resize the player to occupy the entire space of the<div>. - JavaScript embed code - Allows the player to exist in the the HTML page directly, not in an iframe. This offers developers the benefits of ease of accessing the player and associated properties and events. By using the JavaScript embed code, you lose the ease of use of the player as a single, contained unit in social media applications and sharing. This option is available only for the published player.
- Iframe embed code - Recommended for most cases. This type places the player inside an
- Copy the publishing code by clicking Copy code. When finished, click Close.
Using reference IDs when publishing
It is also possible to use the video or playlist reference ID when publishing. With this method, if you accidentally delete a video or playlist, you simply upload another video or re-create a playlist and assign it the same reference ID as the deleted item. For information, see Using Reference IDs.
Adding an application ID to the embed code
In the past, publishers would commonly create new players with different names to use on different parts of a site or to use on different sites. When reviewing player analytics, having different player names made it easier to determine which players were getting the most views. By adding an application ID parameter to the embed code, the same player can be used across a site, or sites, and the application ID can be used to identify where the player was published. Using a player application ID can help reduce the number of players that need to be created and maintained. For information on adding an application ID to the embed code, see Adding an Application ID to the Player Embed Code.
Setting playlist properties
There are some playlist-related player properties that can be configured when working with playlists. To configure the playlist-related player properties, follow these steps.
- Open the Players module.
- Click on the player name to open the player properties.
- As part of the Player Information properties, select a Player Type of Playlist. Click Save.
- Open the Styling accordion on the Overview tab.
- Select a Playlist Type:
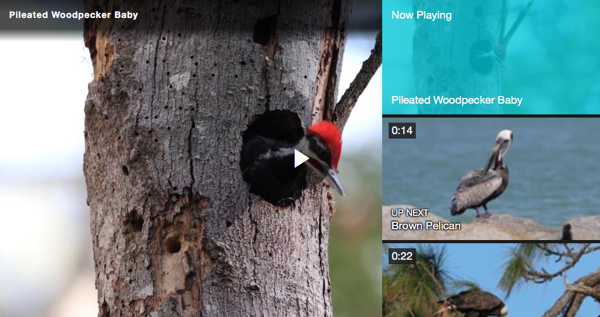
- Playlist (Vertical) - Playlist displays on the right side of the player.
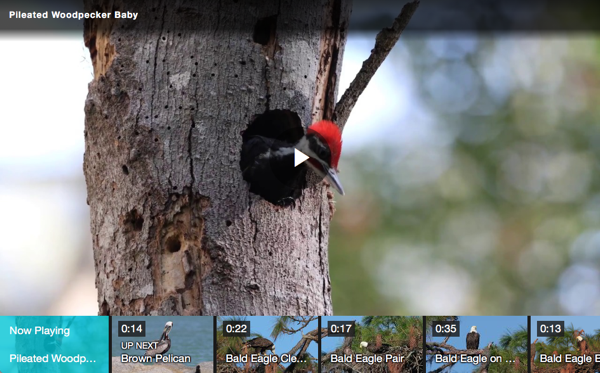
- Playlist (Horizontal) - Playlist displays on the bottom of the player.
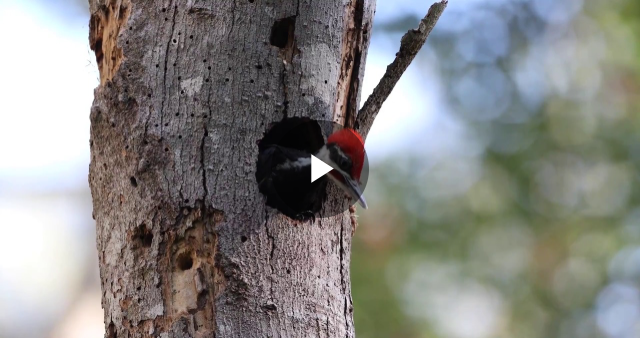
- Playlist (Hidden) - Playlist is not displayed.
- Playlist (Vertical) - Playlist displays on the right side of the player.
- When a Player Type of Playlist is selected as part of the Player Information properties, additional Playback properties can be configured:
- Randomize play order - Videos will be played in a random order
- Play video when selected - Clicking a thumbnail in the playlist menu will cause the video to play when loaded, even if the previous video in the player was paused
- Continuous play mode - Videos will advance automatically and repeat indefinitely
- Video Countdown - Only enabled when Continuous play mode is checked
- Up next card (auto advance) - An up next card is displayed in the player
- Up next endscreen (countdown) - An end screen countdown is displayed in the player
- Click Save to save changes. Remember to publish the player so the changes appear in the published player.
When using the Iframe embed code, the playlist has a show/hide button and is automatically sized and positioned. When using the JavaScript embed code, you must insert the playlist as an HTML <div> element and write your own CSS to position and size the playlist. This gives you full control over the playlist's display. In the latter case, the playlist does not even need to be adjacent to the player if you don't want it to be. The JavaScript embed player section of the Implementing Playlists document has substantial content on formatting and styling a playlist.