Managing Playback Rights
Playback rights are used to restrict video playback. After playback rights have been created, they can be assigned to videos using the Media module.
To access the Playback Rights administration page, open the Admin module and then Playback Rights. A list of playback rights will appear.
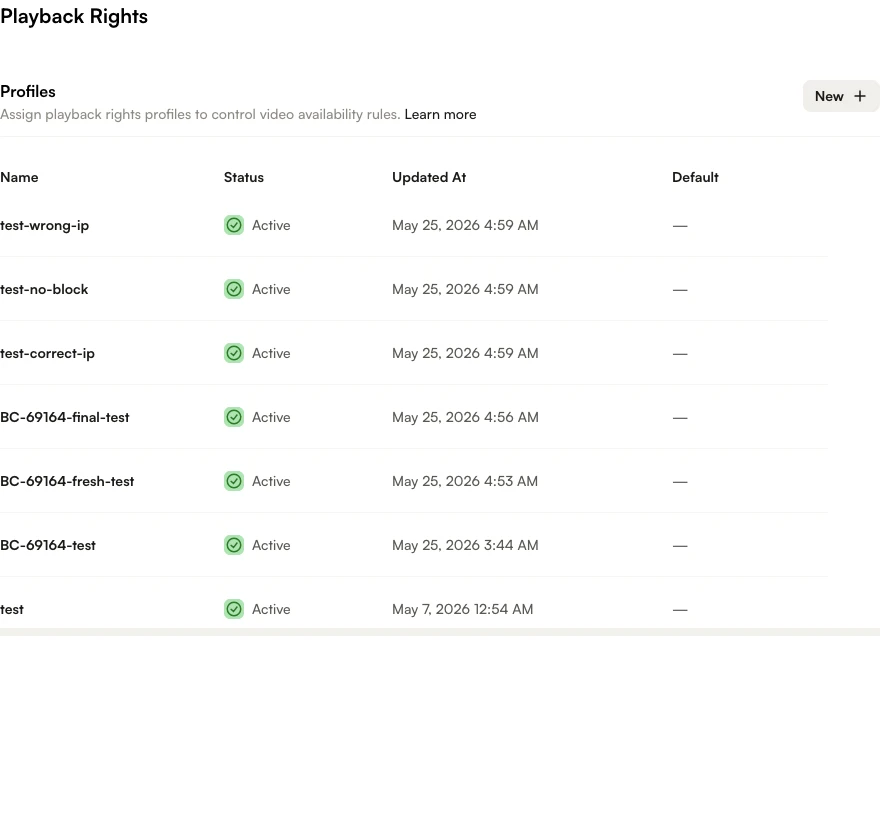
Playback rights with a Status of Inactive cannot be assigned to videos in the Media module.
Creating playback rights
To create playback rights, follow these steps.
- Login to Video Cloud Studio as an Administrator.
- Open the Admin module and then Playback Rights. Note that you must be an account administrator to access to the ADMIN menu.
- Click New.
- Enter a Playback Rights Name.
- Checking Allow Playback Right without token will allow playback requests to be made without a JSON Web Token (JWT).
- Check Use as default to make this the default playback right. This will apply the configured playback right restrictions to uploaded videos.
- Click Add.
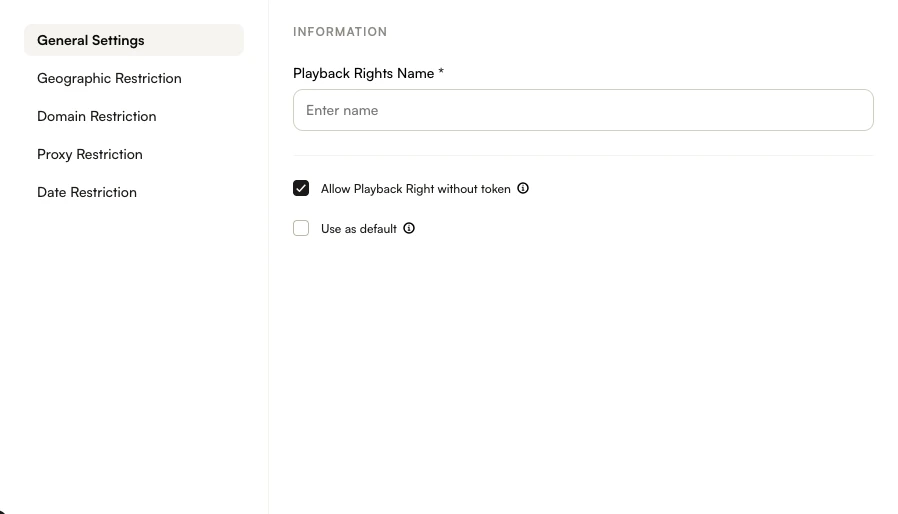
Click a restriction link in the left navigation to add restrictions to a playback right:
Editing playback rights
To edit playback rights, follow these steps:
- Click on a playback right.
- Make required changes and click Save.
Duplicating playback rights
To duplicate a playback right, follow these steps:
- Click on a playback right.
- Click Duplicate.
- Make required changes and click Save.
Activating/Deactivating playback rights
Playback rights cannot be deleted, however, they can be deactivated so they can't be assigned to videos in the Media module. To activate/deactivate playback rights, follow these steps:
- Click on a playback right.
- Click Activate to activate a playback right or Deactivate to deactivate a playback right. Playback rights that are deactivated cannot be assigned to videos in the Media module.
Assigning geographic restrictions
Geographic restrictions allow you to limit video playback based upon country, ZIP code, IPs and designated market area. To assign geographic restrictions to a playback right, follow these steps:
- Click on a playback right.
- In the left navigation, click Geographic Restriction.
The Global Rule can be set to Allow all Regions or Block all Regions.
- Allow all Regions
- Used when you want to blocklist a small number of groups who will not have access
- Select to allow viewing for all and then add a list of blocked countries, zip codes, IPs and DMAs that are prevented from viewing
- Block all Regions
- Used when you want to allowlist a small number of groups who will have access
- Select to block viewing for all and then add a list of allowed countries, zip codes, IPs or DMAs that are allowed to view
Geographic restrictions can be added to allow/prevent viewing based upon:
Restricting access to countries
Country playback rights can be used to limit viewing to specific countries.
- Select the countries that will be prevented (blocked) or allowed (allowed) to view. As you type, the selection list will be filtered.

- Click Save.
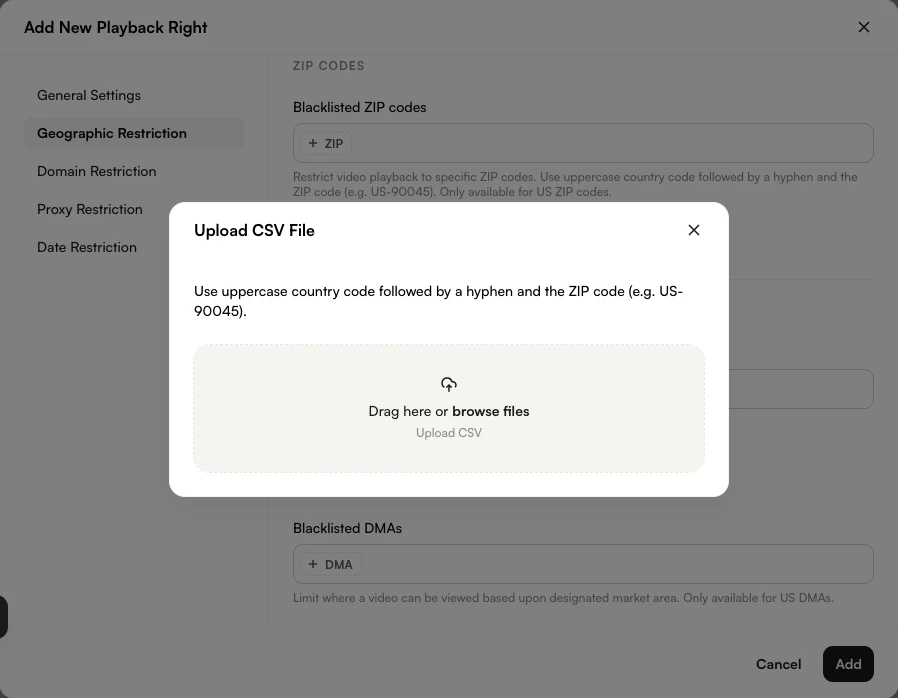
Restricting access to zip codes
Zip code playback rights can be used to limit viewing to specific zip codes.
- Enter a list of zip codes that will be prevented (blocked) or allowed (allowed) from viewing. The zip codes should be prefixed with an uppercase, two letter country code and hyphen, for example, US-90045.

It is also possible to upload a .csv file containing zip codes. Click Upload CSV to browse and select a file to upload.
Restricting access to IPs
IP playback rights can be used to limit viewing to an IP address range.
- Enter a range of IP addresses that will be prevented (blocked) or allowed (allowed) from viewing. CIDR block notation is also supported.

- Click Save.
Restricting access to DMAs
A designated market area (DMA), also referred to as a media market, is a region of the United States that is used to define television and radio markets. Playback rights can be used to limit viewing based upon DMAs.
- Enter a list of DMAs that will be prevented (blocked) or allowed (allowed) from viewing

- ClickSave.
Assigning domain restrictions
Domain restrictions allow you to limit video playback based upon domain. To assign domain restrictions to a playback right, follow these steps:
- Click on a playback right.
- In the left navigation, click Domain Restriction.
- In the Blocked Domains field, enter the domains that will be prevented from viewing.
- In the Allowed Domains field, enter the domains that will be allowed to view.
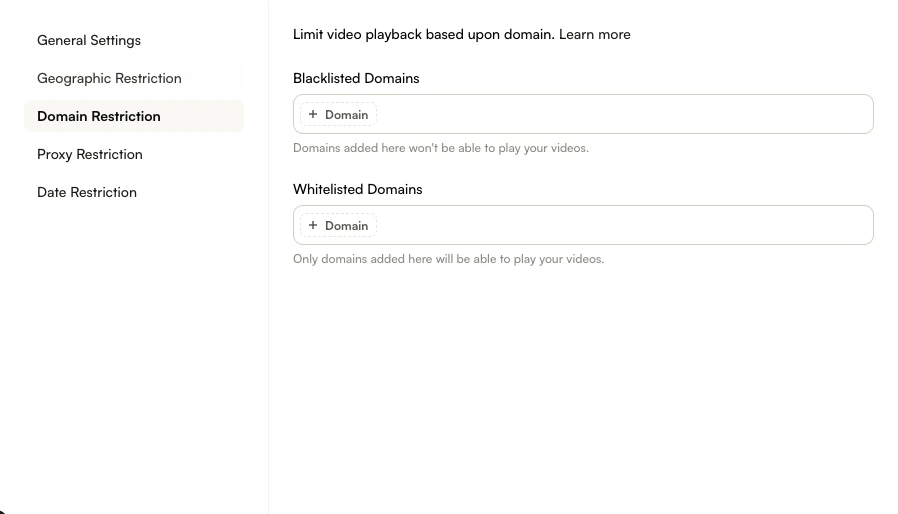
- Click Save.
Assigning proxy restrictions
Proxy restrictions allow you to limit video playback based upon certain types of connections. To assign proxy restrictions to a playback right, follow these steps:
- Click on a playback right.
- In the left navigation, click Proxy Restriction.
- Select the proxy types to block.
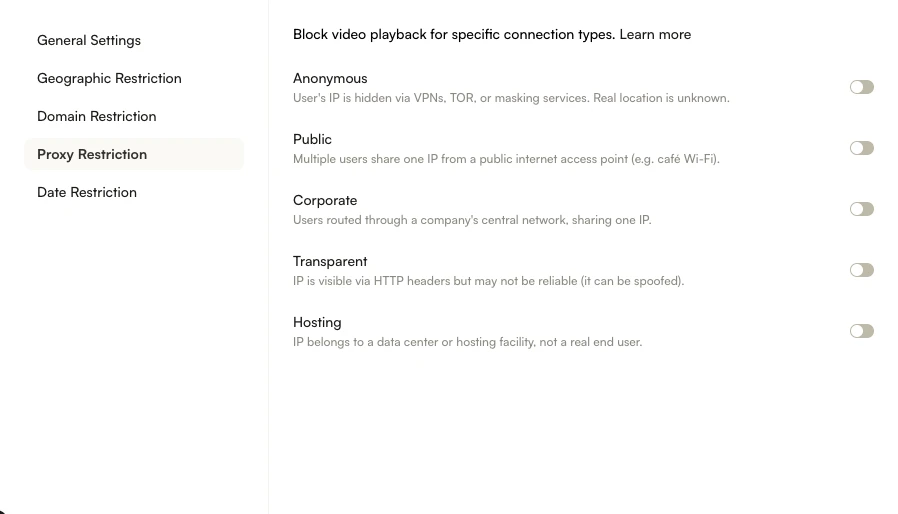
Playback Rights proxy properties
Field Type Description blocked_proxiesObject Properties related to proxy rights blocked_proxies.anonymousBoolean IP address of the client is not available. Includes services that change location to beat DRM, TOR points, temporary proxies, and other masking services. blocked_proxies.corporateBoolean Generally considered harmless, but location can be a concern. Identify if multiple users are proxied through a central location or locations, and can share a single network-apparent IP address. blocked_proxies.hostingBoolean IP Address belongs to a hosting facility and is likely to be a proxy as end users are not typically located in a hosting facility. blocked_proxies.publicBoolean Multiple users proxied from a location allowing public internet access. blocked_proxies.transparentBoolean IP address of the client is available via HTTP headers, though the value is not necessarily reliable (e.g., it can be spoofed). - Click Save.
Assigning time restrictions
Time restrictions allow you to limit video playback based upon a specified start date. To assign time restrictions to a playback right, follow these steps:
- Click on a playback right.
- In the left navigation, click Date Restriction.
- Click the calendar control to select a Start Date.
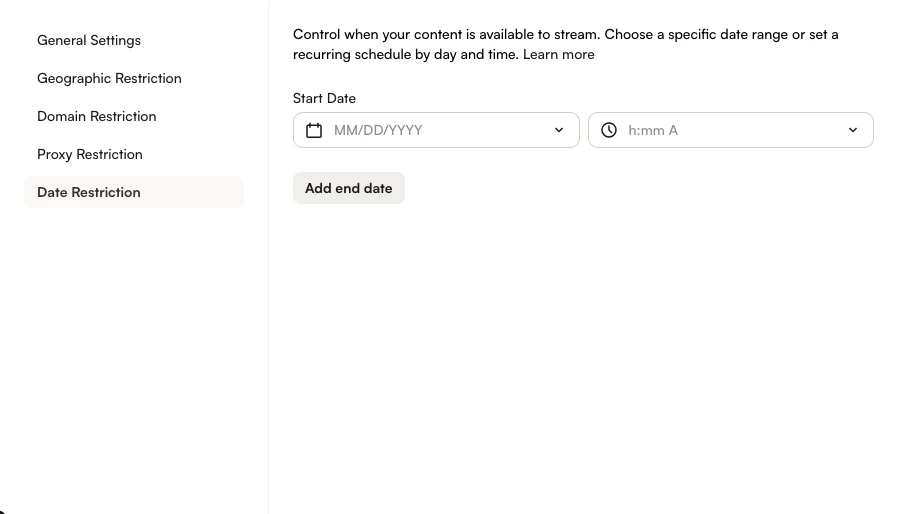
- (Optional) Click Add end date to select an end date.
- Click Save.