Creating a Campaign-enabled Player
Video engagement data will only be recorded when video content is viewed inside of a Campaign-enabled Brightcove Player. There are two ways to create a Campaign-enabled player:
Creating a new player using the Campaign module
Before creating a Campaign-enabled player using the Campaign module, the Campaign module should be configured with at least one data connection:
- Eloqua
- Marketo (Munchkin)
- Marketo (REST APIs)
- Salesforce
- HubSpot (REST APIs)
- HubSpot (Client-Side APIs)
- SSO
- Custom integration
Note that Campaign Tracking is provided by default. To create a Campaign-enabled player using the Campaign module, follow these steps.
- Open the Campaign module.
- In the left navigation, click Campaign Players.
- Click . A new Campaign-enabled player will be created and appear in the list of players.
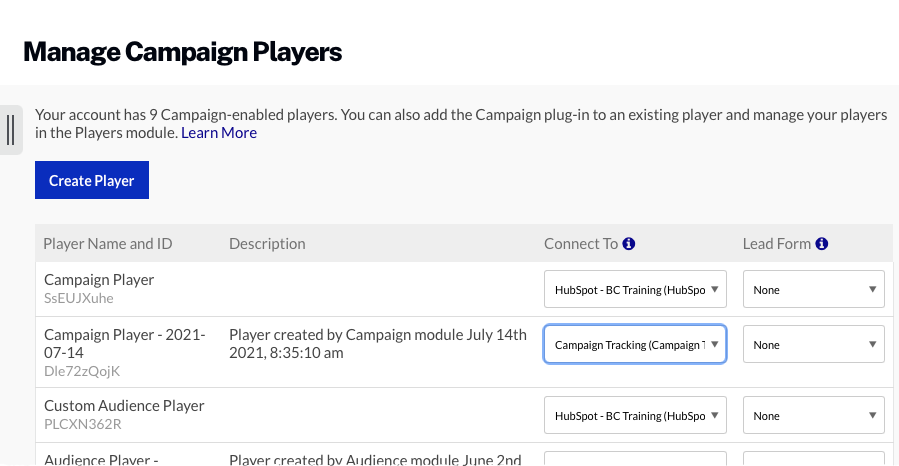
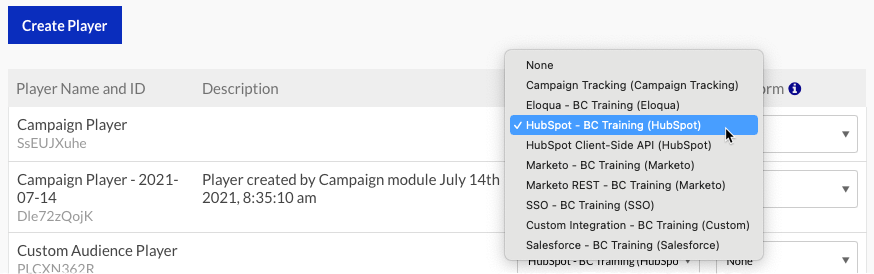
- Using the Connect To dropdown, select the data connection that the player will use.
- (Optional) Using the Lead Form dropdown, select the lead form that the player will use.
Enabling Campaign on an existing player
To Campaign-enable an existing player, follow these steps.
- Open the Players module.
- Click on a player name to open the player properties.
- Click Campaign in the left navigation menu.
- Check the Enable Campaign option.
- Use the Connect To dropdown to select a Campaign connection.
- (Optional) Use the Lead Form dropdown to select a lead form to use.
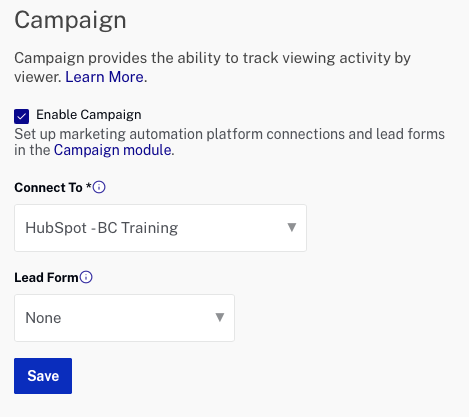
- Click . A message will appear indicating that you have unpublished changes.

- Click and then to publish the change to the player.
- Return to the Campaign module. Click Campaign Players in the left navigation.
- Confirm that the player appears in the list of Campaign players.