Getting Started with Brightcove Social
To access Brightcove Social, login to Video Cloud Studio and open the Social module in the primary navigation. A list of your published videos will be displayed by default.
Using Brightcove Social you can:
Viewing your published videos
To view your published videos, click the Published link in the left navigation. Each published video will display the publishing status, video information and a link to the social platform that the video has been published to. For information on viewing published videos, see Viewing Videos Published to Social Media.
Clipping videos
The Social module allows clipping on VOD video, save the clipped video to the Media Module, and then publish the video to a social destination based on your preference.
Follow these steps to clip a video
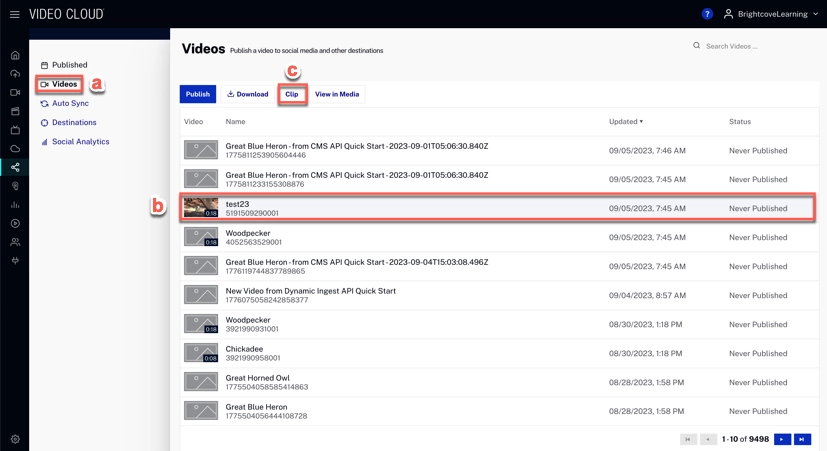
- Login to Video Cloud Studio.
- Open the Social module.
- Click Videos.
- Click on the video you want to clip.
-
At the top of the list click .

-
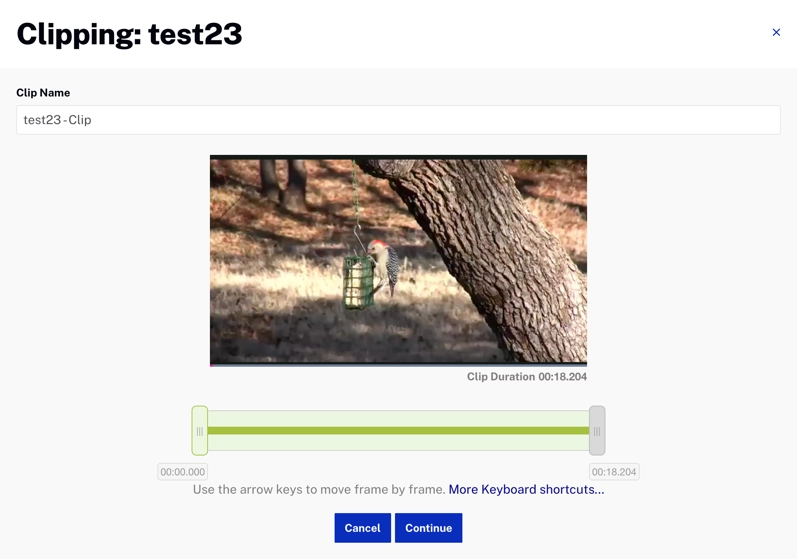
Notice how a new window appears. Using the sliders, you can clip the video.

- Click .
-
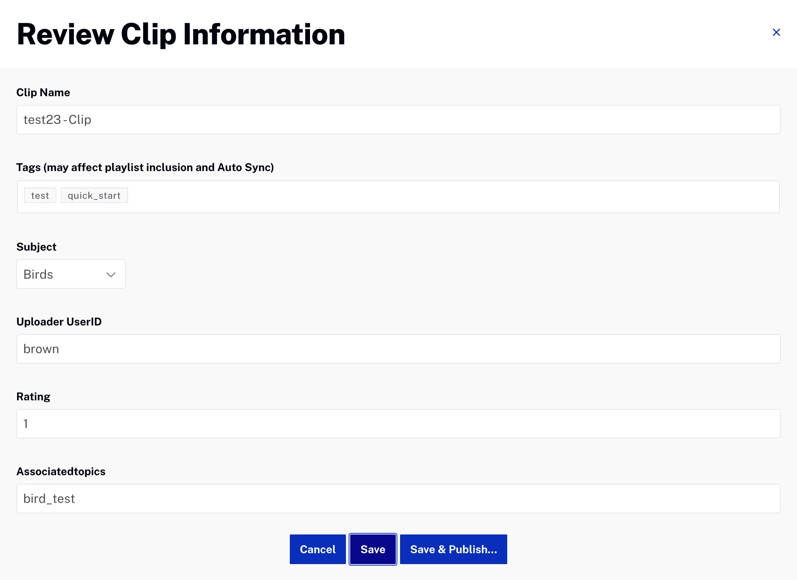
Update the fields if needed.

- Notice there are two save options:
- to save the video in the media module.
- to see the option to publish the video in your preferred destination.
Publishing videos to social media platforms
To publish a video to a social media platform, click the Videos link in the left navigation or click at the top of the page. For information on publishing videos to a social media account, see Publishing Videos to Social Media Platforms.
Publishing live videos to social media platforms
To publish a live video to a social media platform, click at the top of the page. For information on publishing live videos to a social media account, see one of the following:
Automatically syncing videos to social media accounts
The Auto Sync feature can be used to have videos automatically published to social media destinations based upon tags that are assigned to a video. Configure Auto Sync by clicking Auto Sync in the left navigation. For information on configuring the Auto Sync feature, see Using Auto Sync to Synchronize Videos to Social Media Accounts.
Creating social media publishing destinations
Publishing destinations are the social media accounts to which you will publish videos to. A publishing destination can be a YouTube channel, Facebook page or Twitter account. Publishing destinations are created by clicking Destinations in the left navigation. For information on creating publishing destinations, see Creating Social Media Publishing Destinations.
Reviewing social analytics
Social Analytics provides data on how videos shared to social media channels are performing. View the social analytics by clicking Social Analytics in the left navigation. For information on social analytics, see Reviewing Social Analytics.
