Also see Adding Bumpers to Content for adding bumpers to VOD or live event items.
Introduction
Your Cloud Playout channel can contain up to 1000 content items in a program. Here we will see how to manage the program, including how to add and re-order content items.
The sections below will guide you through:
- Understanding and switching between the Schedule and Program views
- Adding VOD content
- Importing playlists
- Adding Live events
- Reordering Program items
Also see:
- Adding Bumpers to Content for adding bumpers to VOD or live event items
- Static Image Overlays for adding image overlays
- Dynamic Overlays for adding Dynamic Overlays such as news headlines or weather conditions.
- Enabling Server-Side Ads and Midroll Ad Insertion for adding ads.
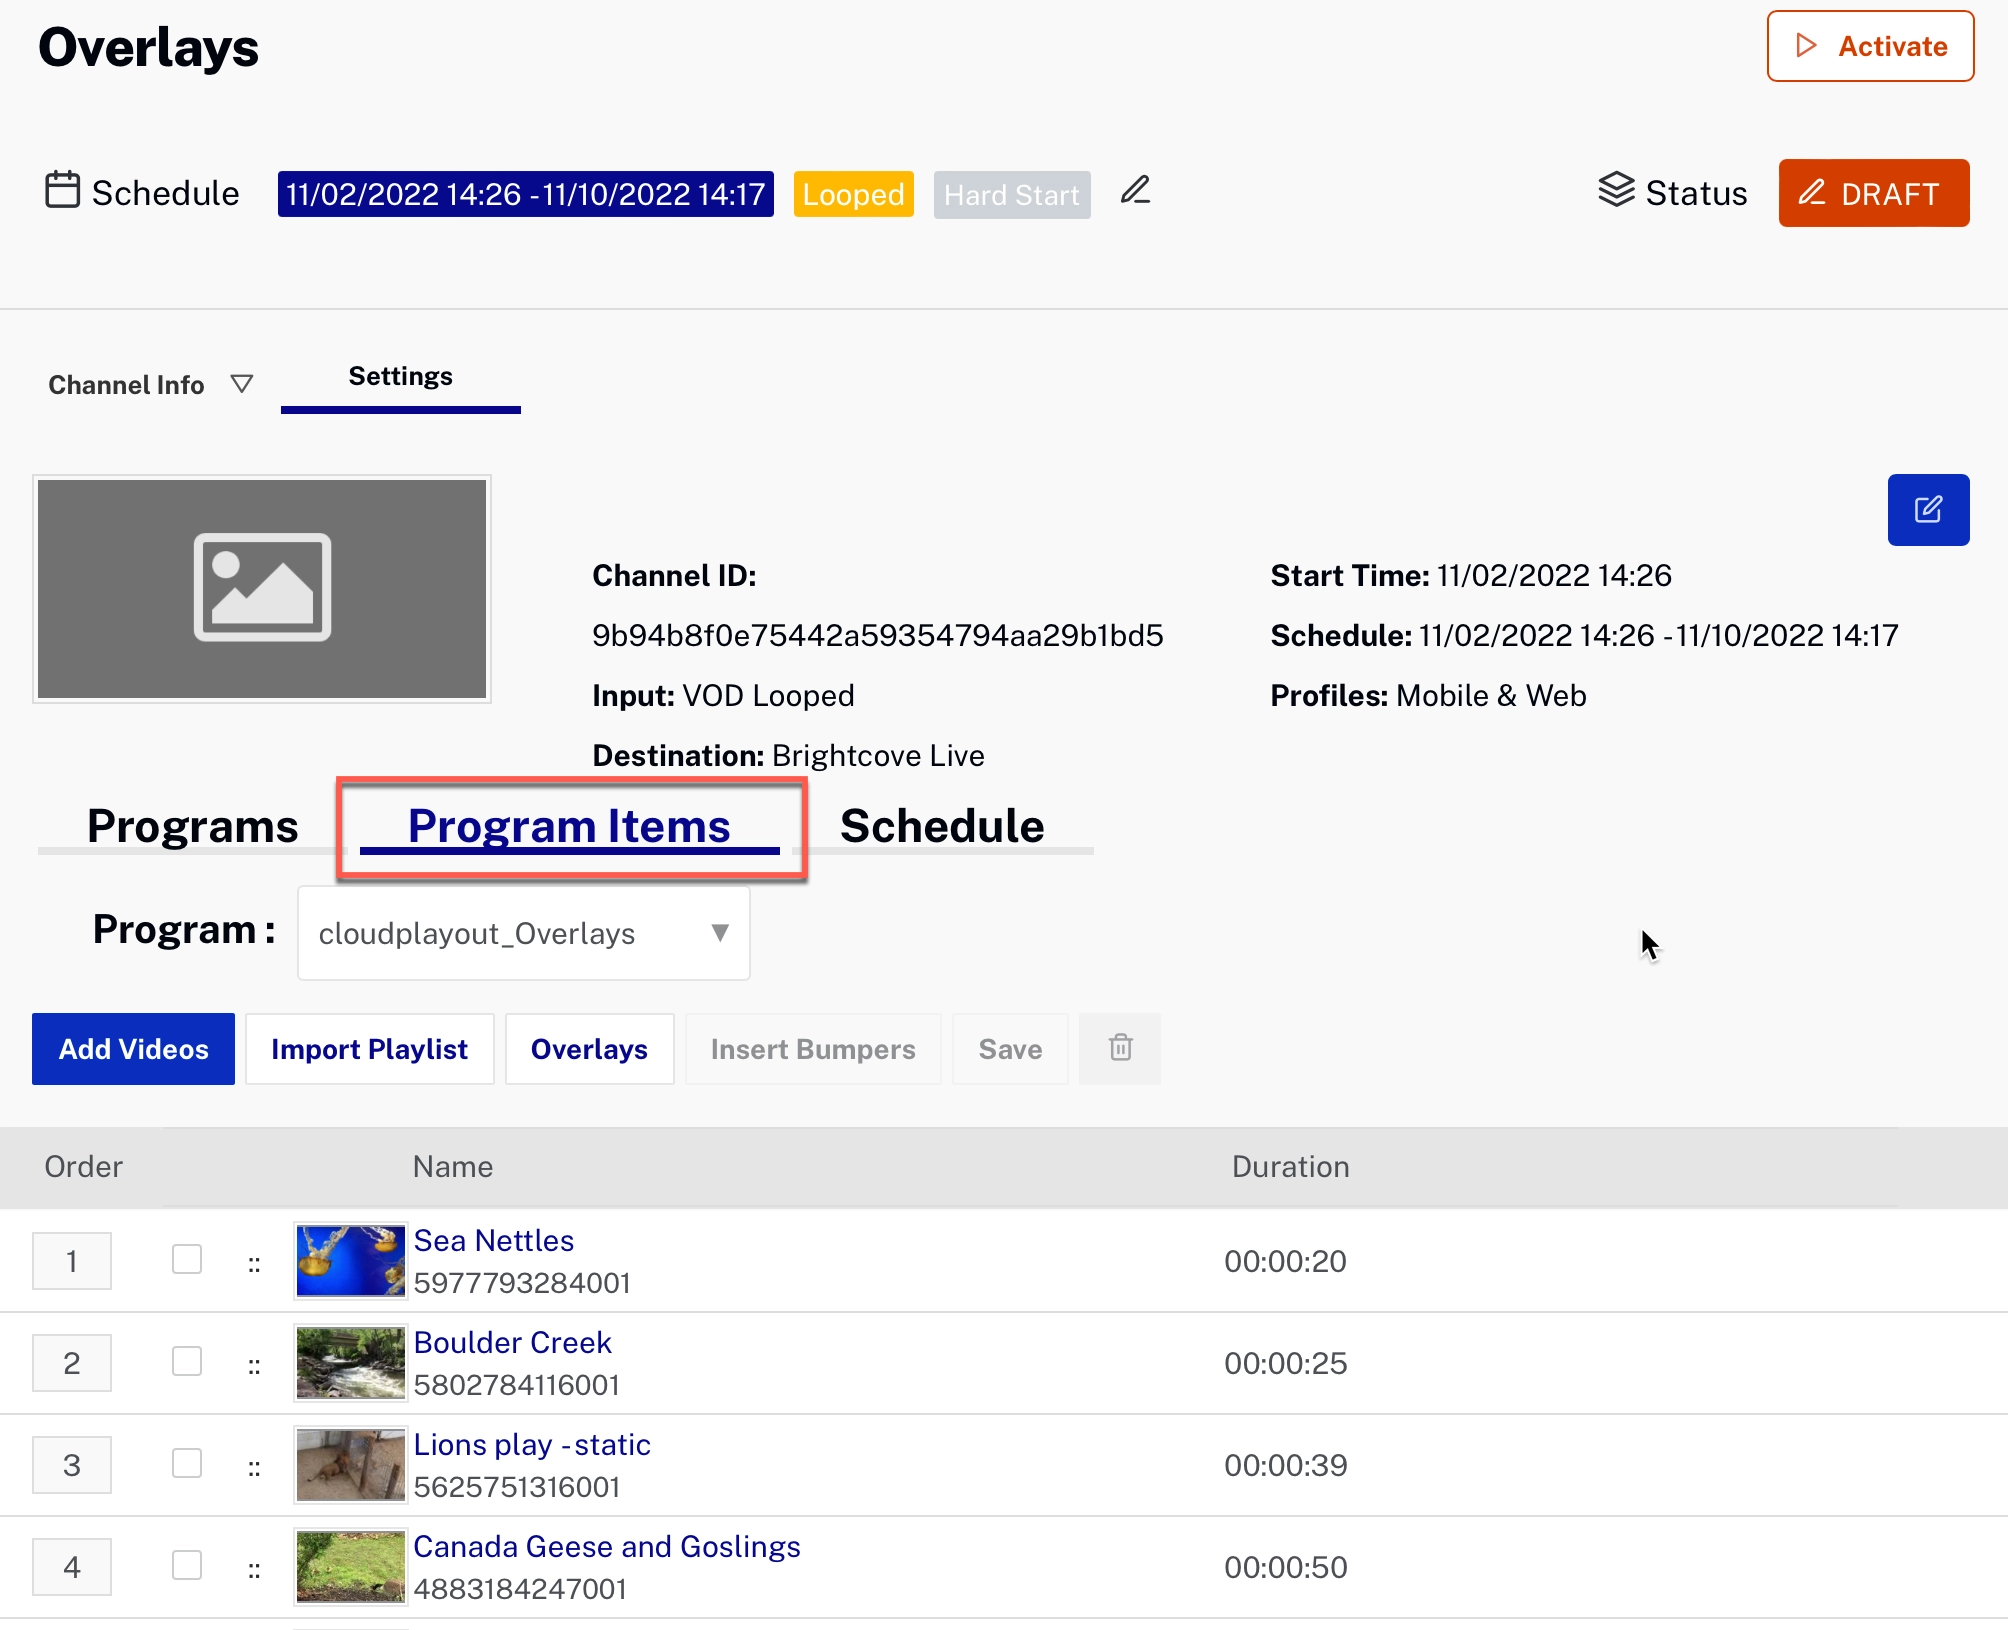
Schedule and Program views
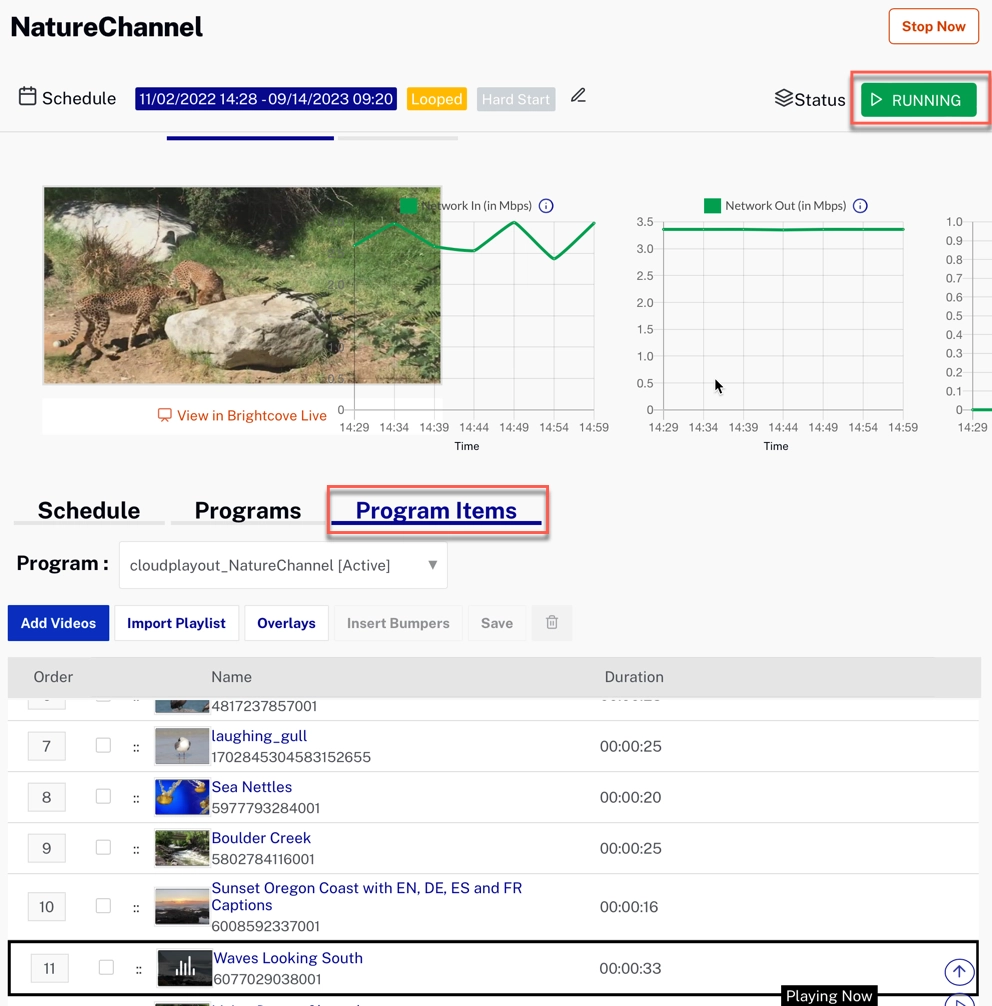
You can easily switch between Schedule and Program views by clicking the corresponding tab. The Schedule view will present the complete schedule of the channel with video start time, end time and duration. In the Program Items view, you can add videos, import playlists, insert bumpers, insert ads, add live events, and reorder the program items (if this is non-looping channel with multiple programs, you will need to select the program you want to edit).
Adding content
Depending on how you configured your Cloud Playout channel, you can add content of various kinds. VOD content and playlists can be added to any channel. In addition, you can add live events if you configured the channel to support that. The following sections provide steps for adding each kind of content.
Adding VOD content
After you create your channel, or when you go to the channel details, the screen will show the channel settings. You can edit details, but the main next step is to add content to the channel.
Add videos (VOD) steps
- Go to the Program Items tab (if this is non-looping channel with multiple programs, you will need to select the program you want to edit).
- Click (If you are on the channel list page, click the channel name to open the channel settings page and then click ).
-
If you have already added other content to the channel, select one video that you want the new video(s) to be inserted after:
Select Insertion Point -
Use Search to find videos you want. In addition to searching on general terms, you can also search by field and use a sign at the beginning of the search string to limit results to videos that match. The fields you can search on are
name,tags, andcustom_fields. For example:+tags:bird+name:"blue heron"
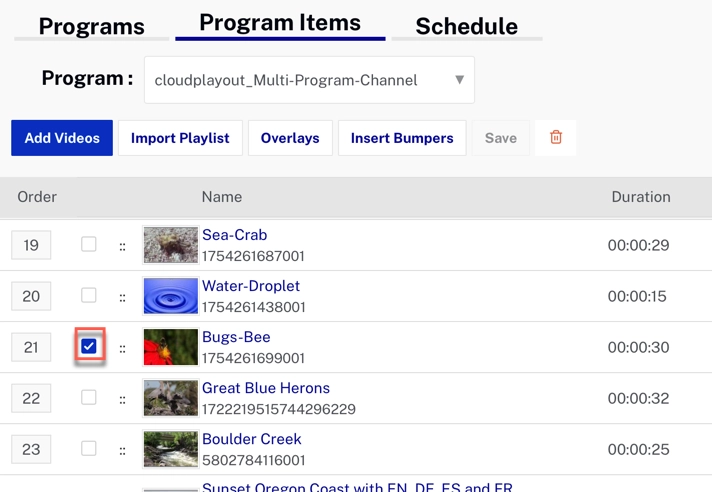
- Click the checkbox next to the videos you want to add to the channel.
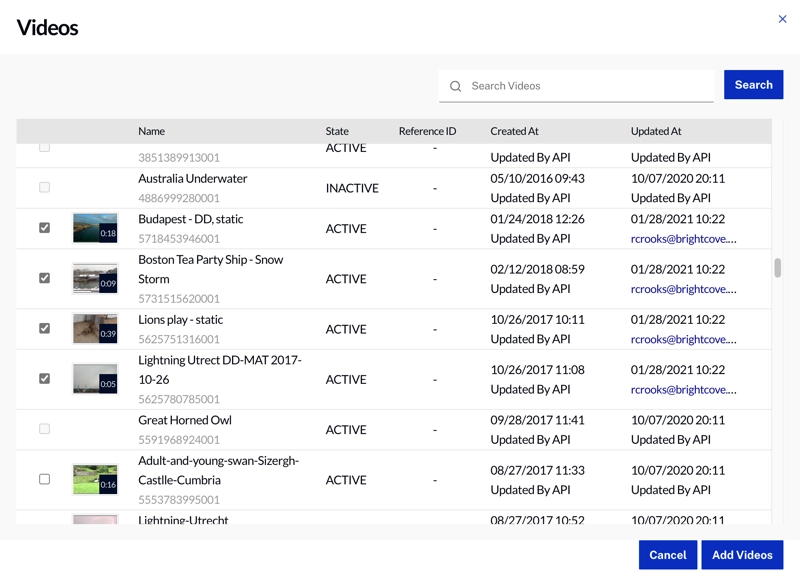
- Click )
- Click .
-
Newly added videos will appear in the program with an label beside the titles:
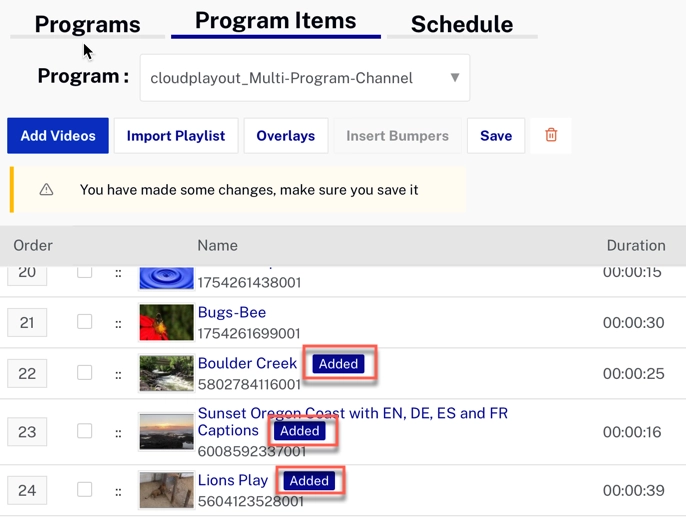
Added Videos Note that start and end times are automatically calculated from the video durations. You can drag and drop videos in the list to reorder them, and the start/end times will be automatically adjusted.
Importing playlists
You can also import whole playlists into you channel. Note the following conditions:
- You can import both EXPLICIT (manual) and smart playlists.
- A snapshot of the playlist in its current state will be imported (meaning that future changes to the playlist will not be reflected in the channel contents).
- Only one playlist can be imported at a time.
- If the imported playlist contains a Live event, an identical new Live event with same name, description & duration will be created. This is because a Live event always shares an 1:1 relationship with the channel.
- The videos in the playlist will be added to the end of the current channel program.
- You can add VOD content as well as playlists, and duplicates are allowed.
- There is a validation check on the total asset limit (1000). If the import will exceed 1000 asset limit, the import will fail.
- If Live input is not enabled for the channel, you can still import a playlist that includes Live events in it by choosing to exclude the Live events from import.
- If this is an SSAI-enabled channel, live events are not allowed. You can still import a playlist that includes Live events in it by choosing to exclude the Live events from import.
- Only the eligible assets with an MP4 rendition will be allowed. A warning indicates what assets will be ineligible for import - upon confirmation, only the eligible assets will be imported.
Add playlist steps
-
If you have already added other content to the channel, select one video that you want the new video(s) to be inserted after:
Select Insertion Point - There is a validation check on the total asset limit (100). If the import will exceed 100 asset limit, the import will fail.
- Click .
- Click for the playlist you want to import.
- If messages appear indicating that some items in the playlist cannot be imported, click if you want to import the supported videos.
- Click .
-
If the import was successful, you will see the videos in your program list with an label beside the titles:
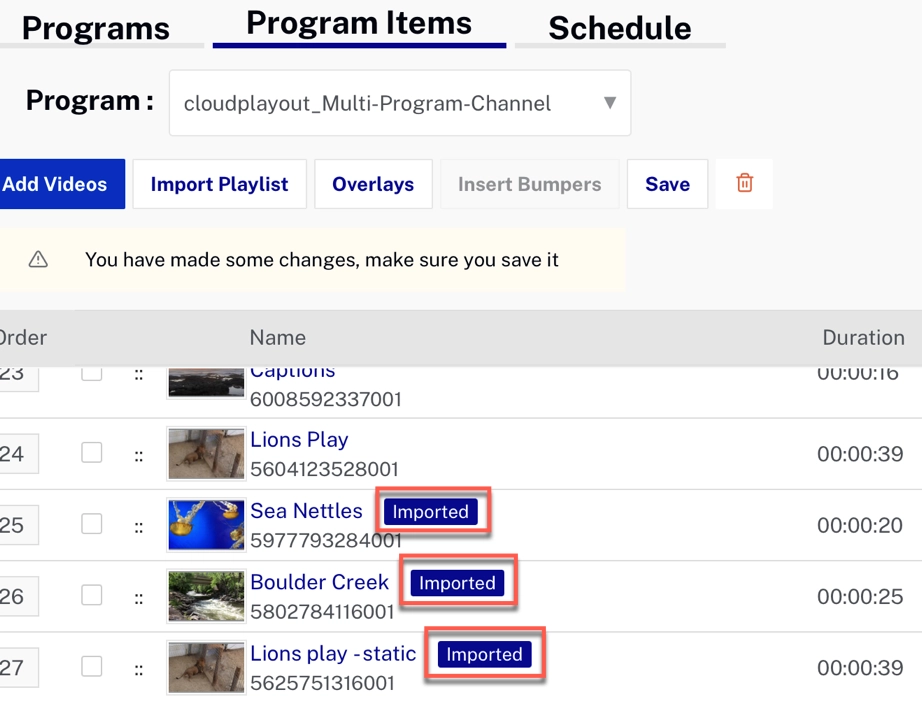
Videos Imported from Playlist
Add playlist steps
Adding Live events
Note: this only applies if the channel is enabled for live events.
-
If you have already added other content to the channel, select one video that you want the new video(s) to be inserted after:
Select Insertion Point - Click
-
In the Add Live Event dialog, enter the Name, Duration, and Description for the live event:
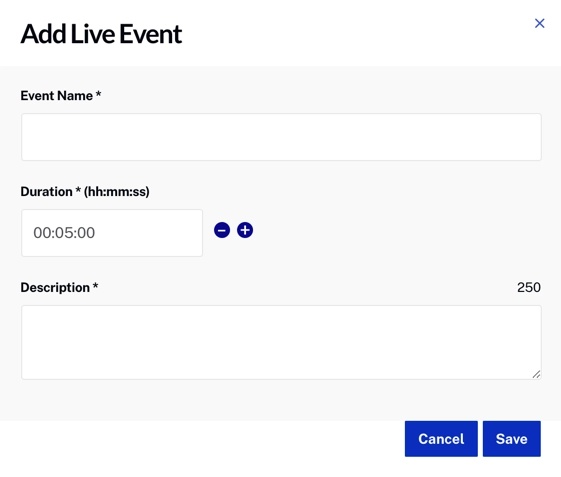
Add Live Event Note that the minimum duration for a live event is 5 minutes, and the duration can be incremented or decremented in 5 minute intervals only - If needed the duration can be edited in-line on the textbox to adjust the granularity of time. The duration of a live event can be modified at any time, even while it is currently playing.
-
After you add live events, they will appear in the program list along with VOD items:
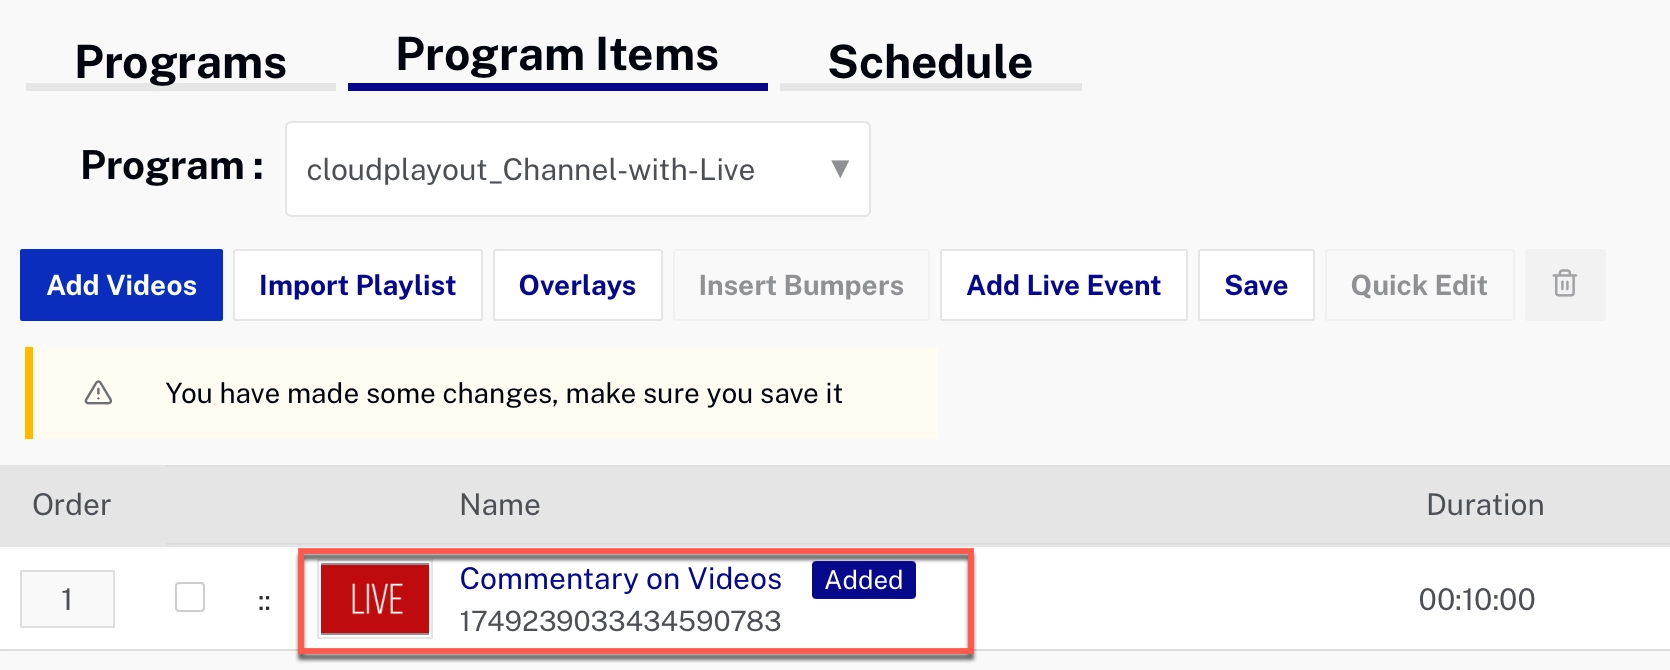
Live Event Added - You can drag live events to reorder the list just as you can videos. You can also use the button to modify the duration of a live event.
Reordering Program items
There are two ways to reorder items in the program:
- If you are just moving an item to a nearby location, you can use drag and drop.
- If you are moving an item to a distant location in a large program, you do by changing the order number..
Reordering using drag and drop
Channels that are not running
Steps
- Click and drag the :: icon to the left of the thumbnail image and drag it to the desired location in the list.
Channels that are running
Steps
- Click .
- Click and drag the :: icon to the left of the thumbnail image and drag it to the desired location in the list.
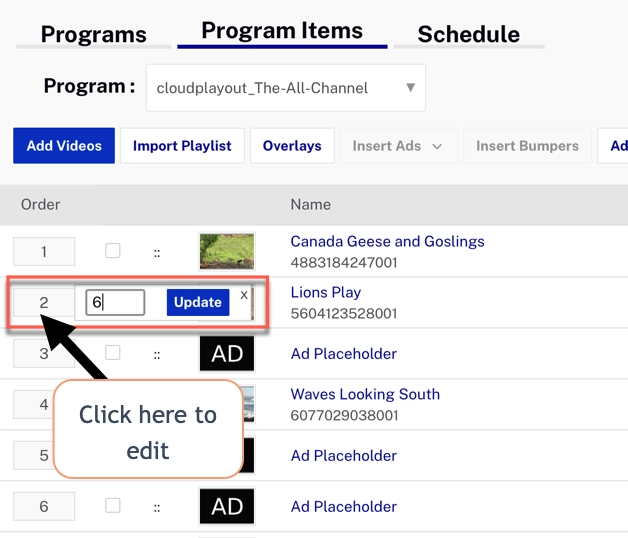
Reordering by order number
Notice that the order number of the program items appears on the left side of the list:
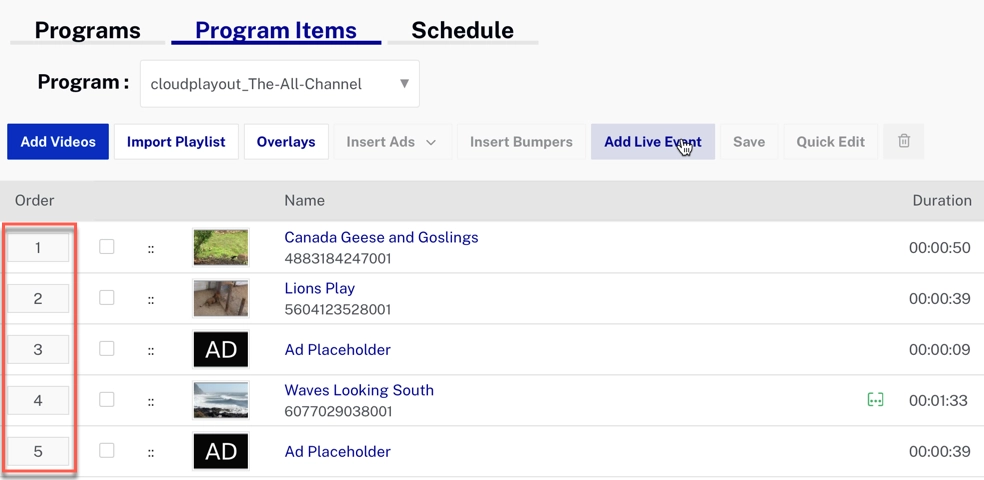
You can also also move a video in the program by clicking the order number and entering a new one. In the example below, we are moving the video at position 2 to position 6 in the program: