Creating a Video Clip Using Brightcove Social
Brightcove Social provides the ability to create video clips from existing videos in your account. There are several reasons you might want to create a clip:
- To create a short, teaser clip that can be posted to social media
- To limit the length of a video that you want to post (most platforms limit the length of videos)
- You have found that shorter videos perform better on social media
Creating a clip
After a clip is saved, it will be saved as a video in your account. Follow these steps to create a clip.
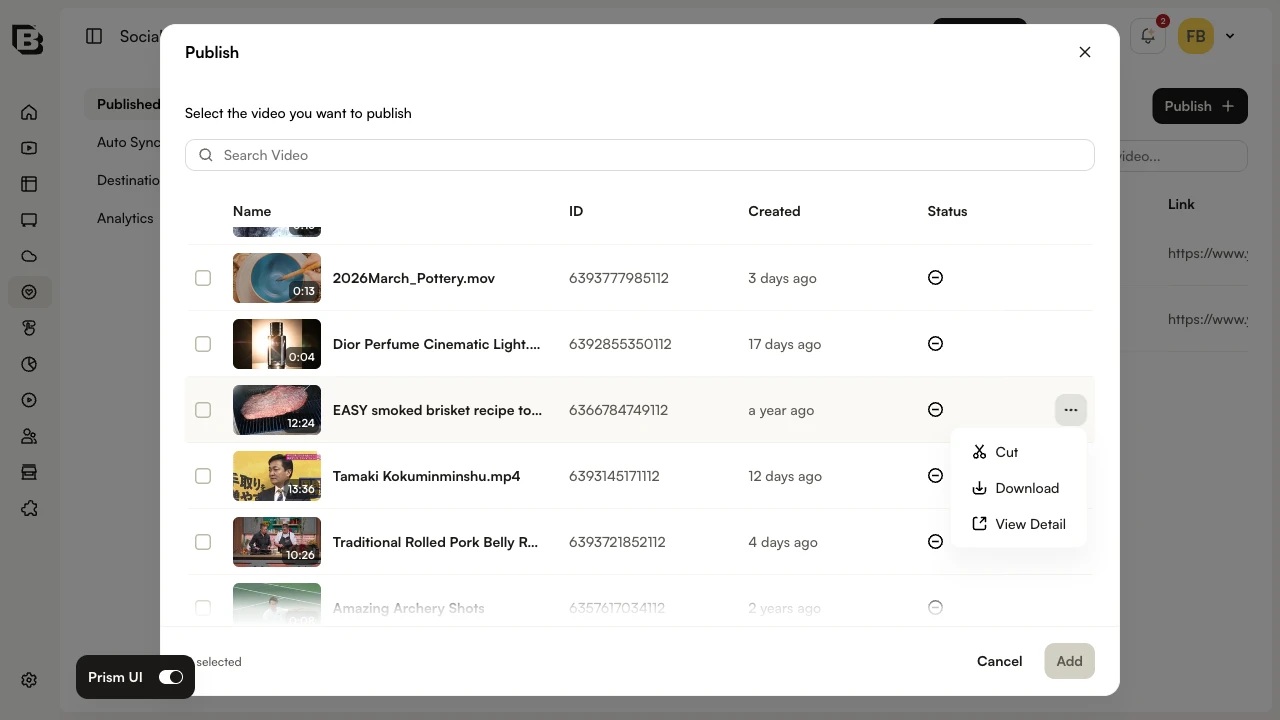
- Open the Social module.
- Click Published in the left navigation, then click Publish at the top right.
- In the Publish dialog, locate the video you want to clip in the video list. Hover over the row, click the kebab menu (···) at the right end of the row, and select Cut.
- The Clips editor opens. Enter a Clip Name.
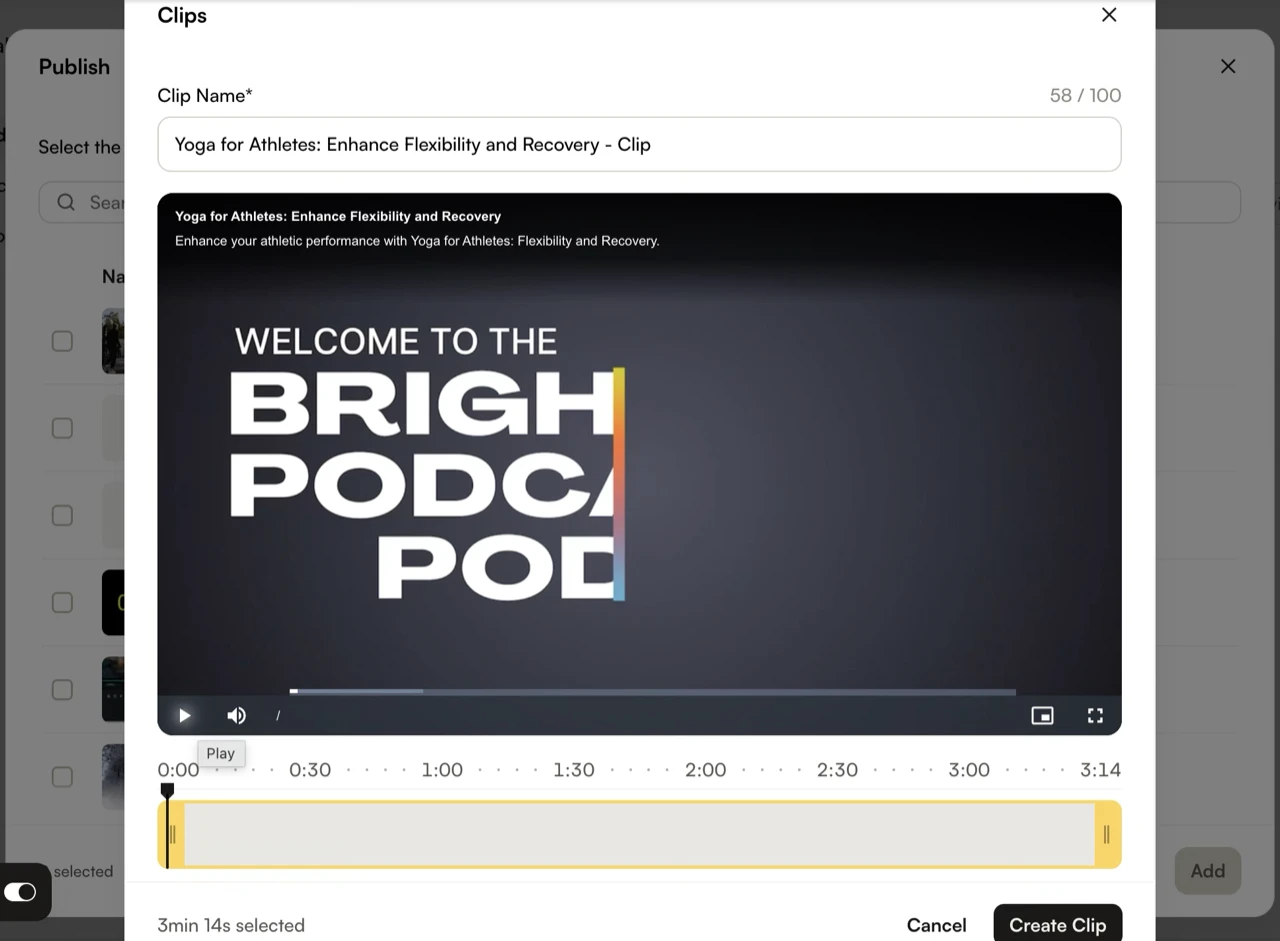
- Drag the handles that appear on the timeline to trim the beginning and end of your video. You can also enter specific start and end times using the edit fields. More precise control when editing may be achieved using the keyboard shortcuts.
- When done, click Create Clip. The clip is transcoded and saved as a new video in your account. To discard the clip, click Cancel.
Clips that are saved are transcoded using the ingest profile designated as the Social clipping default for the account. For information on setting default ingest profiles, see Managing Ingest Profiles.
Note that when creating clips, the entire source video must be downloaded. For longer source videos, it may take longer before the clip is available in your account.
Using keyboard shortcut keys
More precise control over the clipping can be done using the keyboard shortcut keys:
| Shortcut | Description |
|---|---|
| J or ← | Back one frame |
| K | Play / Pause |
| L or → | Forward one frame |
| I | Mark current frame as in point |
| O | Mark current frame as out point |
| Space bar | Play / Pause |
| ⇧ + I | Go to in point |
| ⇧ + O | Go to out point |