Step-by-Step: Video Cloud Studio Publishing Workflow
This topic is a companion to the Introduction to Video Cloud on-demand training course. The hands-on exercises in that training are based upon the steps in this document. It is recommended to watch that training and then use this document so you can complete the hands-on steps on your own.
Prerequisites
Outline
This topic walks through a basic video publishing flow for both a single video and a playlist. The following topics are covered:
- Uploading videos
- Editing video properties
- Creating and styling a player
- Publishing a video to the web
- Creating playlists
- Publishing a playlist
The Analytics module is not covered as part of this Quick Start. To learn about analytics, watch the Introduction to Video Cloud Analytics on-demand training course.
Uploading videos to Video Cloud
Before proceeding, have some sample videos ready or download the sample videos.
Sign in to your Video Cloud account
- In a browser, navigate to https://studio.brightcove.com.
- Enter your credentials and click Sign In.
Upload local videos to Video Cloud
- From any module, click Upload in the top toolbar to open the Upload panel.
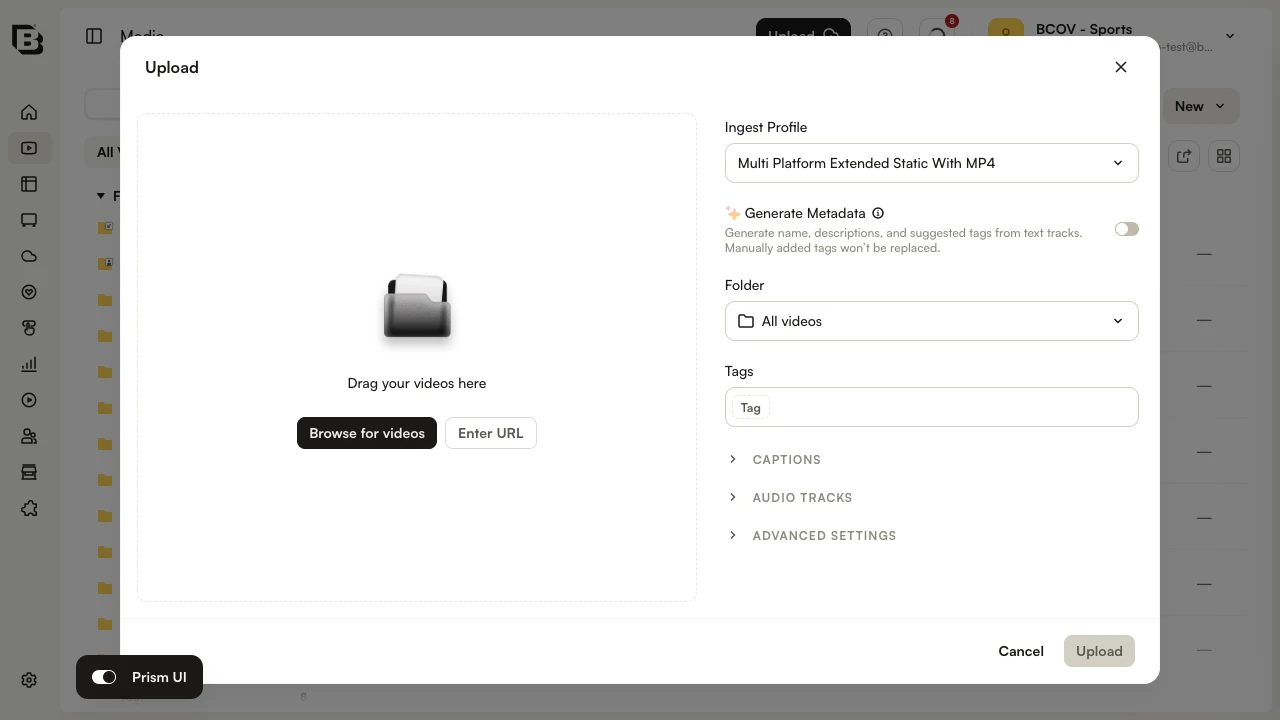
- Select an Ingest Profile from the dropdown.
- Click Browse for videos and select your videos, or drag your videos onto the panel. You can also click Enter URL to ingest a remote file.
- The panel lists each video with its upload progress. While videos are processing, do not close or move away from the browser tab — doing so may interrupt the upload.
- When processing finishes, each video shows a complete state and is safe to navigate away from.
Upload a remote video to Video Cloud
- In the Upload panel, click Enter URL.
- Enter the following URL to a file hosted on Amazon S3:
http://support.brightcove.com/test-assets/videos/oystercatcher.mp4 - Click Upload to begin the ingest.
(Optional) Upload videos from a mobile device
- On a mobile device, open Studio at https://studio.brightcove.com.
- Open the Upload panel from the top toolbar.
- Select an Ingest Profile.
- Tap Browse for videos. Your device's camera roll opens.
- Pick a video to upload. Progress is reported in the same Upload panel.
Editing video properties
In this task you will edit video properties for a single video.
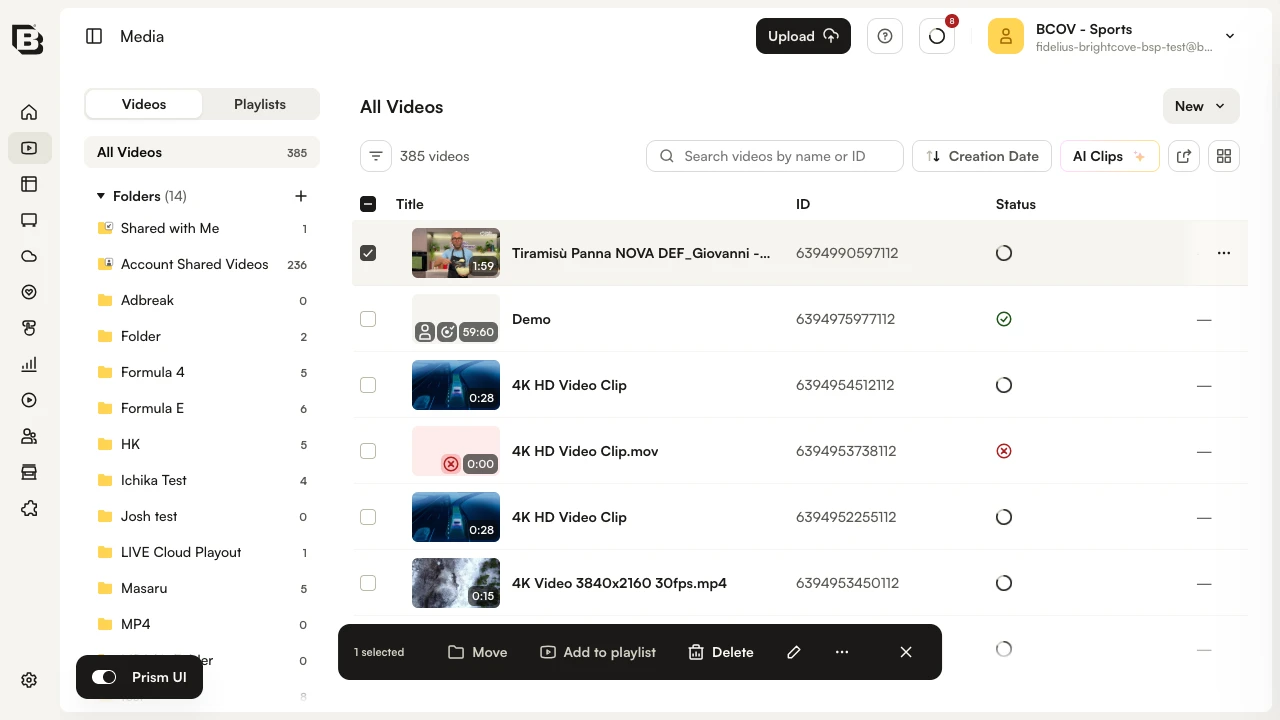
- Click Media in the side navigation to open the Media module.
- In the video list, click the title of a video to open its Video Properties page.
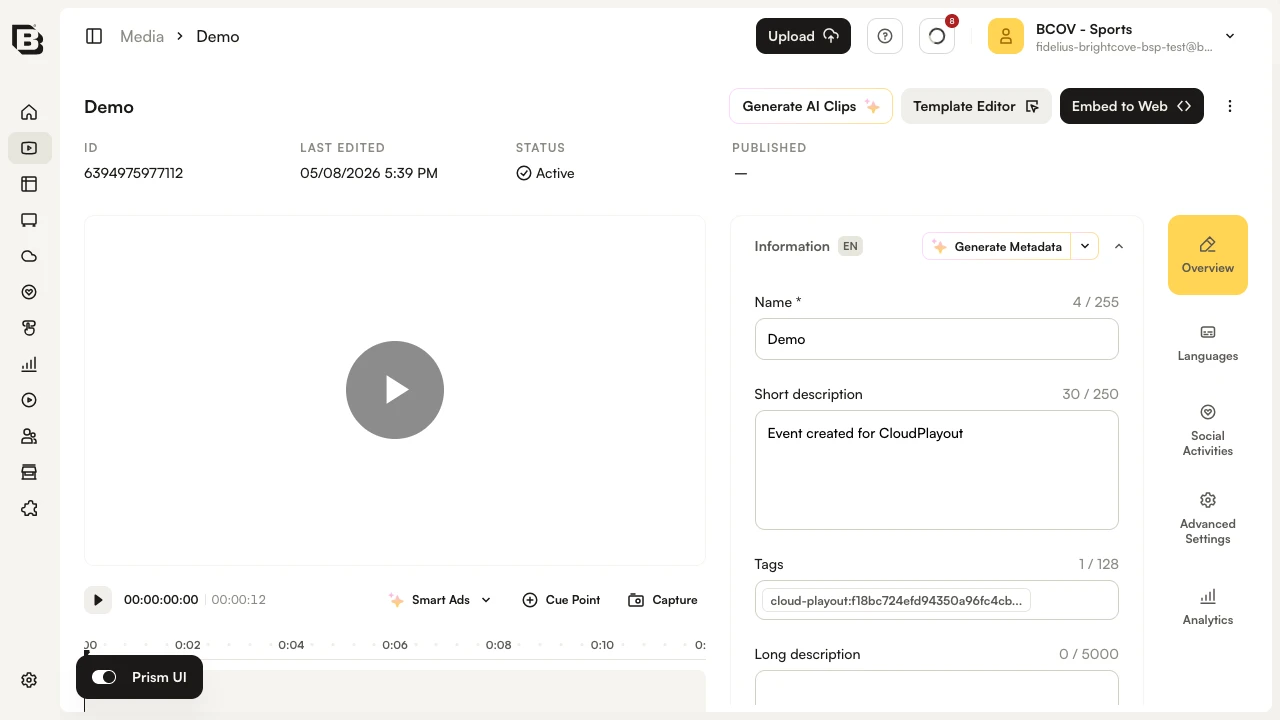
- Expand the Information accordion. Set the Short Description to
Pelican on the rocks. - In the Tags field, type
birdsand press Enter. - Click Save at the bottom of the Information accordion.
- Use the breadcrumbs at the top of the page to return to Media.
- Open the Oystercatcher video. In the Information accordion set the following fields, then click Save:
- Name:
Oystercatcher - Short Description:
Oystercatcher on the beach - Tags:
birds
- Name:
- Repeat for the Chickadee and Woodpecker videos, tagging each with
birds. - (Optional) Tag any of the other animal videos with
animals.
Creating and styling a player
In this task you will create a player and style it.
Create a new player
- Click Players in the side navigation to open the Players module.
- Click Add Player. The Add Player dialog opens.
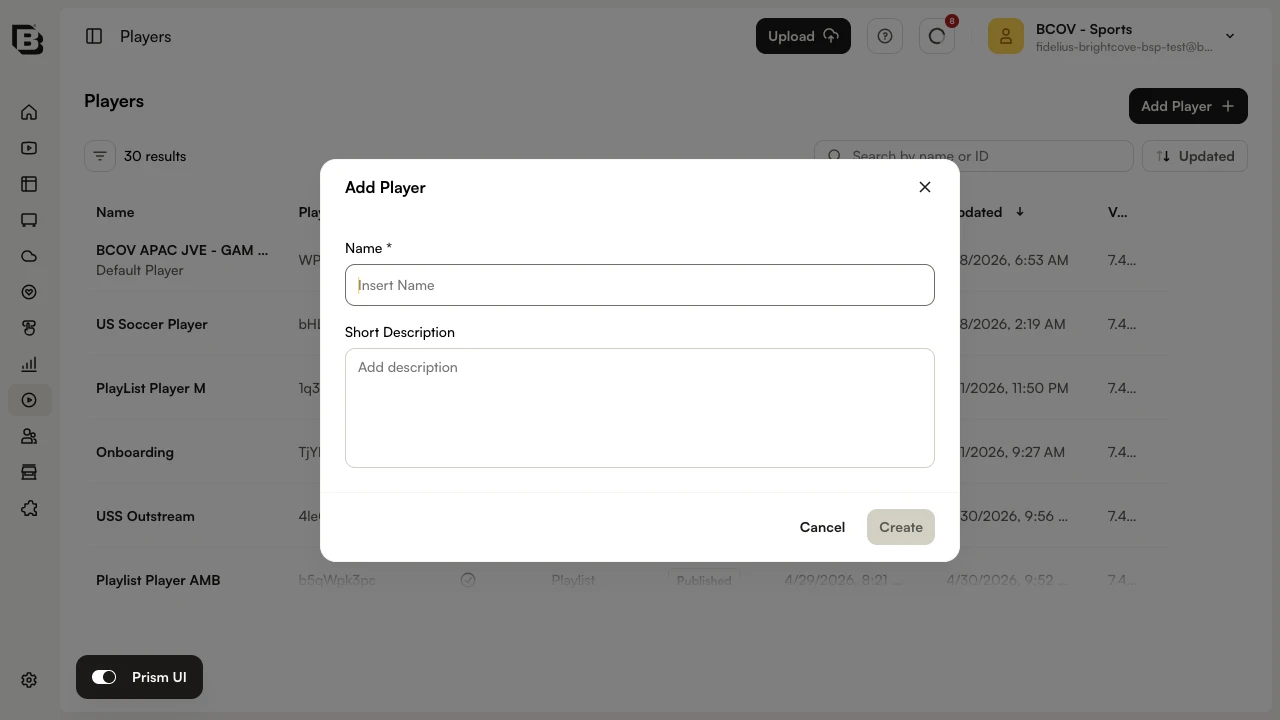
- Enter
Custom Playerfor the Name and click Create.
Style the player
- From the Players list, click the Custom Player name to open the player.
- Confirm the Player Type shown at the top of the page is Single Video. (You can change the Player Type from the Information accordion.)
- On the player page, expand the Styling accordion in the side panel.

- Toggle on Show title and description.
- Pick a Play Button Shape (Circle, Square, or Rectangle) and a Play Button Position.
- Under COLOR THEME, click the Play Button color swatch and choose a shade of red.
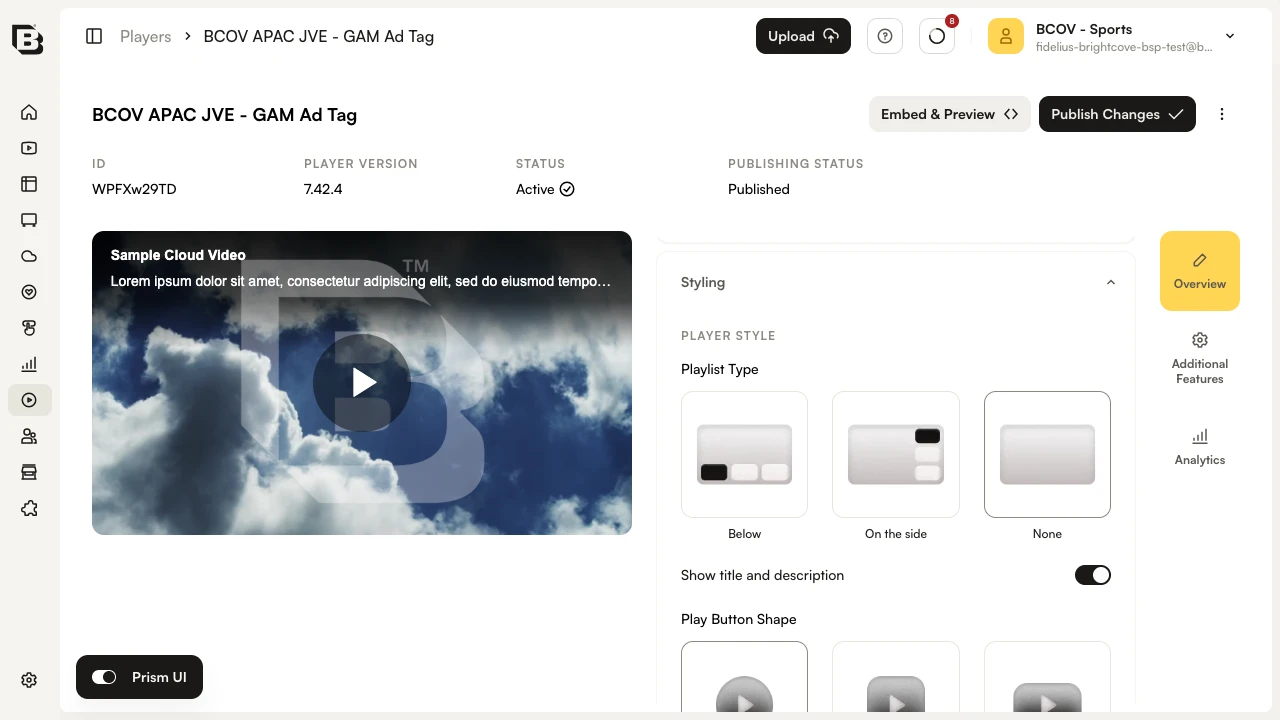
- Confirm the color update appears in the player preview at the top of the page. To start over, click Reset theme.
- Click Publish Changes in the top action bar to publish your edits. To preview the published player or copy the embed code, click Embed & Preview instead.
Publishing a video to the web
In this task you will publish a single video to the web.
- Click Media in the side navigation to open the Media module.
- Select the checkbox next to the Brown Pelican video. The selection action bar appears at the bottom of the page.
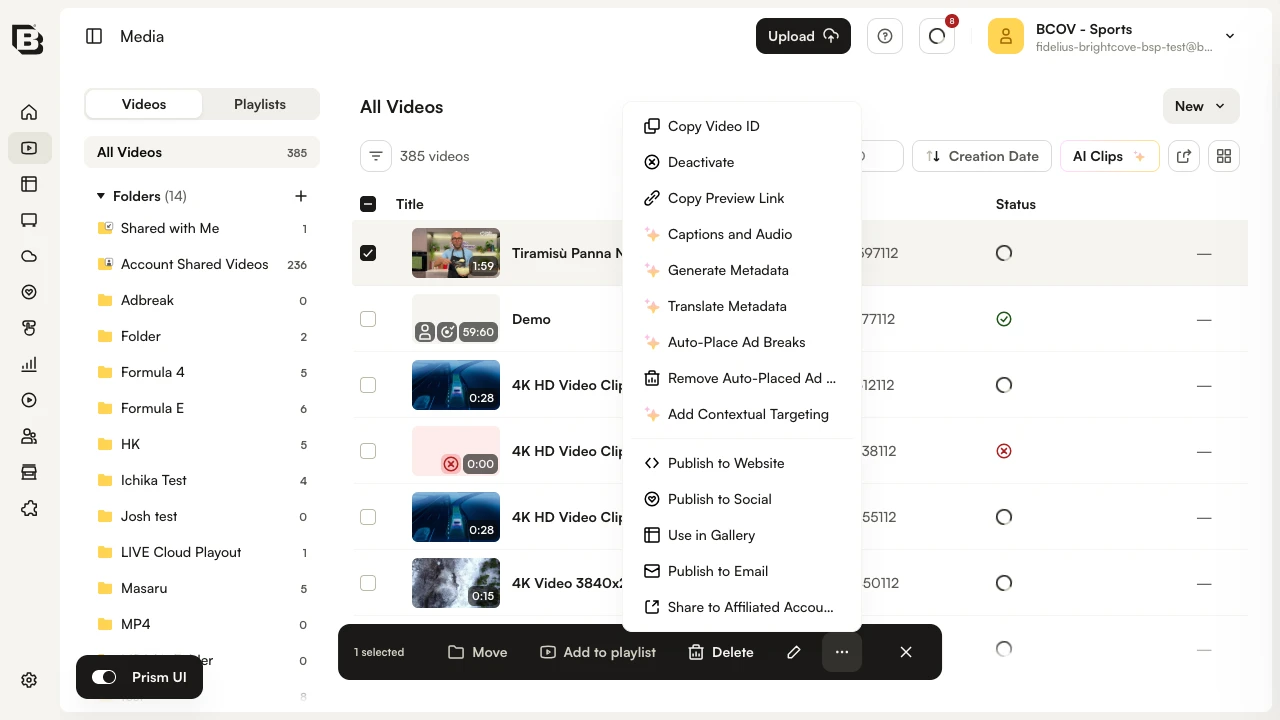
- Click More actions and choose Publish to Website.
- The Embed on Web dialog opens.
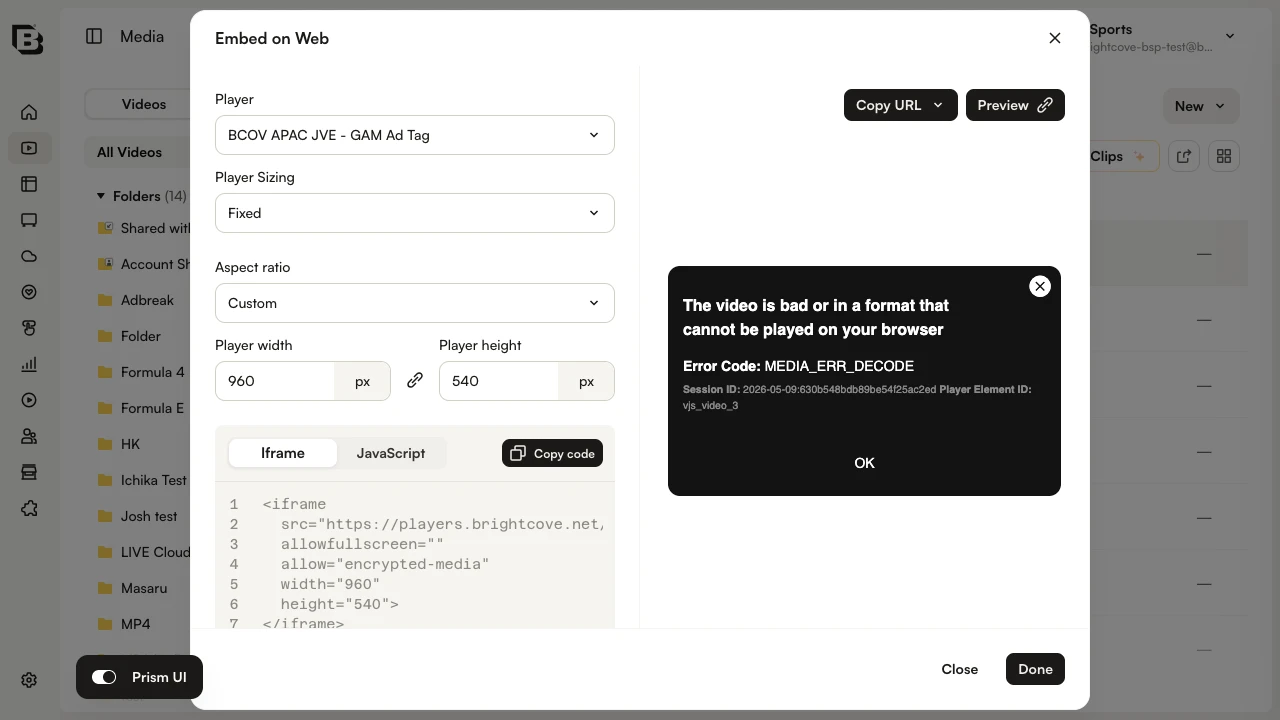
- From the Player dropdown, select Custom Player. This is the player you created earlier.
- Click Preview or Copy URL to open the published video in a new browser tab. Confirm the video appears and plays.
- (Optional) Email the URL to your phone, then open it on the device to confirm the video plays.
- Click Done to close the dialog.
Creating playlists
In this task you will create a manual playlist and a smart playlist.
Create a Manual playlist
- Click Media in the side navigation to open the Media module.
- Switch to the Playlists tab at the top of the Media module.
- Click Create New Playlist. The Create a playlist side panel opens.
- Set the Playlist name to
Favorites. - Under Playlist type, click Manual playlist.
- Click Create playlist. The new playlist opens.
- Toggle on Show in sidebar if you want this playlist pinned in the side navigation.
Add videos to the Manual playlist
- Switch back to the Videos tab.
- Select the checkbox next to each video you want to add.
- In the selection action bar, click Add to playlist.
- Pick the Favorites playlist and click Add.
- Switch to the Playlists tab and open Favorites to confirm the videos were added.
- Reorder videos by dragging a row to a new position in the list.
Create a Smart playlist
- On the Playlists tab, click Create New Playlist again.
- Set the Playlist name to
Birds. - Under Playlist type, click Smart playlist.
- Click Create playlist. The playlist opens with the smart-playlist filter editor.
- Set the Parameter to Tags.
- Set the operator to Match any.
- Enter
birdsfor the tag and press Enter. - Click Apply. The matching videos appear in the playlist preview.
- Open the Information accordion if you want to toggle Show in sidebar.
- Confirm the bird videos appear in the playlist.
Publishing a playlist
In this task you will create a playlist-aware player, then publish a playlist with it.
Create a player that supports playlists
- Click Players in the side navigation to open the Players module.
- Click Add Player. Name the player
Playlist Playerand click Create. - From the Players list, click the Playlist Player name to open the player.
- Expand the Information accordion. Change Player Type to Playlist.
- Set the Aspect Ratio to 16:9 and the Width to
640px. - Expand the Styling accordion. Under Playlist Type, choose On the side (vertical layout).
- Expand the Playback accordion. Toggle on Play video when selected and Continuous play mode.
- Click Publish Changes in the top action bar.
Publish the playlist
- Click Media in the side navigation.
- Switch to the Playlists tab.
- Select the checkbox next to the Birds playlist.
- In the selection action bar click More actions > Publish to Website.
- From the Player dropdown in the Embed on Web dialog, select Playlist Player.
- Click Preview or Copy URL. The playlist player opens in a new browser tab. Confirm the playlist player appears and that videos play.
- (Optional) Email the URL to your phone and confirm the playlist works on the device.