Introduction
MAP and CRM systems are great at storing data about user behavior. They are generally less effective at analyzing that data and identifying patterns that you can act on. This is where Brightcove's Audience Insights technology can provide valuable insights into your data to help you make good business decisions.
Here are some examples of the kind of campaigns you might run based on the insights Brightcove provides:
- Lead Qualification: Set different Segment tags to build a Lead Score in your Marketing Platform. Qualify them and move them along the funnel.
- Ideal Customer Persona (ICP): Identify your ICP and create a segment that will report every viewer with similar behavior to run a targeted campaign. Identify viewer preferences, patterns, and engagement to cater to the specific cohort through targeted messaging and campaigns.
- Content promotion: Engage a prospect that has watched a specific video with related content.
- Subscription Management: Identify different segments of customers to lead them through their subscription or upgrade journey. Examples of Subscription management campaigns based on Segments are: Engage trialist, Updated Onboarding Flow, Idle users, Annual Plan Upgrades, Scheduled Cancellation Win-backs, Lost Customer Win-backs.
Supported third-party platforms
The following third-party platforms are currently supported for this integration:
- Salesforce Sales Cloud
- Blueshift
- Braze
- S3
- Custom S3
- Marketo
- Sailthru
- Segment NodeJS
- HubSpot
Requirements
To use this data platform integration, you must have at least one of the following:
- Marketing Studio Essential or Premium
- Access to Campaign
- Brightcove Beacon
- Full Audience Insights
Set up an integration
Setting up an integration is straightforward. However, you will need some information from the third-party vendor - exactly what you need will vary for different services, but will be clearly indicated by input fields in the setup dialog. Typical requirements are "Account id", "API key", and/or "Secret key". If you are unsure how to find or obtain a required piece of information, consult the vendor's documentation or support service.
Steps
- Login to Studio
-
Click the Integrations icon in the left-side navigation to open the Integrations module:
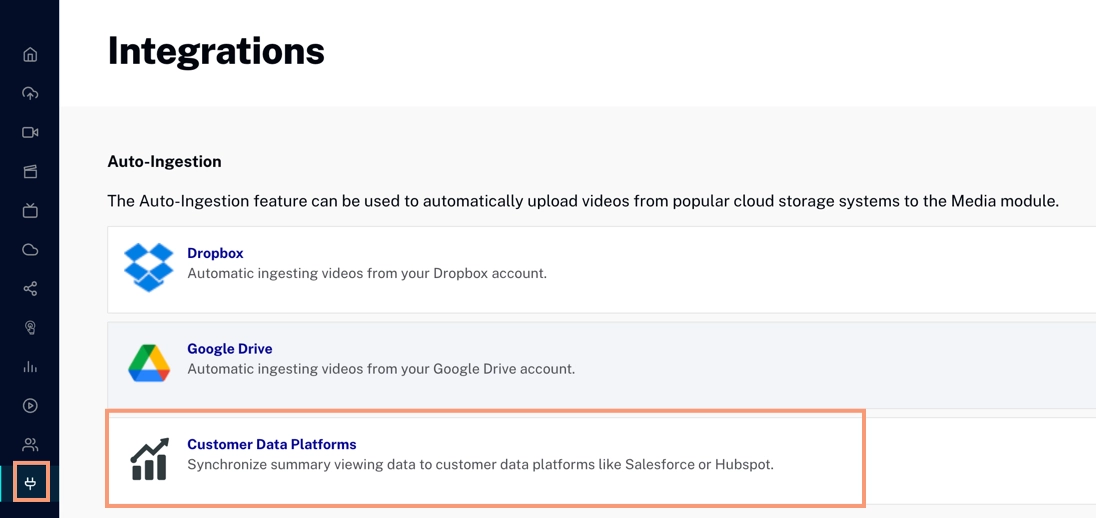
Integrations Module -
Click Customer Data Platforms to go to the data platform integrations:
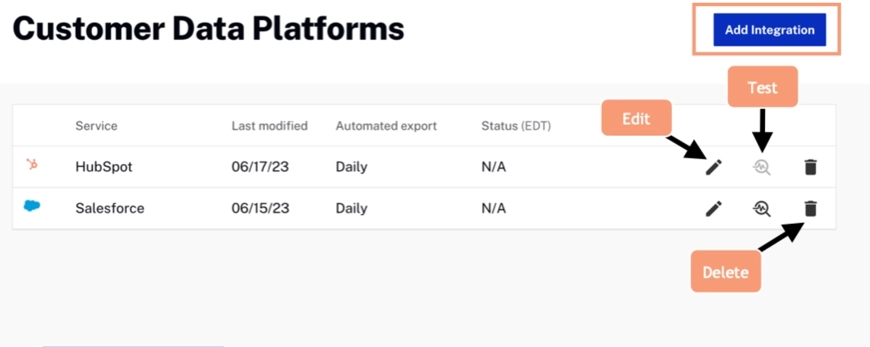
Customer Data Platform Integrations - As you see in the screenshot above, any existing integrations will be shown as a list and can be modified (see the next section). Here we will click to create a new integration.
-
In the Add Integration dialog, first select the service you want to integrate:
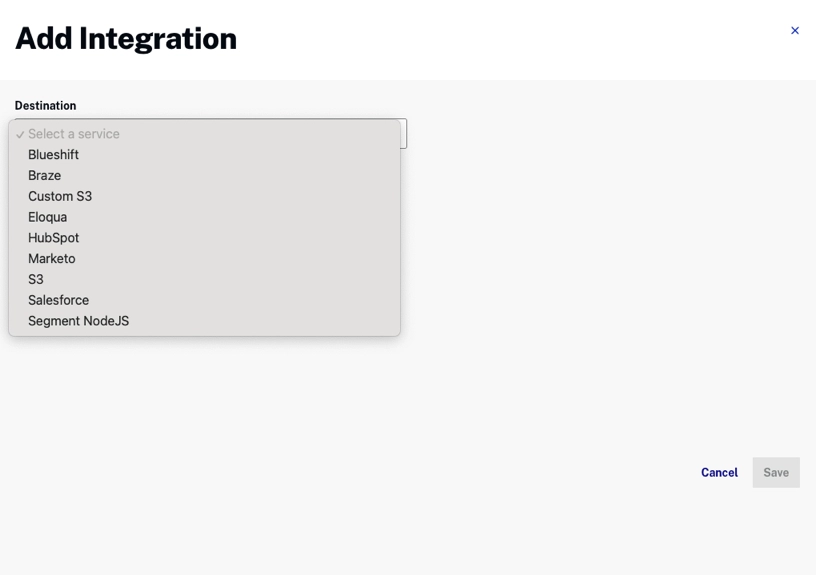
Add Integration Dialog -
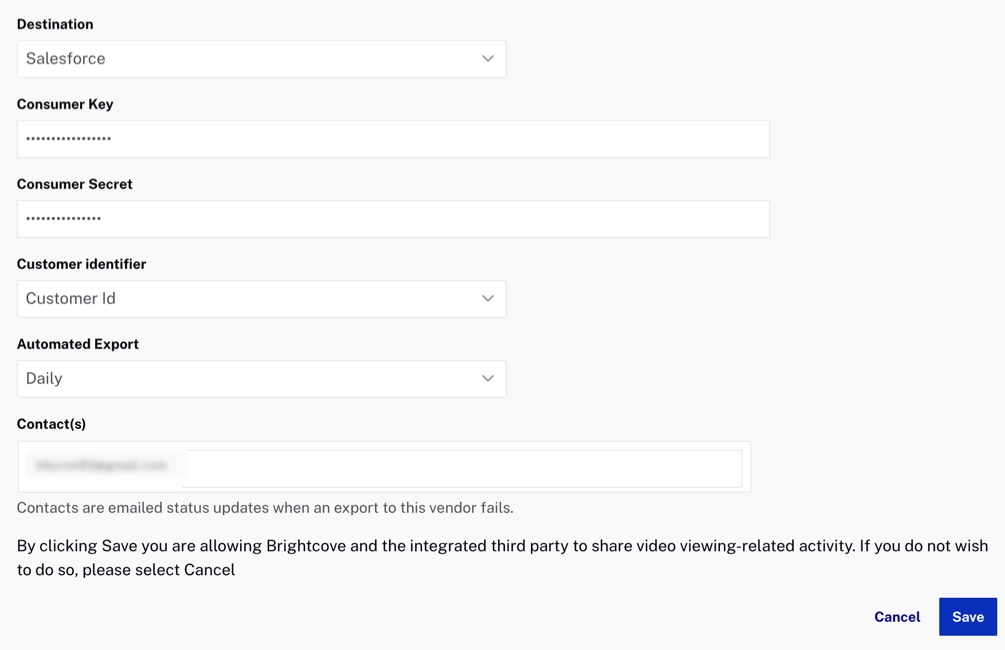
Next, fill in the required information according to the service you are integrating:
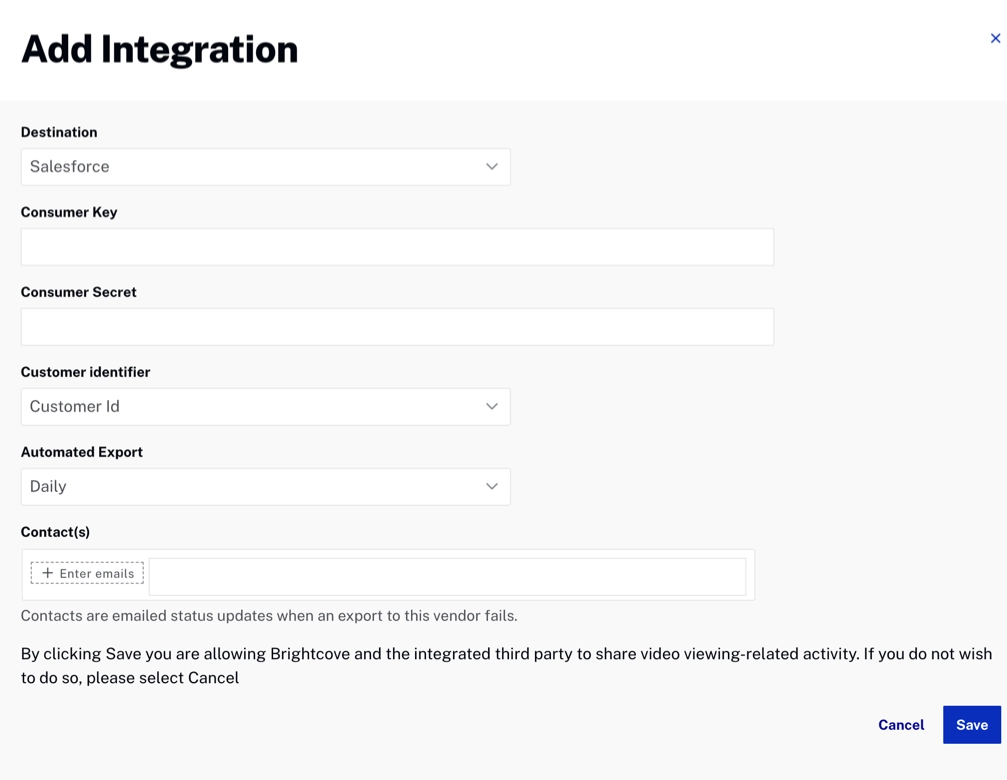
Add Information for Integration Sample - Click to complete the setup.
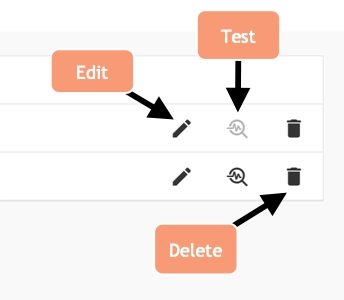
As shown above, in the list of existing integrations, there are three icons that allow you to:
- Edit the integration
- Test the integration
- Delete the integration
If you click the Edit icon, a dialog similar to the Add Integration dialog will appear:
Note the additional Integrations Properties tab. For some services, there will be additional properties you can set here; for others there are no additional properties.