About the S3 integration
When the S3 integration is set up, Brightcove creates an AWS S3 bucket that Audience Insights reports are automatically exported to on a daily or weekly basis (depending on the setup). One or more AWS admins in the customer Brightcove account are given access to the S3 bucket and can grant access to other users so that they can review the reports.
Overview
When you set up an integration with S3, data reports are automatically exported to an S3 bucket called reports.wicketlabs.com and available to be viewed or downloaded from there.
The reports will be exported to S3 on a daily or weekly basis, according to the schedule you set up, and will be available to those you given access by an admin on your AWS account (steps are shown below).
Requirements
- You must have an AWS account
Integration setup
Follow the steps below to set up the integration to S3.
- Login to Studio.
-
Use the left navigation to go to the Integrations module:
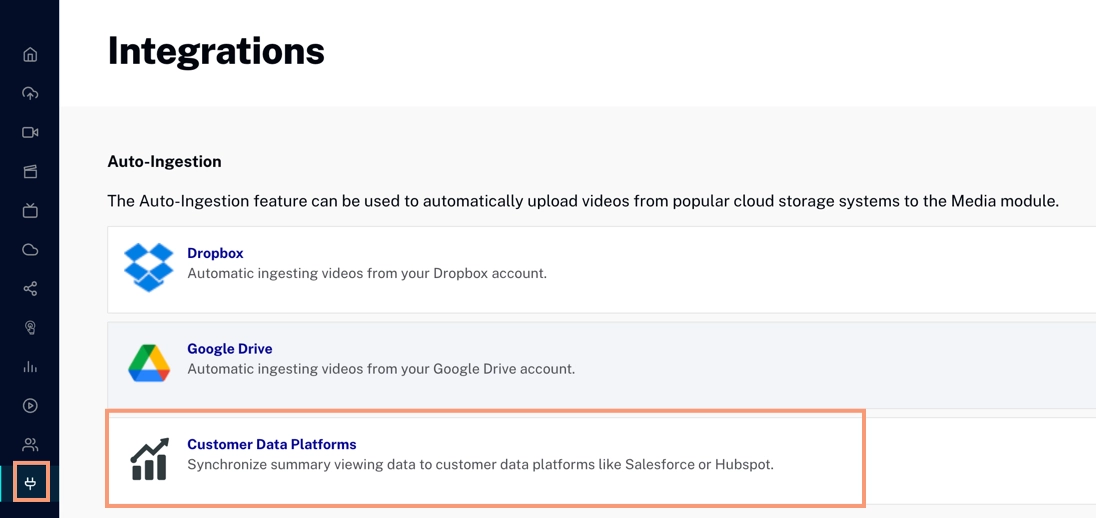
Go to Integrations Module -
Click Customer Data Platforms to open it:
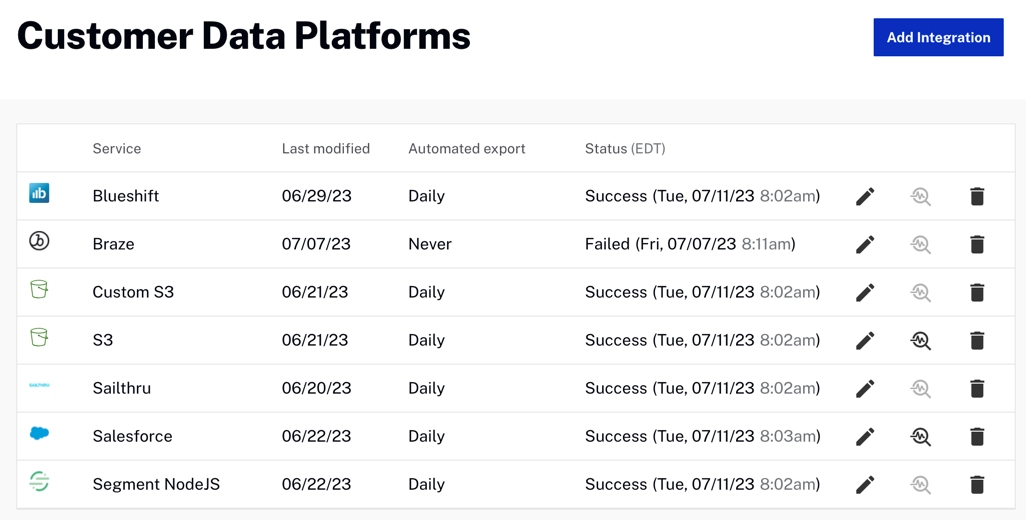
Custom Data Platforms Home - Click
-
Select S3 from the Destination dropdown:
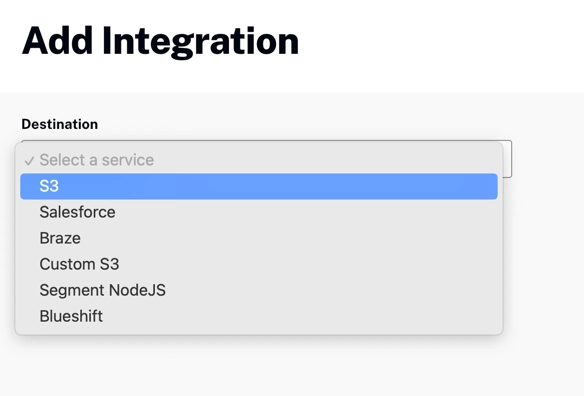
Destination Dropdown -
In the Add Integration dialog, enter your AWS Account ID, choose daily or weekly report exports, and enter one or more email addresses to be notified in case of export errors:
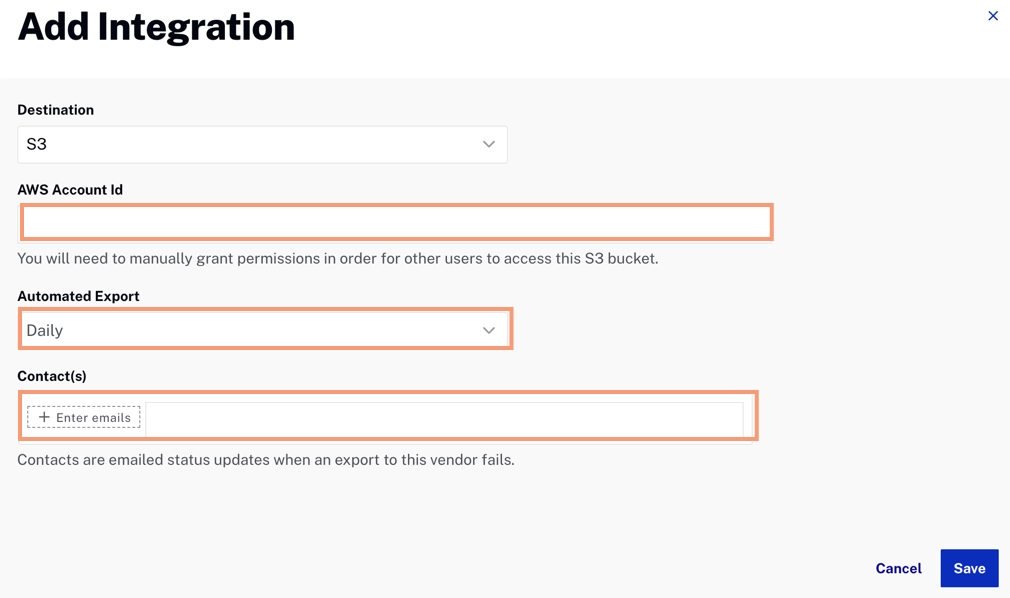
Add Integration Dialog - Click to create the integration.
Note that you can edit the integration details later by returning the Customer Data Services home page and clicking the ![]() .
.
Set up user permissions
Follow the steps below to set up user permissions to view the S3 bucket that reports are exported to.
Create policy
-
Log into your AWS account and navigate to the IAM page. From there click Policies, then Create Policy as shown below:
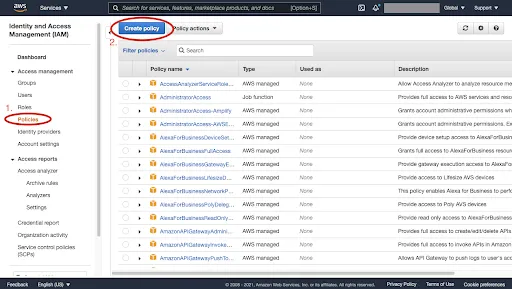
Create AWS Policy -
On the policy page, switch to the JSON policy editor and paste the following policy as shown in the image below:
JSON for policy
{
  "Version": "2012-10-17",
  "Statement": [
      {
          "Effect": "Allow",
          "Action": [
              "s3:GetObject"
          ],
          "Resource": [
          "arn:aws:s3:::reports.wicketlabs.com/*"
          ]
      },
      {
          "Effect": "Allow",
          "Action": "s3:ListBucket",
          "Resource": "arn:aws:s3:::reports.wicketlabs.com"
      }
  ]
}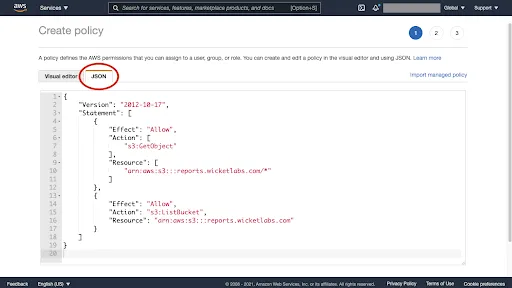
Paste JSON into Policy Editor -
Name the policy, add a description, and create the policy:
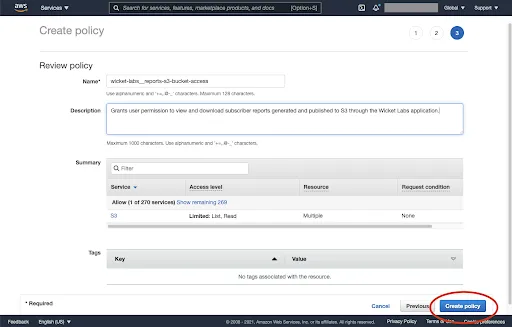
Add Name/Description
Attach policy to users
-
From the IAM page, click on the Users tab and select the user to be updated. From the user details page pictured below, click :

IAM Users -
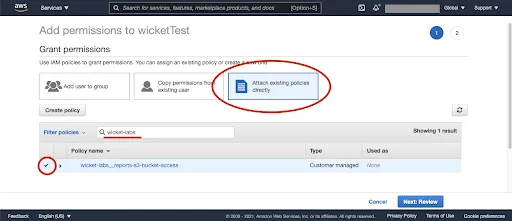
From the permissions page, click on the button to Attach existing policies directly. Use the filter to find the policy created earlier. Attach this policy and save the user. The user will now have access to the Wicket Labs report s3 bucket:
Attach Existing Policy
Viewing exported reports
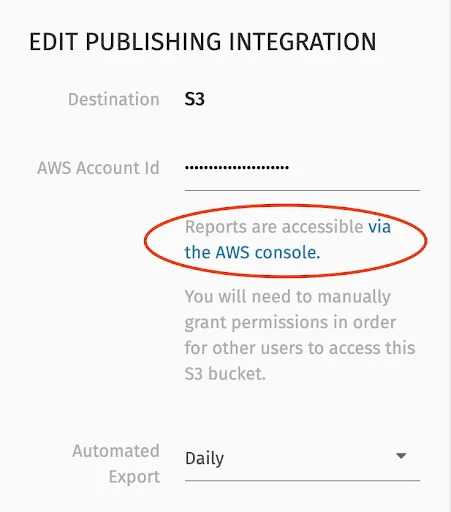
Reports are stored in an S3 bucket located at s3://reports.wicketlabs.com/production/yourWicketLabsAccountId/. Reports can be accessed through the AWS console using the link provided in the Wicket Labs setting page. To locate the link, navigate to the settings page, edit the S3 publish integration, and click on the link as shown below: